I bought a 2014 RAV4 EV (2nd Gen) off-lease in 2017, 49k miles. Between the previous owner and I, everything on it with Tesla's name on it has been replaced at least once under warranty (except the Gateway module, that interfaces the Toyota parts with the Tesla parts). I commuted it daily 56 mi. for years, and its ~100 mi. range worked well for that, saving me thousands. I retired and moved, and now live far, far away from a lot of things I like to visit, so 100 mi. has become limiting, as these vehicles were not offered with DCFC options.
There's an aftermarket CHAdeMO "kit" that adds DCFC . . . with limitations and for $3k. The price isn't awful, but it's not well integrated to the vehicle, requiring the car to be in "Ready" mode (ie drivable) whilst charging, but I want CCS anyway.
As opposed to a clean-sheet project where I have a lot of freedom to use anybody's bits, upgrading an OEM EV imposes restrictions if retaining the existing integration is desired. Things like a GOM, EV system warnings, and the like are already in place and working, and if I were to, eg replace the BMS or OBC, most of that integration would die. I'm planning to keep the Tesla bits thinking they're all working normally, whilst feeding the HV battery DC and without upsetting the BMS, and allowing the Tesla thermal management to do its thing as usual.
The BMW i3 LIM method of implementing CCS requires at least:
- CCSx charge port
- DCFC contactors
- HV cables from charge port to DCFC contactors
- HV cables from DCFC contactors to battery pack (tap into HV rail somewhere)
- BMW i3 LIM
- Voltage sense board that LIM requires
- ISA IVT-S current shunt that ZombieVerter board requires
- ZombieVerter to run the LIM -- or possibly port the ZV code to other hardware
The current plan is to get the basics in place and DCFC working with the vehicle in "Ready" mode, then move to the next phase: Create an OBC replacement "golem" that can take over pretending to the rest of the Tesla bits that it's the real OBC, when DCFCing. This will allow plugging in and DCFC without the vehicle being in "Ready" mode, and can gracefully end a charge session.
---
The basic parts list.
Excludes wrong turns, change of plans, dead-end ideas: this list I'll maintain as what actually ends up getting used.
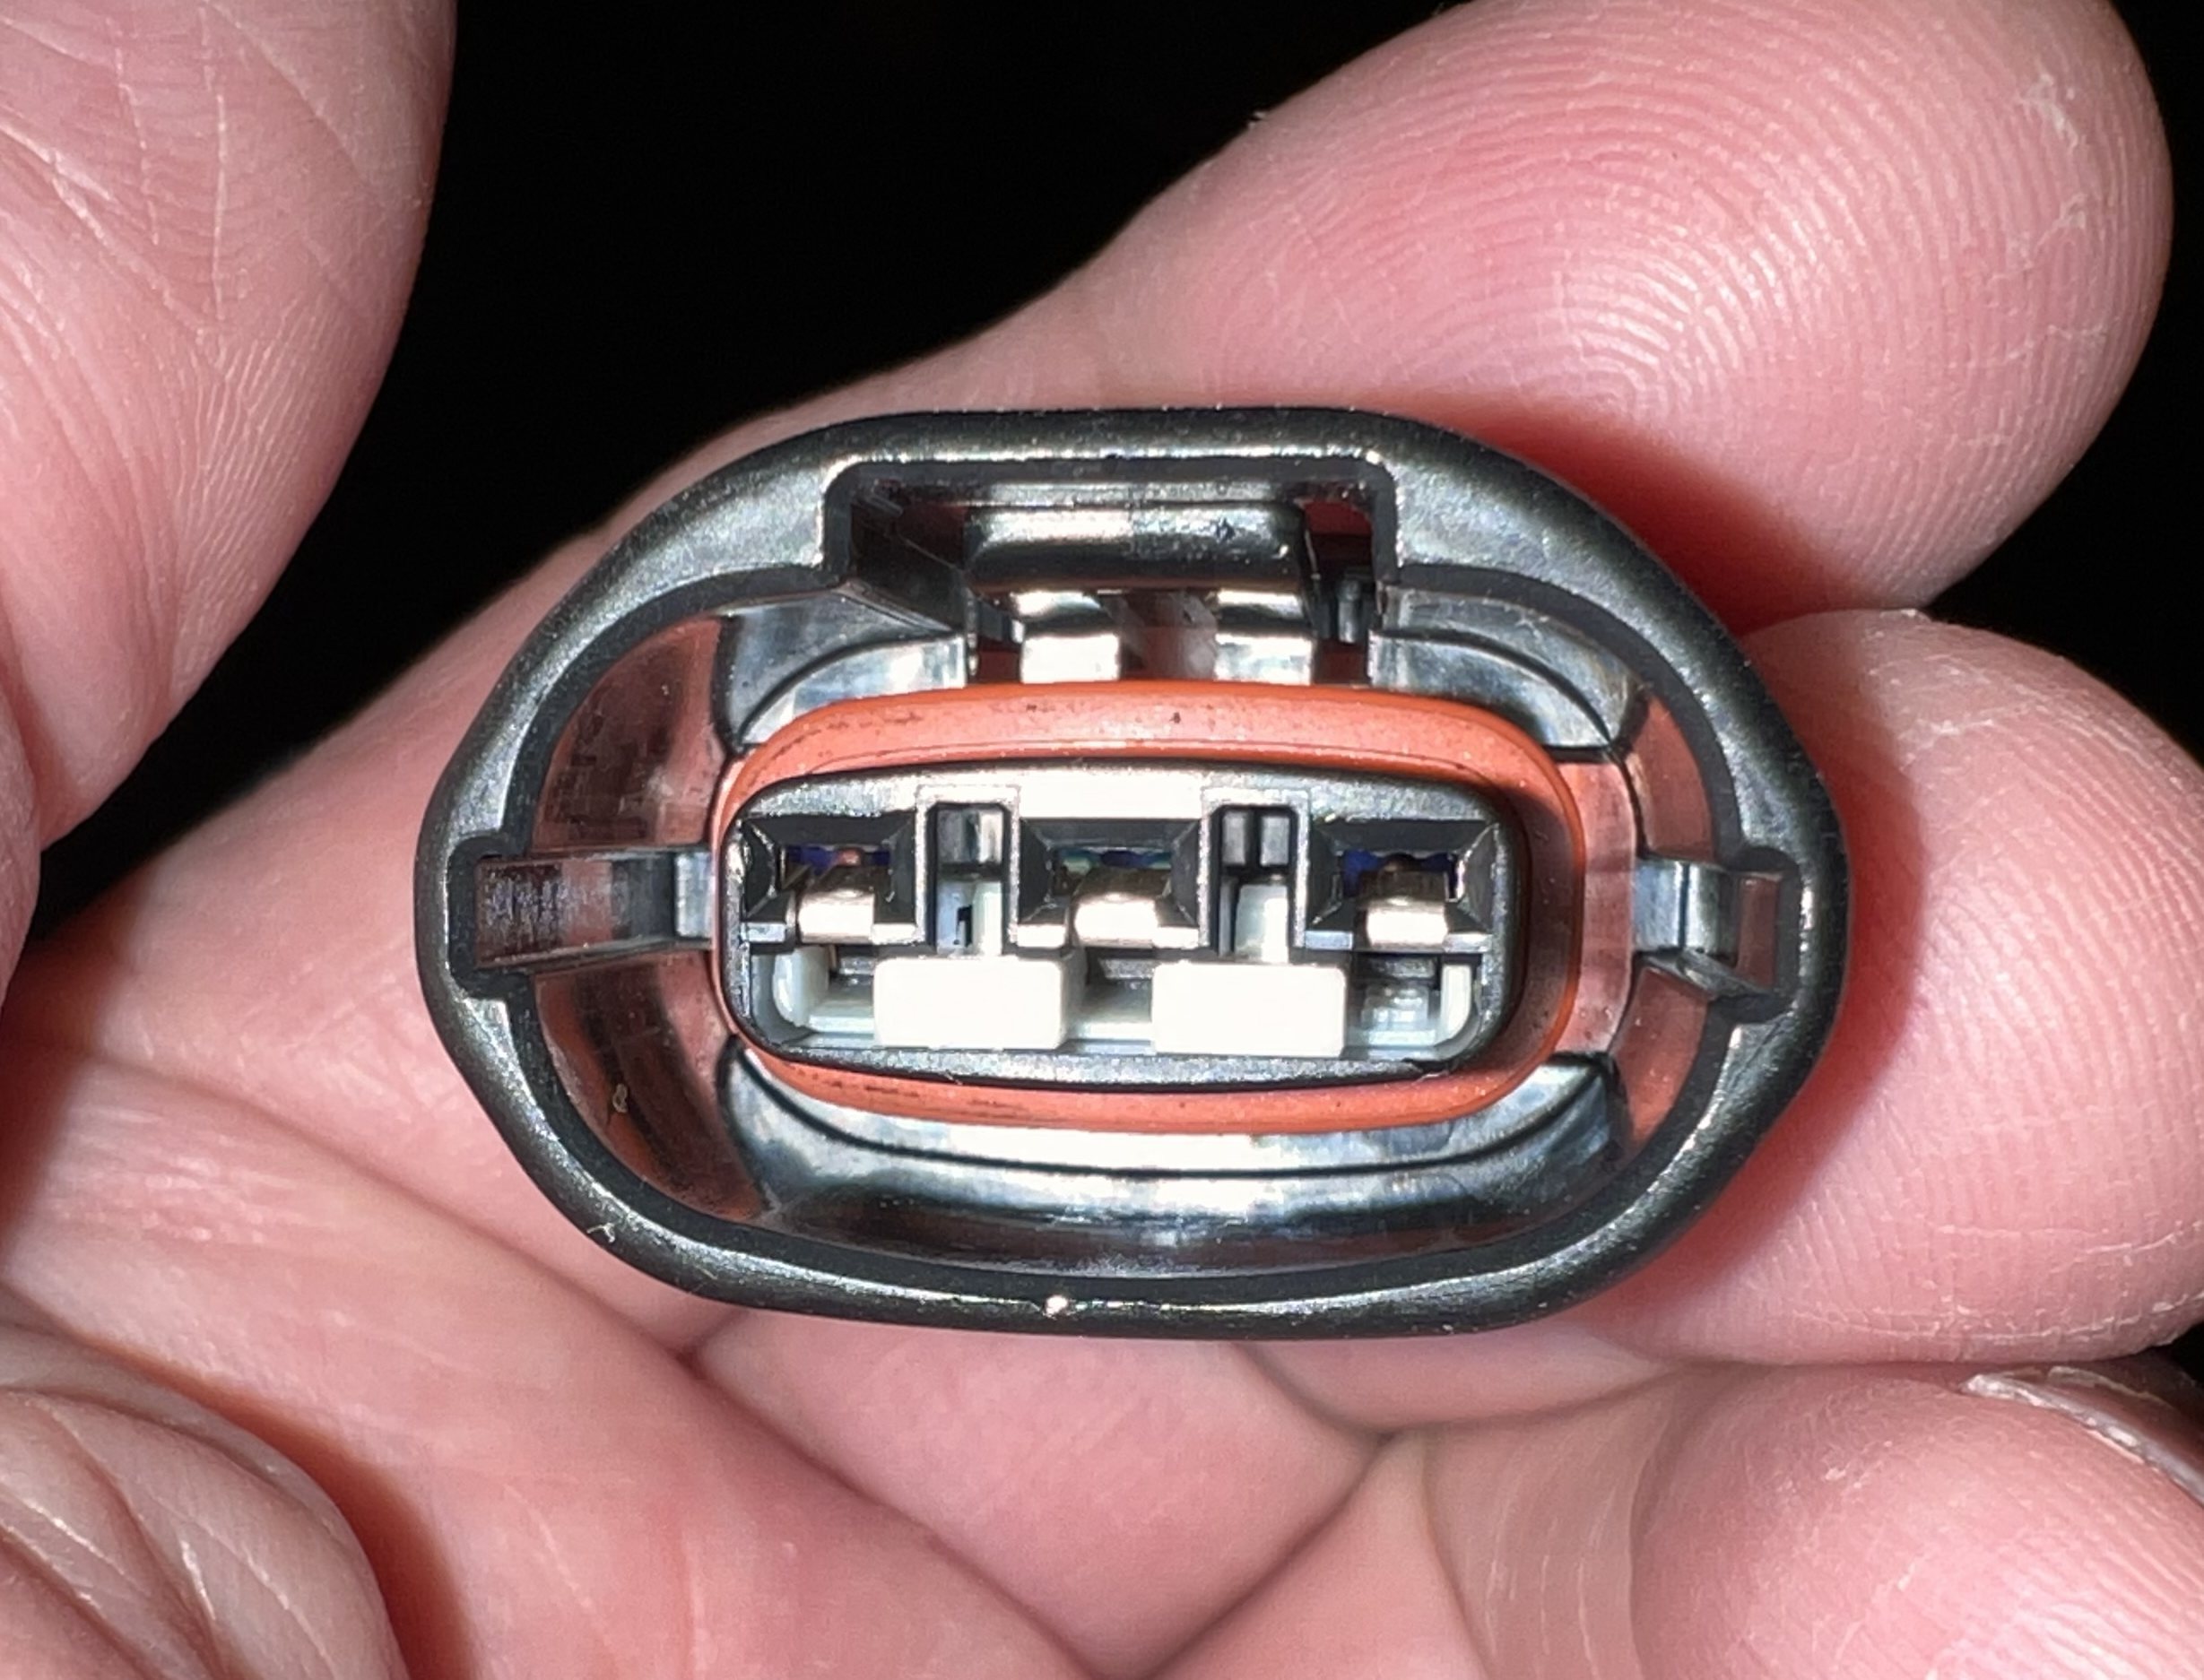
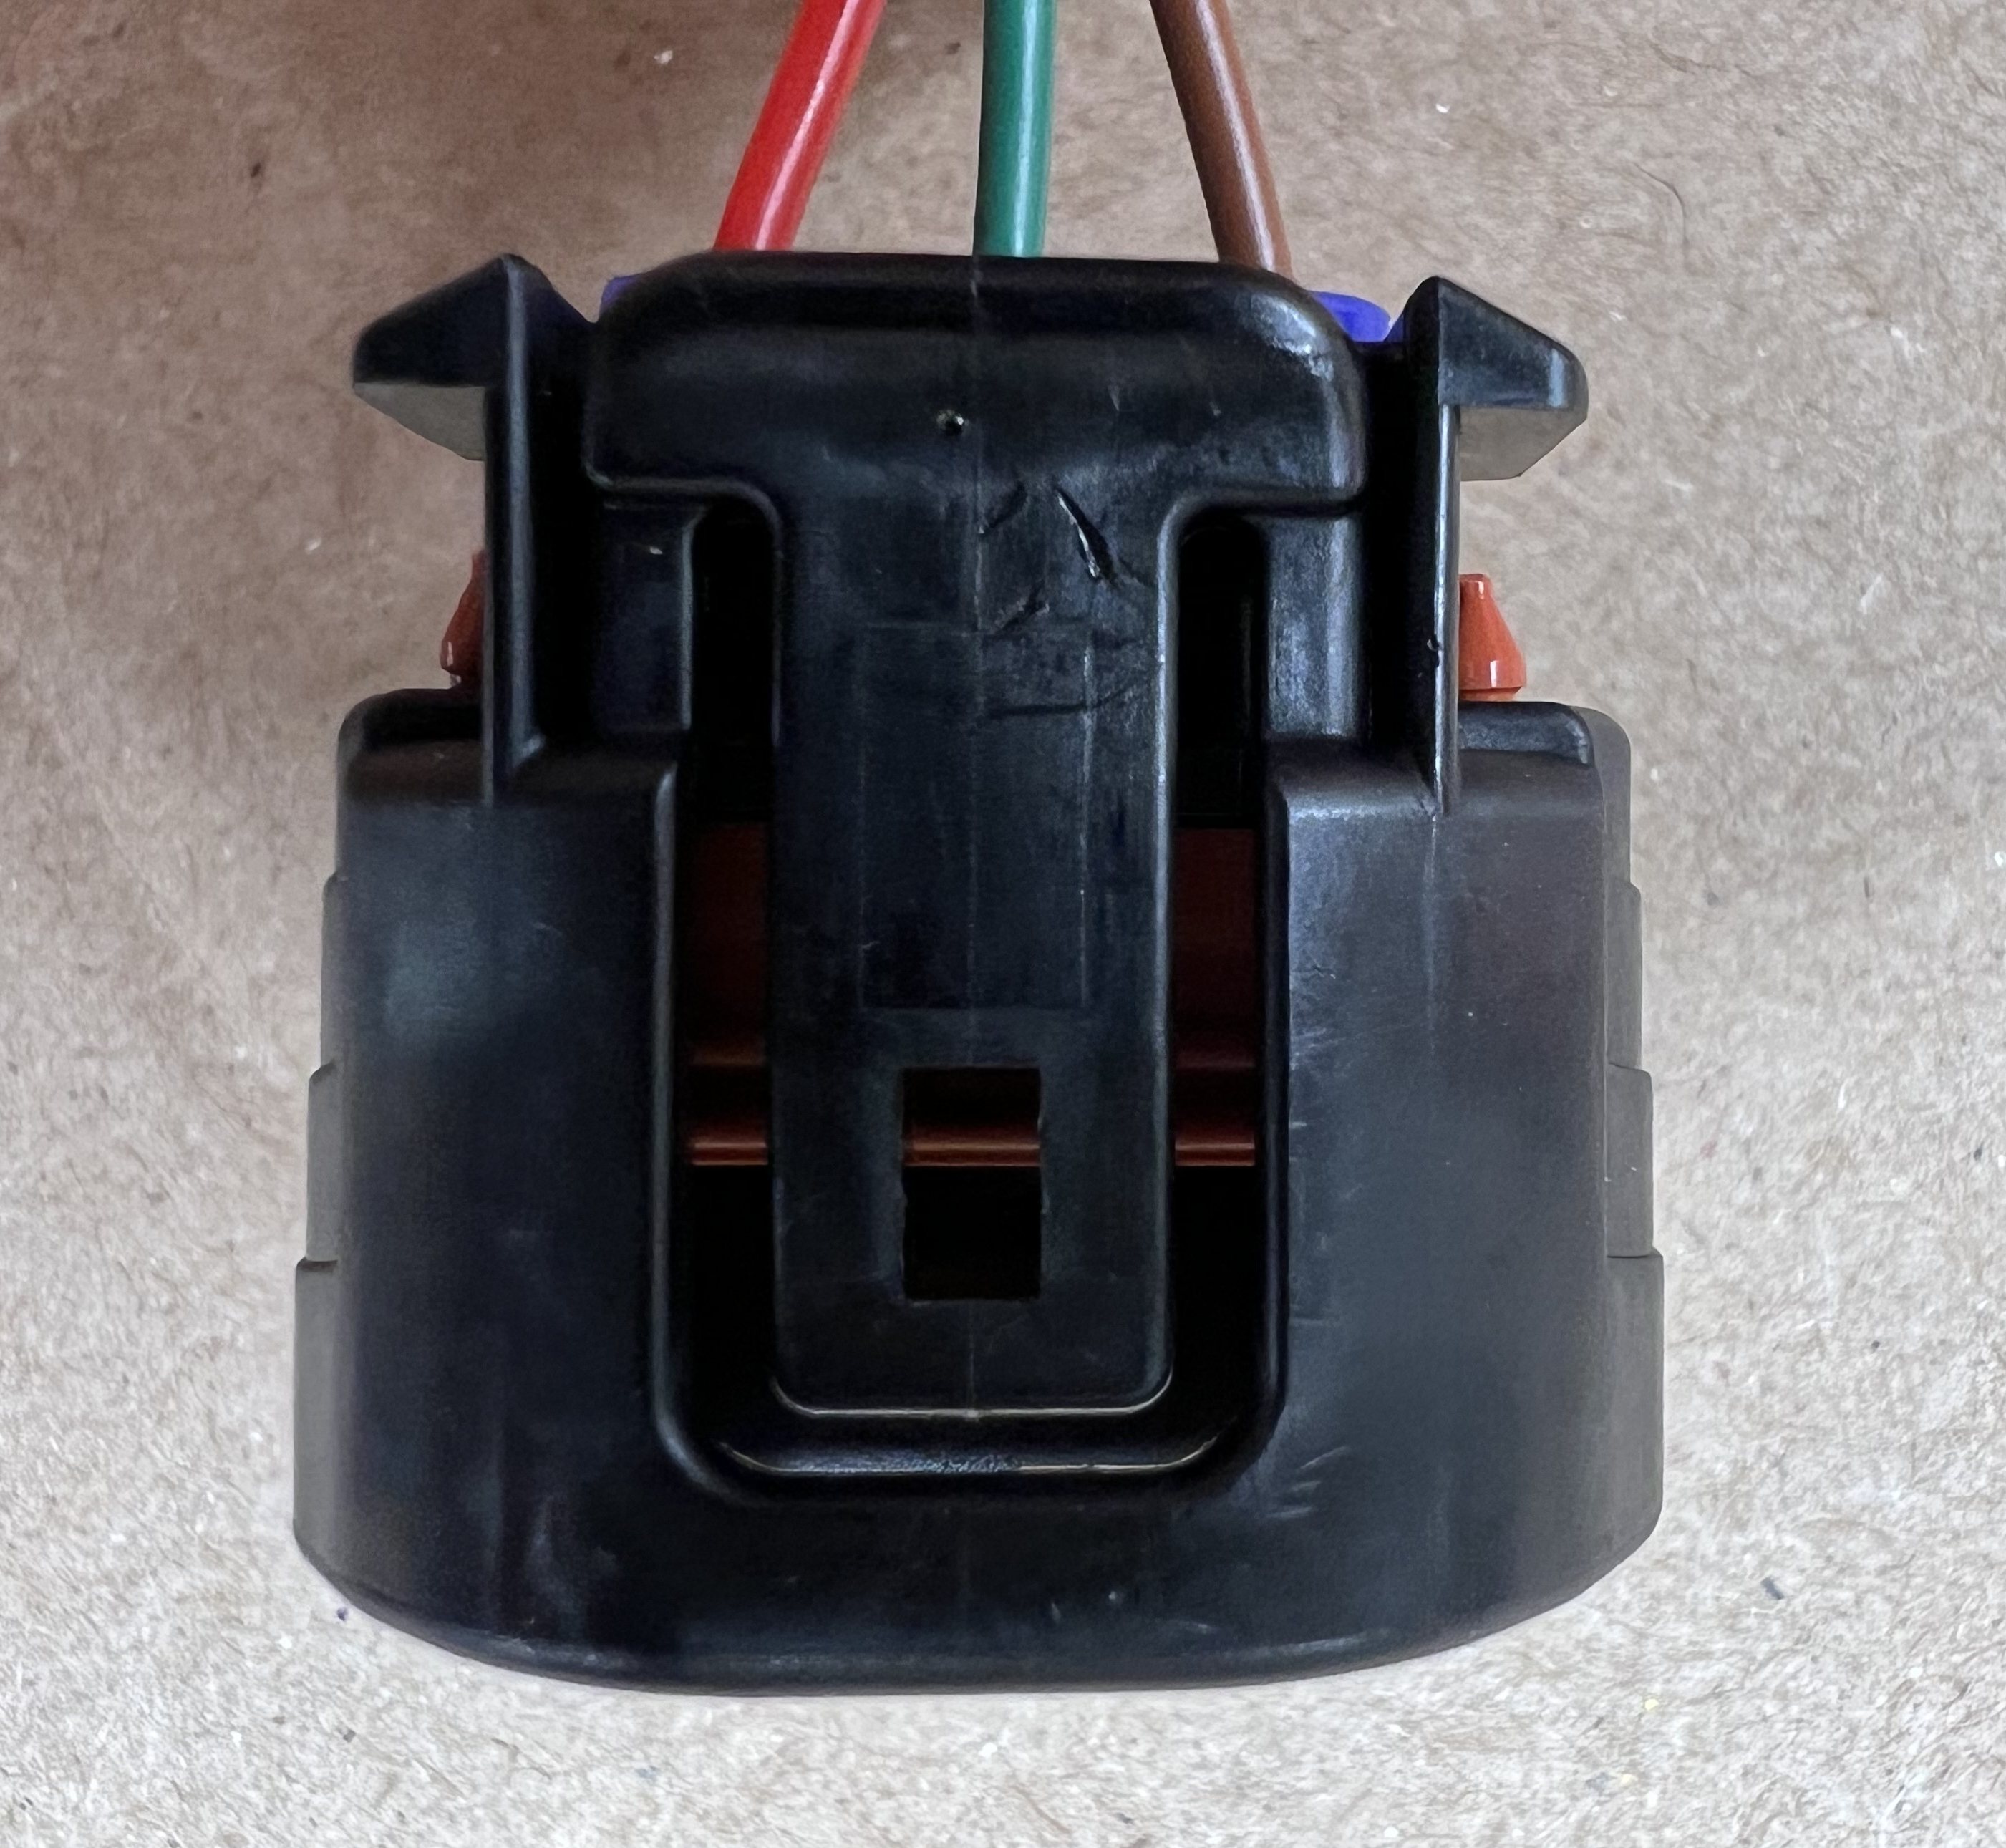
- Charge port, 2013 Tesla Model S
- HVDC cable, shielded, 50mm², 8m
- HVDC Voltage Sense Board
- Butt Splice Connectors, 1/0 AWG (2)
- Bolt terminal lugs for HVJB/50mm² cable, (6)
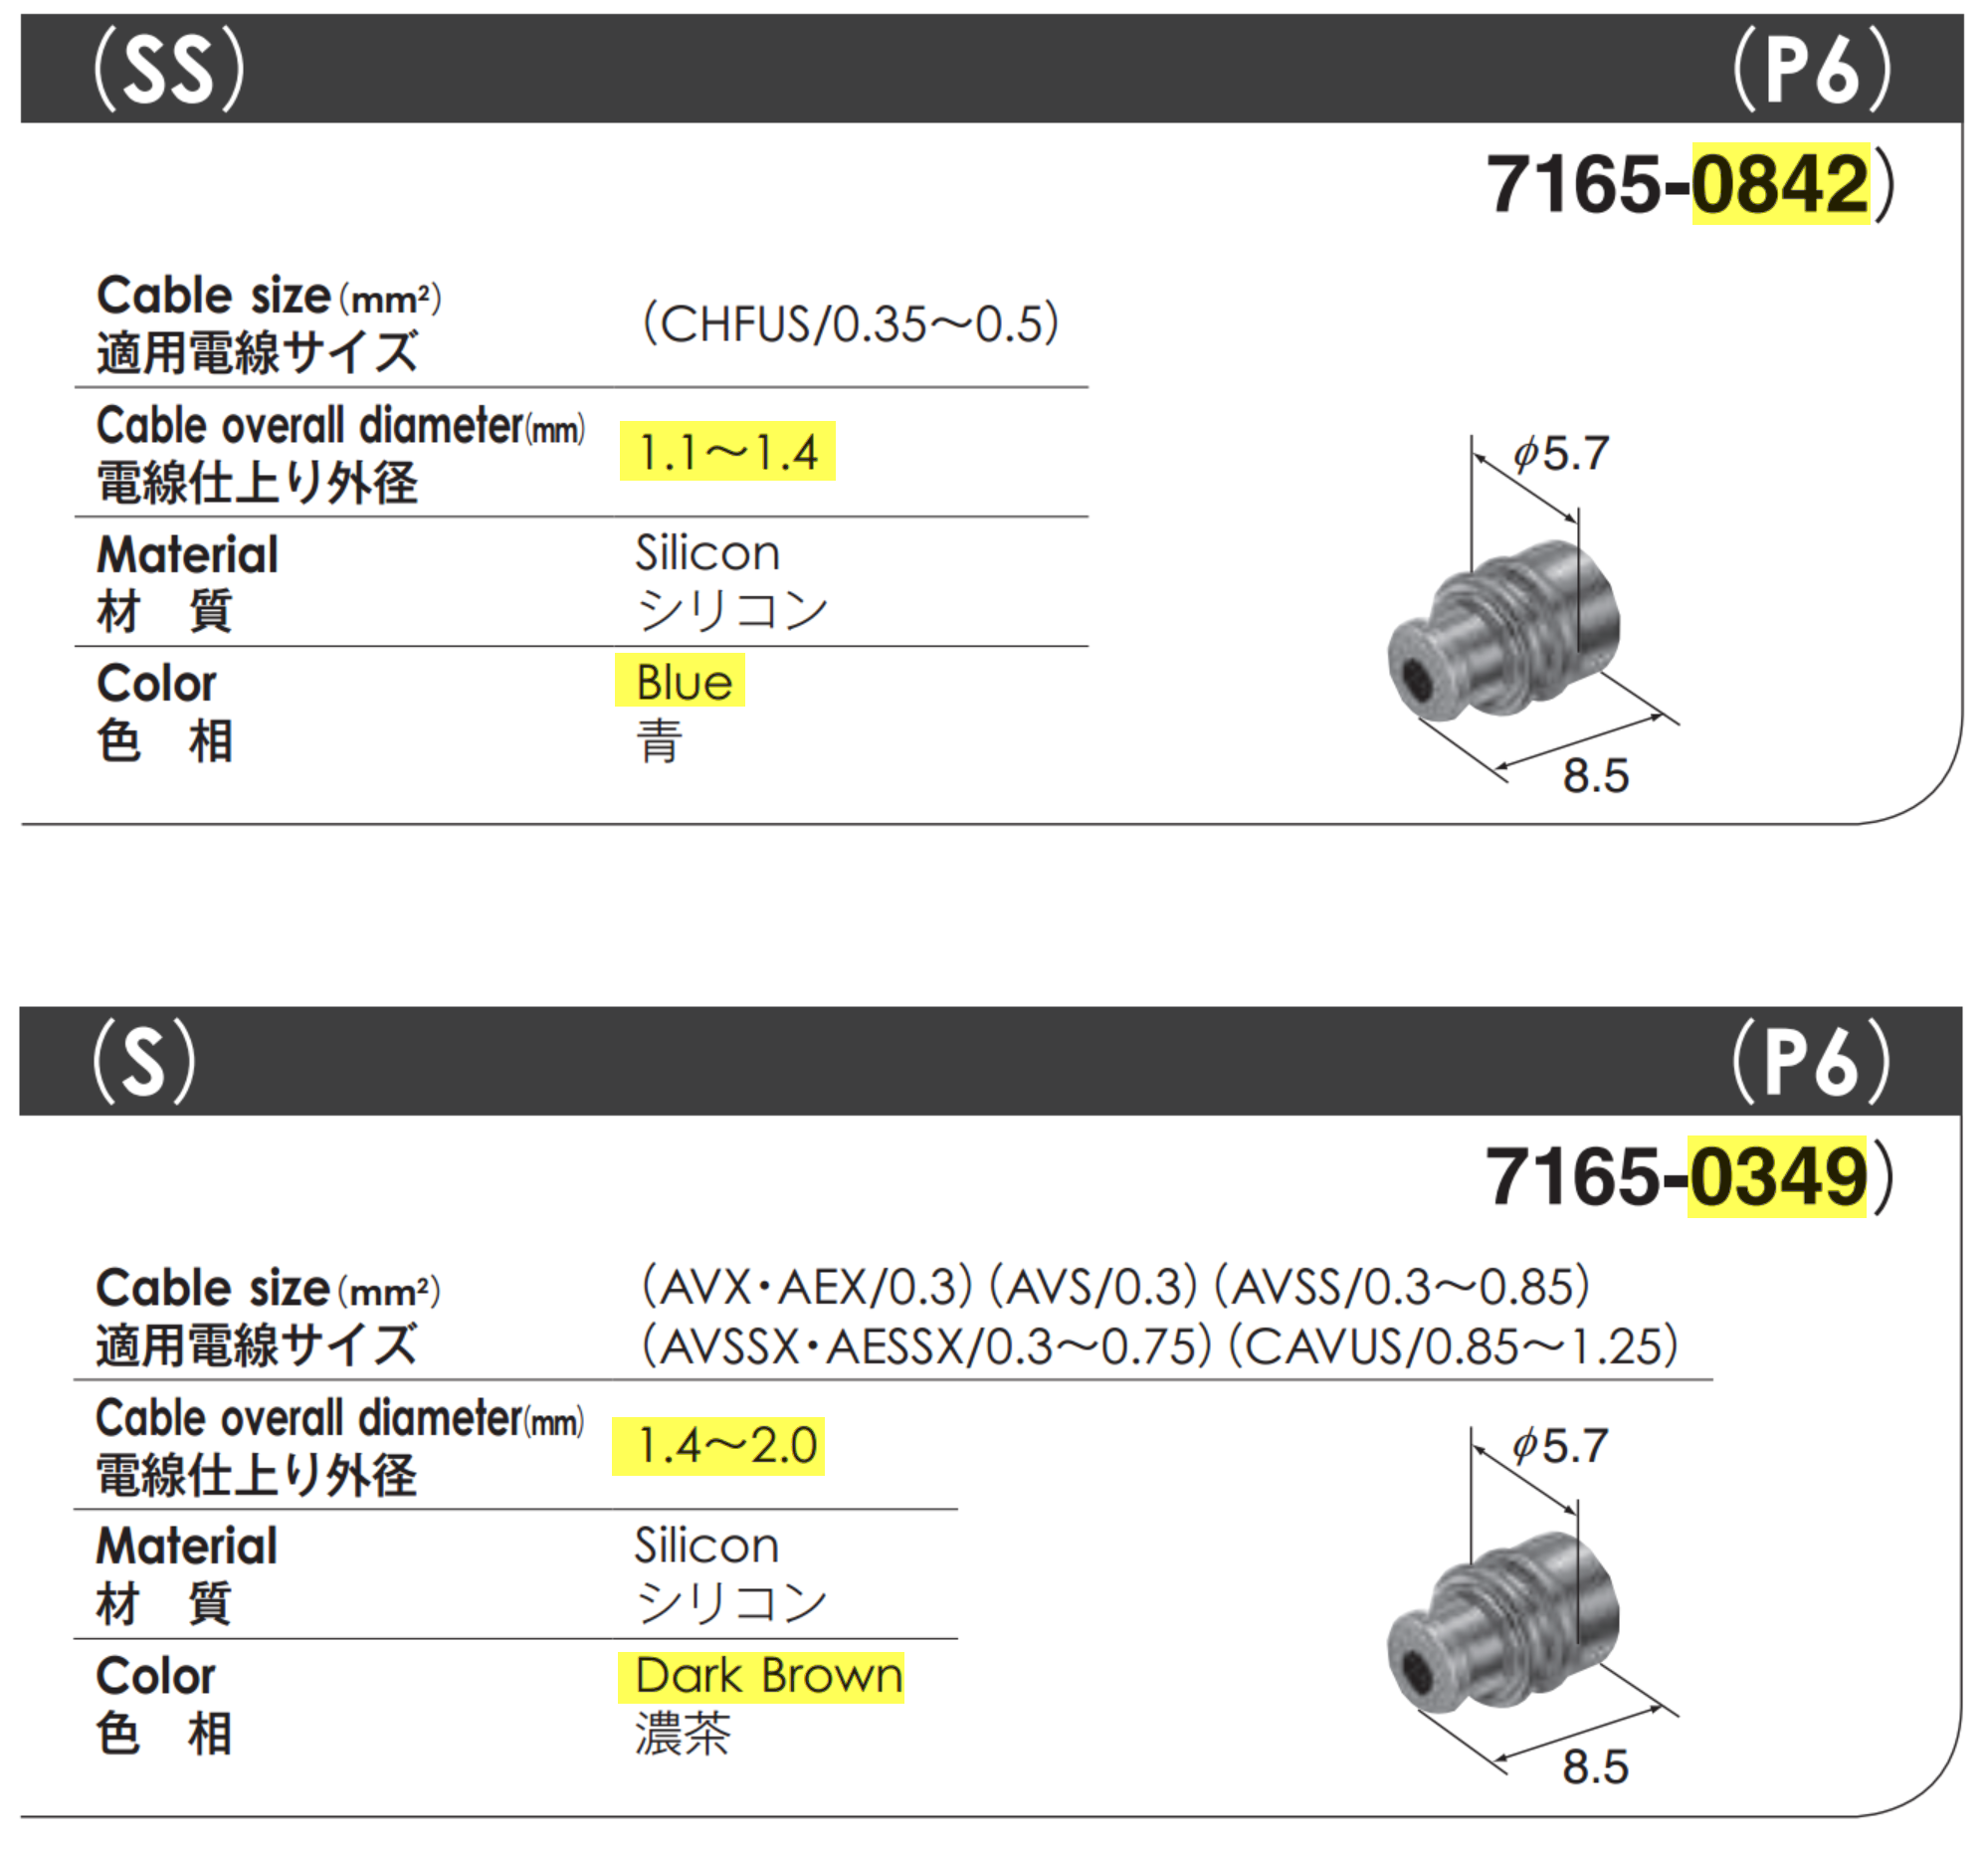
- EMC Cable Glands
- HVJB
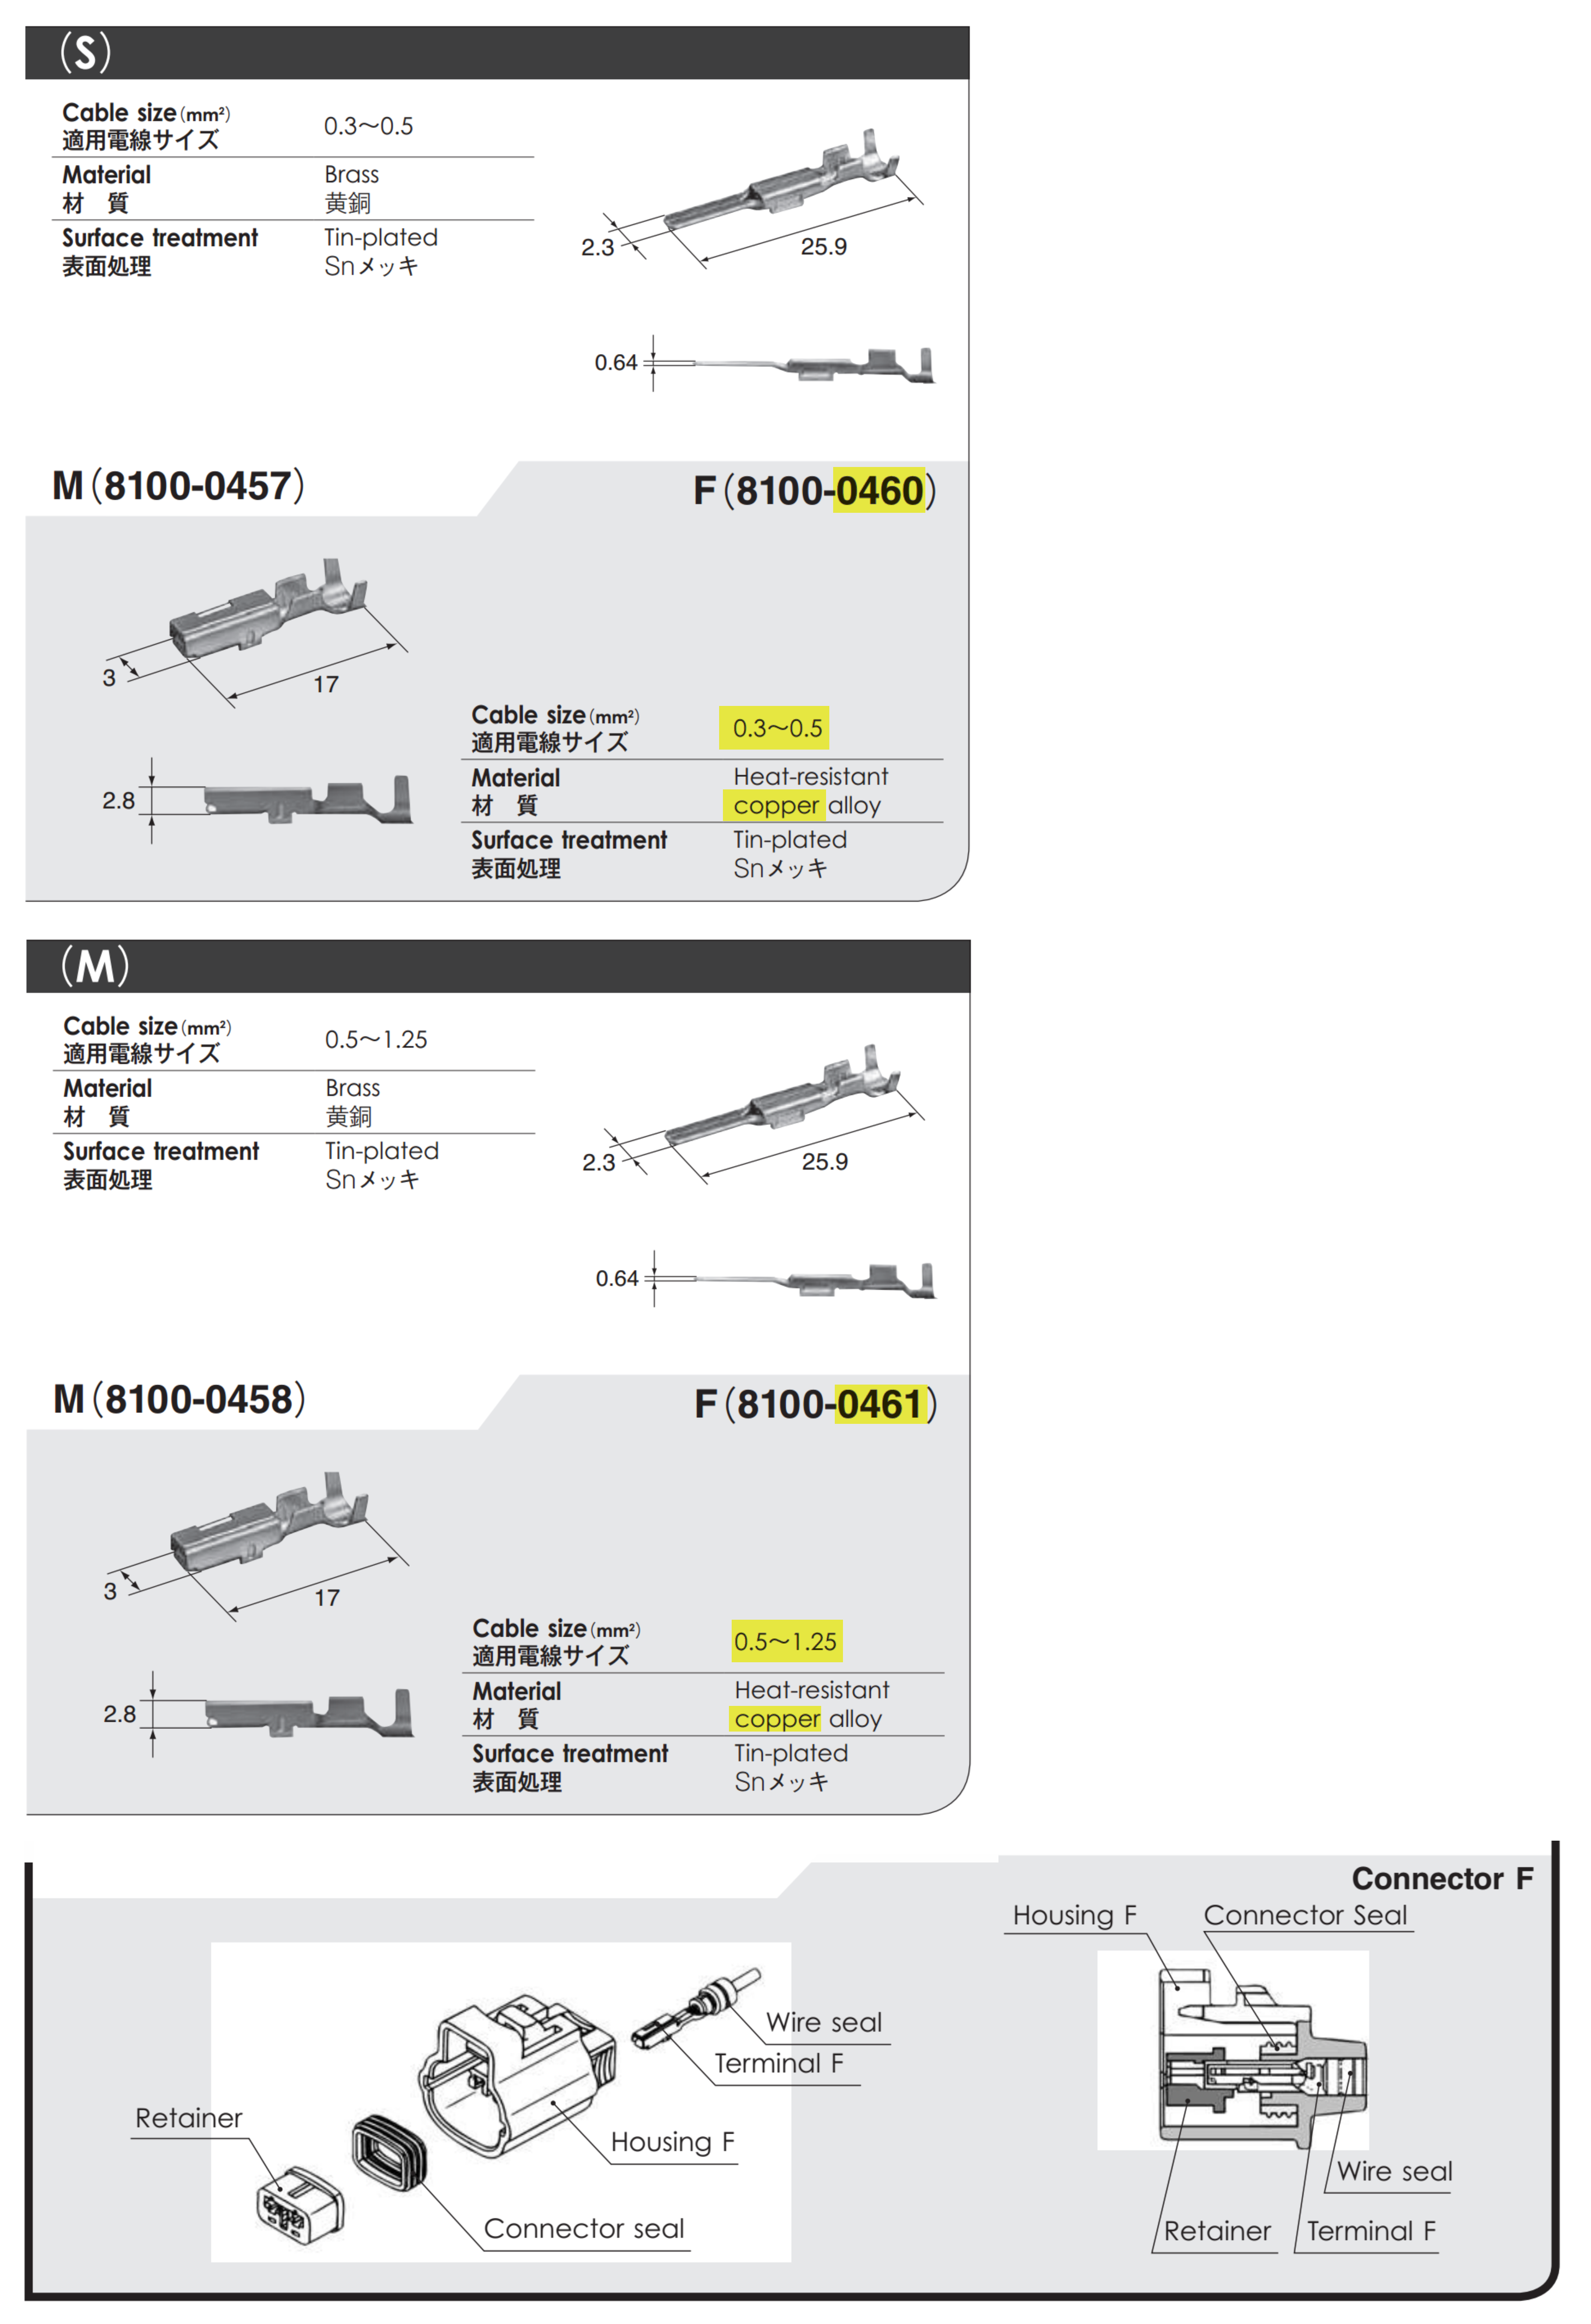
- LV/Signals connector for HVJB
- Used Model S LDU HV cable set
- Heat Shrink Tubing, adhesive lined
- Wiring braid protection for 50mm² cables
- Zip ties for wiring braid protection
- DCFC Contactors, (2)
- MiTM board, Teensy 4.0 w/(3) CAN
- HomePlug PHY QCA700x board
- [ . . . ]
---
Target phases
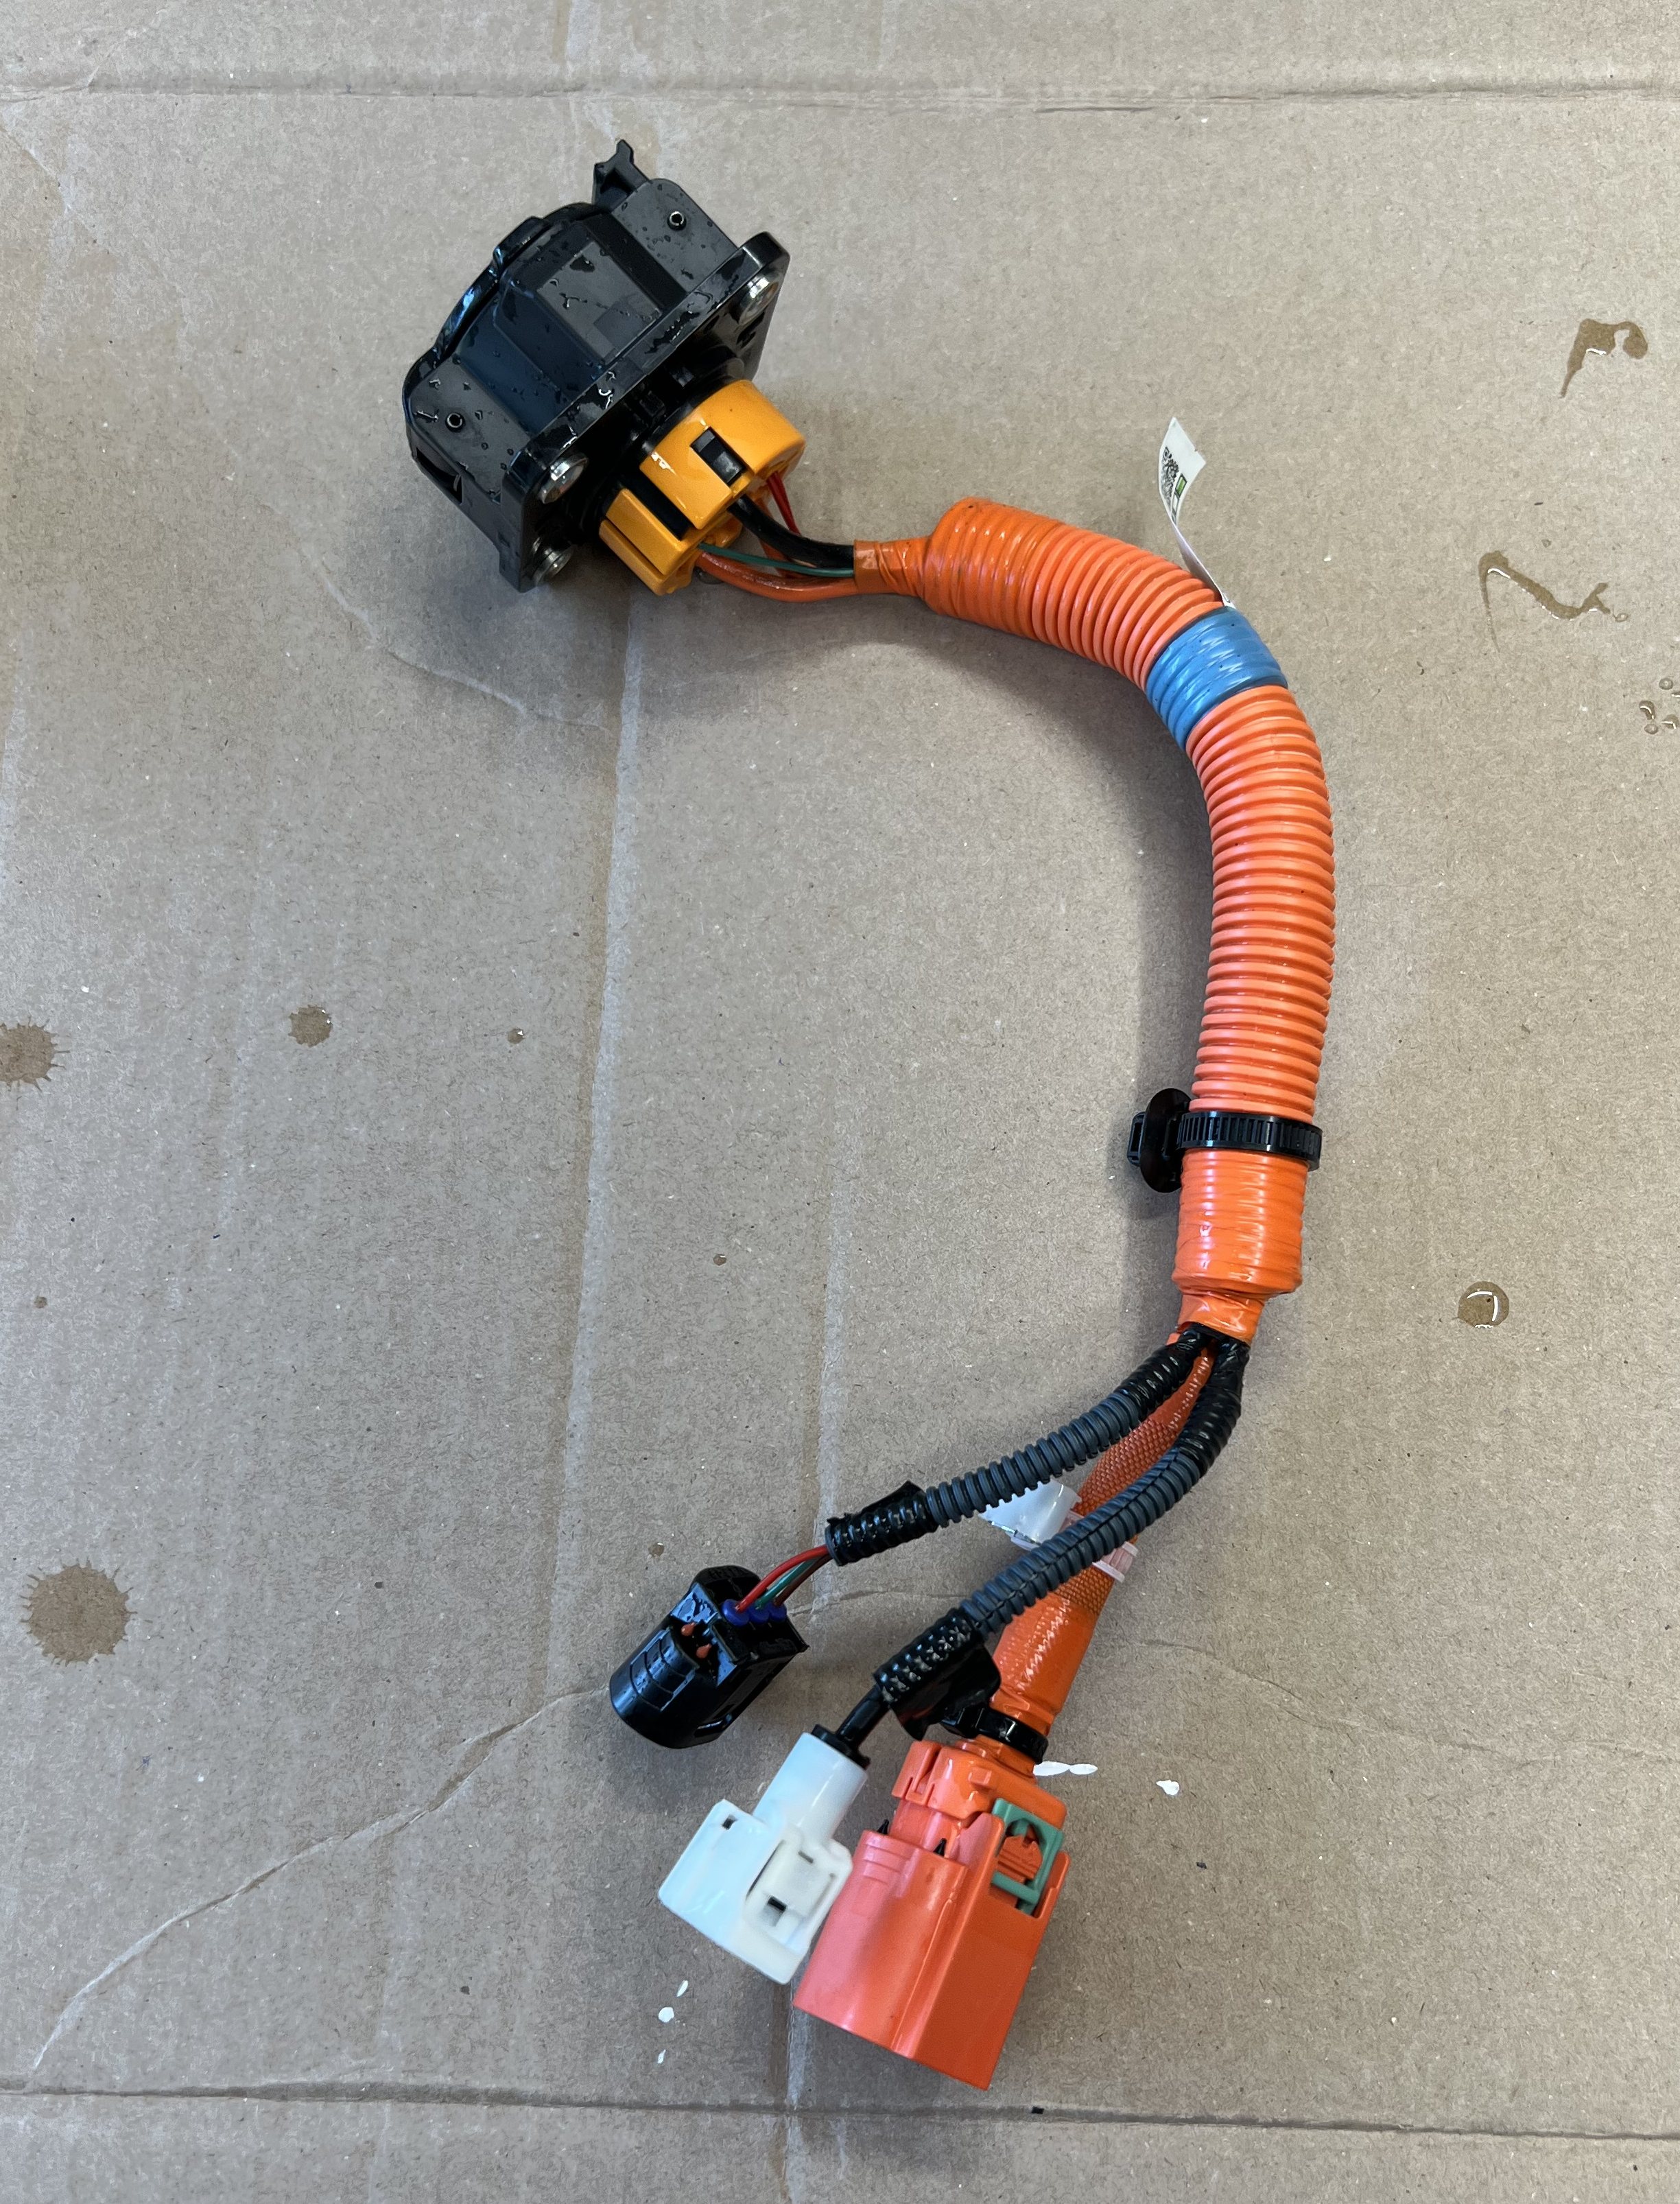
Replace Charge Port
- Install CCS Porsche Taycan early Tesla Model S NACS charge port in place of OEM J1772 port
- Fab adapter as req'd to fit charge port in available space, including cutting existing bodywork, both around the port and the panel behind the fuel filler neck
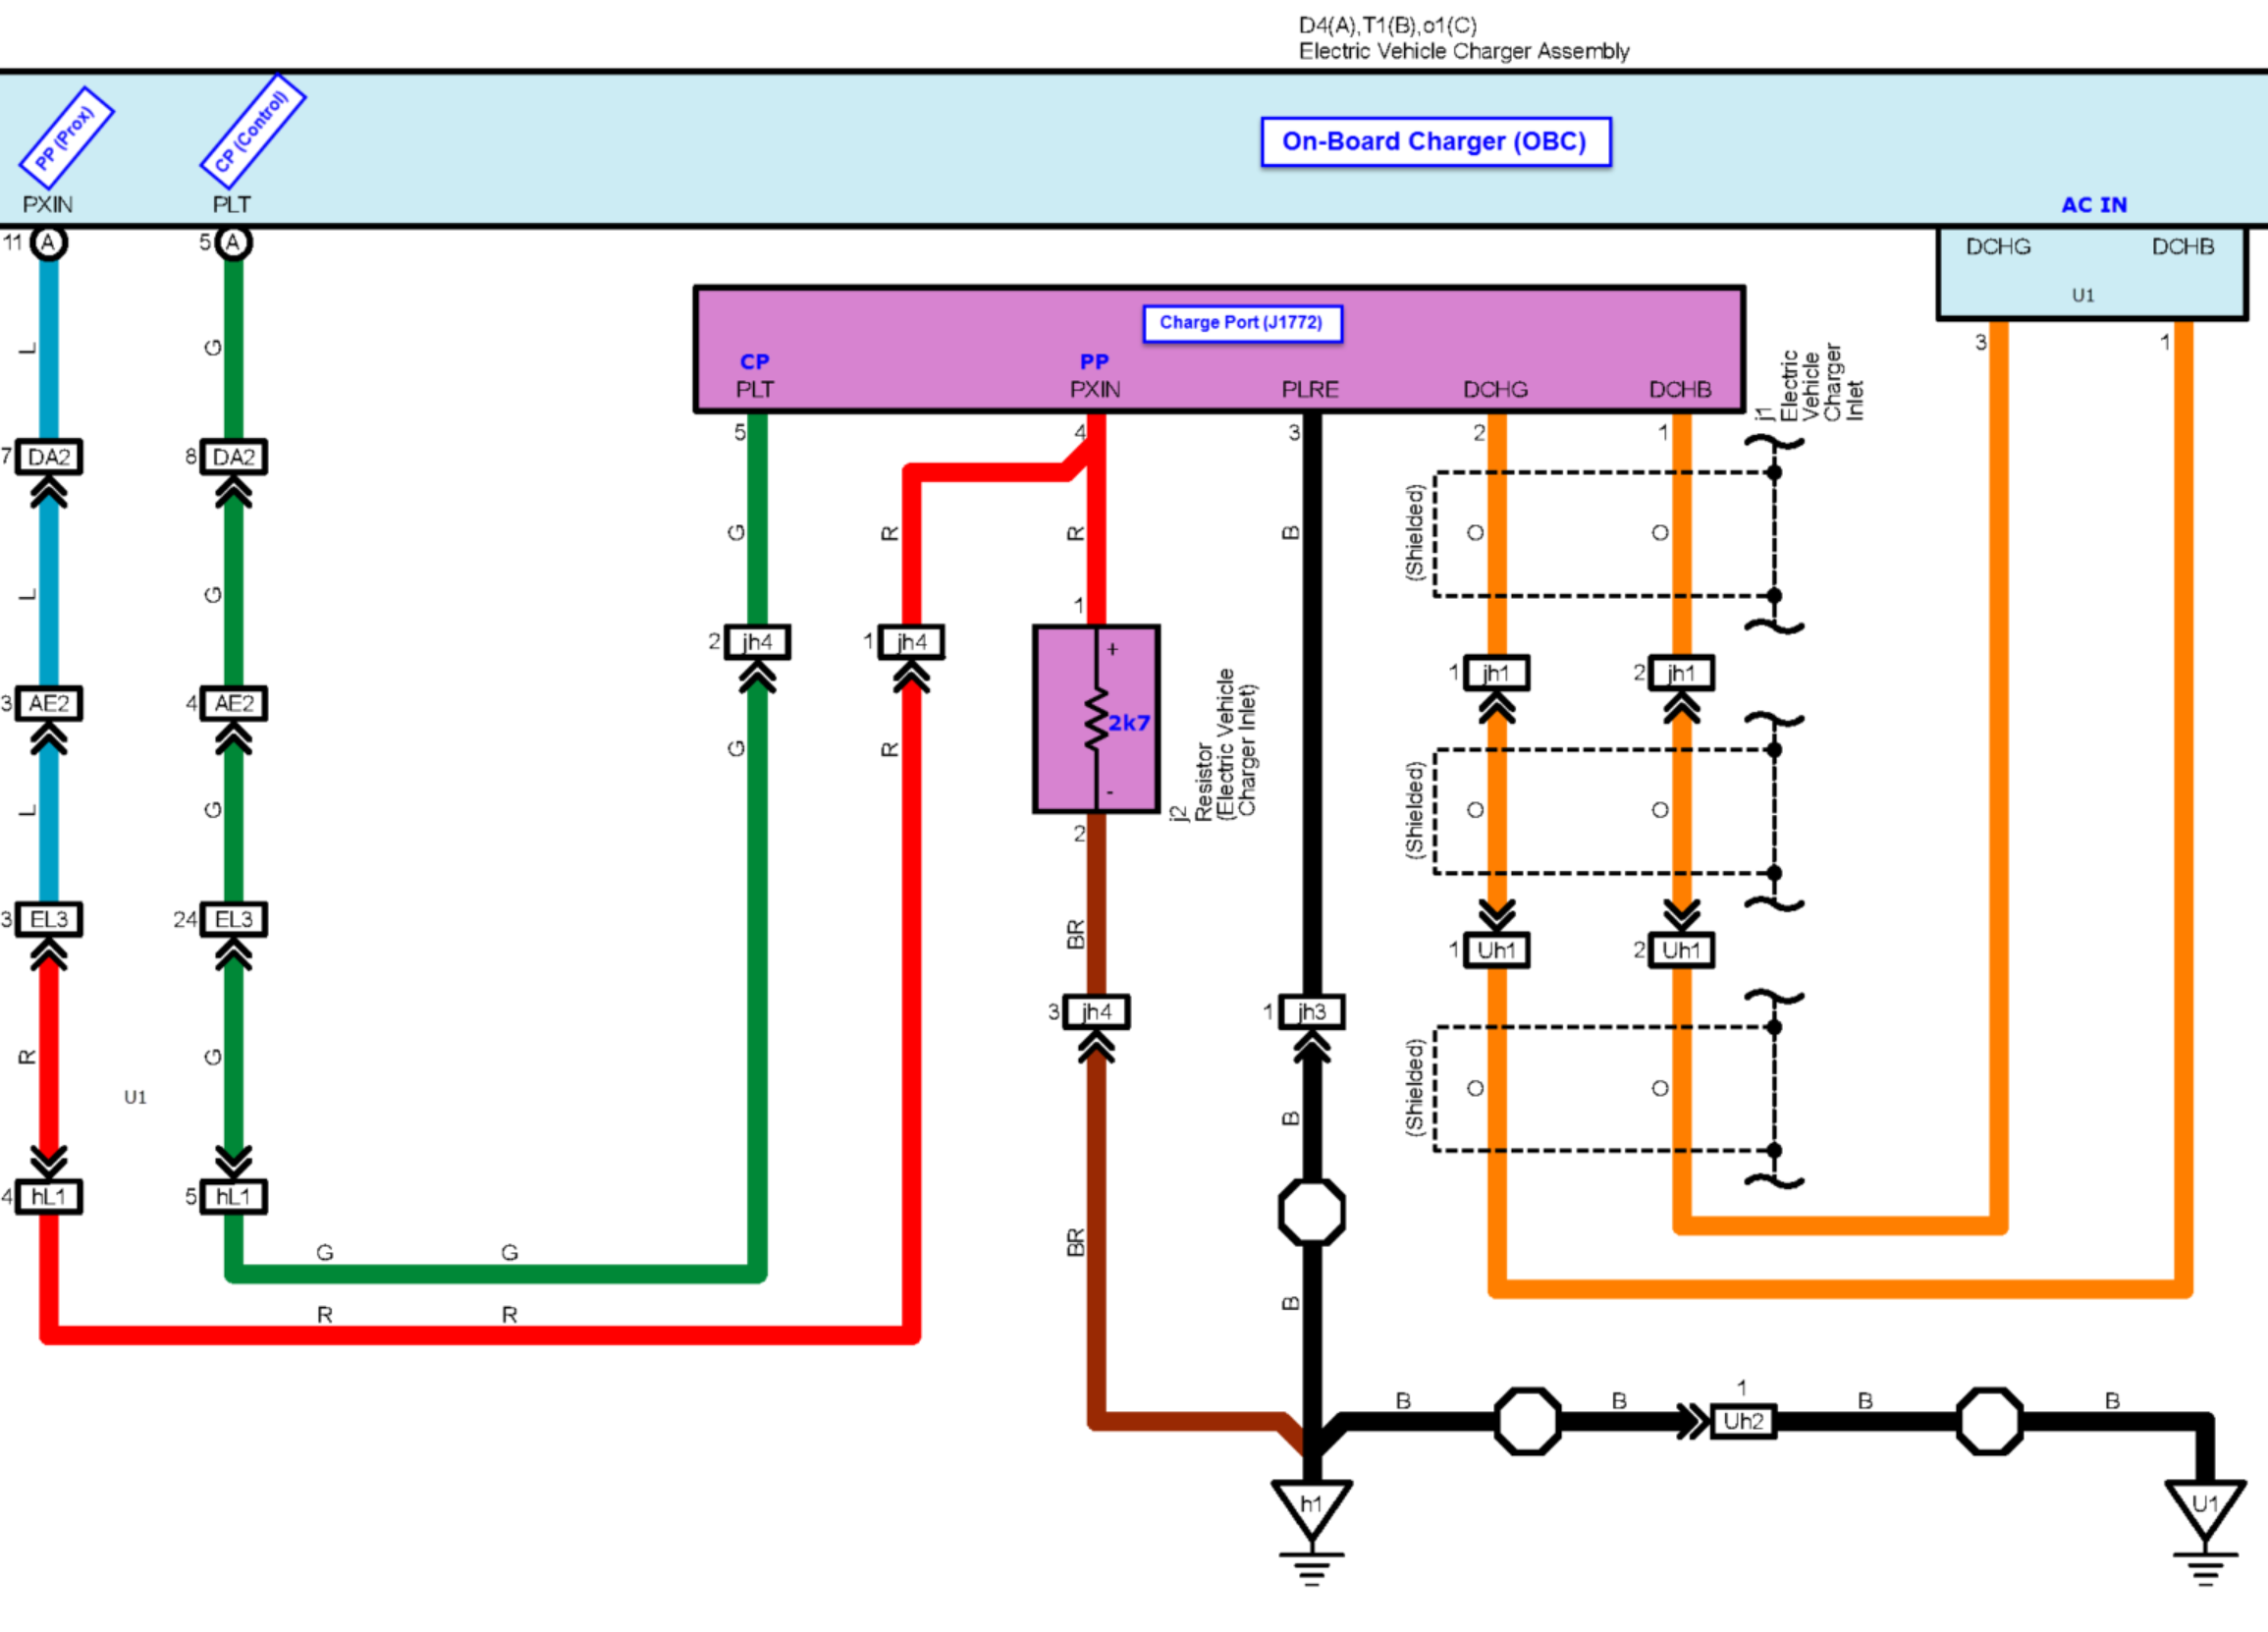
- Butt splice AC leads, PE, CP, and PP from new charge port to OEM leads, to retain AC charging continuity
- Does not require dropping the HV battery pack
- Result: the charge port has been replaced and AC charging is still possible. Vehicle remains in service.
Install new DCFC leads (charge port to new HVJB)
- Install new HVDC leads from charge port's leads to HVJB location
- May involve dropping the HV battery (840 lbs) a few inches
- Possibly, the leads may be run down the unused trans/driveshaft tunnel
- Butt splice + double insulation to mate the new DC leads to new charge port leads.
- Result: new DCFC leads are run and connected from new charge port to new HVJB location. Vehicle remains in service.
New HVJB, Part 1
- Prepare new HVJB
- Install DCFC contactors, glands, and LV connector to new HVJB
- Install HVDC voltage sensing board
- Install HVJB to vehicle, probably at passenger firewall area
- Install new HV DCFC leads from charge port to HVJB
- Fit EMC glands and bolt lug terminals to new DCFC cables
- Install new DCFC cables to HVJB & DCFC contactors using EMC glands
- Result: HVJB installed, with new DCFC leads connected to DCFC contactors. Vehicle remains in service.
New HVJB, Part 2
- Modify OEM HV Battery-to-LDU leads
- Remove OEM HV Battery-to-LDU leads from LDU only
- Cut off LDU ends from OEM cables
- Fit EMC glands and bolt lug terminals to OEM cable
- Install modified OEM cables to HVJB & DCFC contactors using EMC glands
- Modify spare Model S LDU HV cables
- Cut off the Model S Rear HVJB terminal ends
- Fit EMC glands and bolt lug terminals to Model S LDU HV cables
- Result: new HVJB fully installed, vehicle remains in service.
QCA700x board
CP & PP lines: physical switch between OBC and QCA700x
Testing of basic CCS DCFCing
--- END Of MAJOR PHASE ---
Install MiTM board
- Two CAN channels, can differentiate outgoing from incoming
- Comparison with Tesla DBC files I've collected
- Copy and modify existing MiTM snippets that already function
- Attempt to framework the golem basics (pretend to be OBC and tell BMS, "everything's fine here")
- Locate a willing software partner to hire for development