Mitsubishi Outlander DCDC OBC
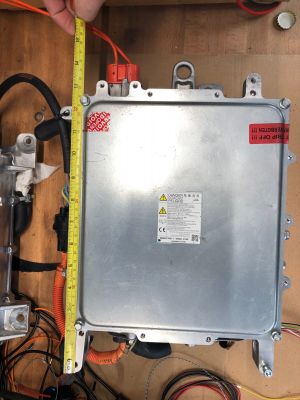
The Mitsubishi Outlander PHEV (2012-2018 models) feature a compact CANBus controlled 3.7kw charger suitable for budget EV conversions. Units can be bought for under £200.
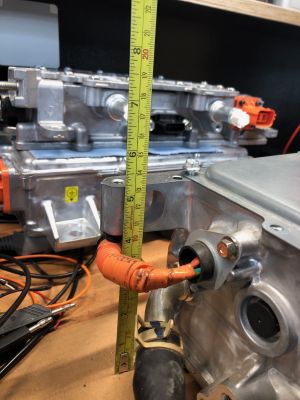
Dimensions
* Length 370mm
* Width 270mm
* Height 150mm


DC-DC Converter
The charger has an integrated DC-DC converter outputting a fixed 14.5V. The converter requires battery voltage between 200V and 420V on the DC bus.
To start the DC-DC converter, first to apply 12V to pin 7 and GND to pin 10. You also need to have its casing connected to common GND.
Then apply 12V ENABLE signal to pin 4 and you will see 14.5Vdc on the power line.
Connections
The charger is controlled via a 13-pin connector mounted on a short tail into the case. Connectors seem to be widely available to mate with this. Search for "Sumitomo 6189-1092 13-WAY CONNECTOR KIT Inc Terminals & seals [13-AC001]".

Pinout as as follows:
- Pin 1 (Orange) NC on outlander
- Pin 2 NC on outlander
- Pin 3 (Blue) NC on outlander
- Pin 4 DC SW (enables the DC:DC converter)
- Pin 5 CHIN (Serial protocol to EV Remote wifi module)
- Pin 6 CAN H (Black)
- Pin 7 Sense line for DC to DC converter
- Pin 8 IGCT main power to charger
- Pin 9 Control Pilot from charging cable
- Pin 10 GND
- Pin 11 NC
- Pin 12 CHOT (Serial protocol to EV Remote wifi module)
- Pin 13 CAN L (Red)
The AC power connector is Yakaza 90980-11413https://www.auto-click.co.uk/7283-7350-30?search=90980-11413
Charge Control
There is no voltage adjustment only current so your controller needs to monitor output voltage and step the charge current. Regardless of the set current the pilot signal will limit the charge current automatically. The pilot signal duty cycle is available on the can bus.
CANBus Messages
The CANBus interface operates at 500kbps/100ms.
Starting charging requires two messages:
0x285 alone will connect the EVSE but won't charge until you send 0x286. Byte 2 = 0xb6 pulls in the EVSE.
0x286 byte 2 sets the charge current, there is a voltage setting on byte 0 and 1 but that is completely ignored
- Byte 0-1 = Voltage setpoint (Big Endian e.g. 0x0E 0x74 = 3700 = 370v)
- Byte 2 = Current in amps x 10
The charger also returns information over the CANbus:
0x377h 8bytes DC-DC converter status
- B0+B1 = 12V Battery voltage	(h04DC=12,45V -> 0,01V/bit)
- B2+B3 = 12V Supply current	(H53=8,3A -> 0,1A/bit)
- B4 = Temperature 1		(starts at -40degC, +1degC/bit)
- B5 = Temperature 2		(starts at -40degC, +1degC/bit)
- B6 = Temperature 3		(starts at -40degC, +1degC/bit)
- B7 = Statusbyte 		(h20=standby, h21=error, h22=in operation)
-  - bit0(LSB) = Error
-  - bit1	= In Operation
-  - bit3      =
-  - bit4      =
-  - bit5      = Ready
-  - bit6	=
-  - bit7(MSB) =
0x389
- B0 = Battery Voltage (as seen by the charger), needs to be scaled x 2, so can represent up to 255*2V; used to monitor battery during charge
- B1 = Charger supply voltage, no scaling needed
- B5-6 = Charger Supply Current x 100
0x38A
- B0 = temp x 2?
- B1 = temp x 2?
- B3 = EVSE Control Duty Cycle (granny cable ~26 = 26%)
Links
Other Mistubishi OEM Parts on Open Inverter