Controlling an analog dash
-
DaveH
- Posts: 93
- Joined: Sat Jun 13, 2020 9:04 am
- Location: Hull, UK
- Has thanked: 1 time
- Been thanked: 11 times
Re: Controlling an analog dash
You will know if you have the wrong resistors if your gauge won't go all the way up with 100% PWM, or vice versa with 0%.
-
Bigpie
- Posts: 1783
- Joined: Wed Apr 10, 2019 8:11 pm
- Location: South Yorkshire, UK
- Has thanked: 83 times
- Been thanked: 430 times
Re: Controlling an analog dash
I can make the dial go to empty and full with my resistor pair manually with 1 and then both in series, so should be the right ones.
BMW E91 2006
ZombieVerter
GS450h
Outlander Charger DC/DC
Outlander Compressor
Renault Kangoo 36kWh battery
FOCCCI CCS
ZombieVerter
GS450h
Outlander Charger DC/DC
Outlander Compressor
Renault Kangoo 36kWh battery
FOCCCI CCS
-
muehlpower

- Posts: 698
- Joined: Fri Oct 11, 2019 10:51 am
- Location: Germany Fürstenfeldbruck
- Has thanked: 14 times
- Been thanked: 142 times
Re: Controlling an analog dash
In my previous cars there was always a voltage regulator for the temperature and fuel gauge to compensate for fluctuations in the on-board voltage. Maybe it works with your car via pwm and your pwm messes up this regulation.
-
Bigpie
- Posts: 1783
- Joined: Wed Apr 10, 2019 8:11 pm
- Location: South Yorkshire, UK
- Has thanked: 83 times
- Been thanked: 430 times
Re: Controlling an analog dash
How did you control them in your case?
*EDIT* the IR520 did the same, maybe a need much higher frequency PWM? Digipot might be the answer.
**EDIT** Given up and ordered a couple of digipots to play with.
*EDIT* the IR520 did the same, maybe a need much higher frequency PWM? Digipot might be the answer.
**EDIT** Given up and ordered a couple of digipots to play with.
BMW E91 2006
ZombieVerter
GS450h
Outlander Charger DC/DC
Outlander Compressor
Renault Kangoo 36kWh battery
FOCCCI CCS
ZombieVerter
GS450h
Outlander Charger DC/DC
Outlander Compressor
Renault Kangoo 36kWh battery
FOCCCI CCS
-
Bigpie
- Posts: 1783
- Joined: Wed Apr 10, 2019 8:11 pm
- Location: South Yorkshire, UK
- Has thanked: 83 times
- Been thanked: 430 times
Re: Controlling an analog dash
Well the digipots work to control the dash. 10k seem to be the easiest to get hold of quickly, but they only give 3 positions on the fuel gauge without paralleling them up. I'll have to get a 1k from China.
BMW E91 2006
ZombieVerter
GS450h
Outlander Charger DC/DC
Outlander Compressor
Renault Kangoo 36kWh battery
FOCCCI CCS
ZombieVerter
GS450h
Outlander Charger DC/DC
Outlander Compressor
Renault Kangoo 36kWh battery
FOCCCI CCS
-
Jack Bauer

- Posts: 3667
- Joined: Wed Dec 12, 2018 5:24 pm
- Location: Ireland
- Has thanked: 12 times
- Been thanked: 353 times
- Contact:
Re: Controlling an analog dash
Check out the schematic on this guy :
https://hackaday.io/project/6288-can-bu ... -simulator
Super simple way to drive the vag fuel gauge.
https://hackaday.io/project/6288-can-bu ... -simulator
Super simple way to drive the vag fuel gauge.
I'm going to need a hacksaw
-
Bigpie
- Posts: 1783
- Joined: Wed Apr 10, 2019 8:11 pm
- Location: South Yorkshire, UK
- Has thanked: 83 times
- Been thanked: 430 times
Re: Controlling an analog dash
Great find, that's a genius solution.
Code: Select all
void Fuel(int amount)
{
  pinMode(2, INPUT);
  pinMode(3, INPUT);
  pinMode(4, INPUT);
  pinMode(5, INPUT);
  pinMode(6, INPUT);
  pinMode(7, INPUT);

  if (amount >= 90)
  {
    pinMode(2, OUTPUT);
    digitalWrite(2, LOW);
    return;
  }
  if (amount >= 75)
  {
    pinMode(3, OUTPUT);
    digitalWrite(3, LOW);
    return;
  }
  if (amount >= 50)
  {
    pinMode(4, OUTPUT);
    digitalWrite(4, LOW);
    return;
  }
  if (amount >= 25)
  {
    pinMode(5, OUTPUT);
    digitalWrite(5, LOW);
    return;
  }
  if (amount >= 10)
  {
    pinMode(6, OUTPUT);
    digitalWrite(6, LOW);
    return;
  }
  if (amount >= 0)
  {
    pinMode(7, OUTPUT);
    digitalWrite(7, LOW);
    return;
  }
}
BMW E91 2006
ZombieVerter
GS450h
Outlander Charger DC/DC
Outlander Compressor
Renault Kangoo 36kWh battery
FOCCCI CCS
ZombieVerter
GS450h
Outlander Charger DC/DC
Outlander Compressor
Renault Kangoo 36kWh battery
FOCCCI CCS
-
DaveH
- Posts: 93
- Joined: Sat Jun 13, 2020 9:04 am
- Location: Hull, UK
- Has thanked: 1 time
- Been thanked: 11 times
Re: Controlling an analog dash
That's a very cheap kind of DAC (see also https://en.wikipedia.org/wiki/Resistor_ladder). Funnily enough I was just thinking about using a simple DAC yesterday after testing one of my gauges with PWM (will post a video later). The above method is fine if you have plenty of I/O available but I want to control at least 2 gauges and not sure I will have enough I/O on a Teensy 3.2.
-
arber333
- Posts: 3577
- Joined: Mon Dec 24, 2018 1:37 pm
- Location: Slovenia
- Has thanked: 134 times
- Been thanked: 342 times
- Contact:
Re: Controlling an analog dash
What about using multiplexers?DaveH wrote: ↑Sun Aug 22, 2021 9:16 am That's a very cheap kind of DAC (see also https://en.wikipedia.org/wiki/Resistor_ladder). Funnily enough I was just thinking about using a simple DAC yesterday after testing one of my gauges with PWM (will post a video later). The above method is fine if you have plenty of I/O available but I want to control at least 2 gauges and not sure I will have enough I/O on a Teensy 3.2.
https://eu.mouser.com/datasheet/2/427/d ... 764700.pdf
Or simply LED drivers?
https://www.ti.com/lit/ds/symlink/tlc69 ... &distId=26
-
DaveH
- Posts: 93
- Joined: Sat Jun 13, 2020 9:04 am
- Location: Hull, UK
- Has thanked: 1 time
- Been thanked: 11 times
Re: Controlling an analog dash
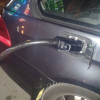
Here's what I did yesterday. This is using a darlington transistor as that's what I had to hand. It works, but the PWM is audible with this kind of gauge. It's quiet, and it was also raining on the steel roof, so you can't hear it very well in the video.
-
DaveH
- Posts: 93
- Joined: Sat Jun 13, 2020 9:04 am
- Location: Hull, UK
- Has thanked: 1 time
- Been thanked: 11 times
Re: Controlling an analog dash
I don't think LED drivers would give enough current for most applications, also the max voltage of that particular one is only up to Vcc+0.3. Analog switches also don't allow much current and have a relatively high on-resistance.arber333 wrote: ↑Sun Aug 22, 2021 9:35 am What about using multiplexers?
https://eu.mouser.com/datasheet/2/427/d ... 764700.pdf
Or simply LED drivers?
https://www.ti.com/lit/ds/symlink/tlc69 ... &distId=26
-
DaveH
- Posts: 93
- Joined: Sat Jun 13, 2020 9:04 am
- Location: Hull, UK
- Has thanked: 1 time
- Been thanked: 11 times
Re: Controlling an analog dash
I've come up with a simple low cost solution that should work and still uses PWM.
I made a simplified model of one of my gauges, represented by Rp, Rs and Rn. The maximum current for this is about 70mA.
V2, V4 and A1 are modelling the PWM logic output with a 3.3V supply. This is low pass filtered by R4, R5 and C2 to give about 3mA peak-to-peak ripple in R1.
I'll breadboard this when I get a chance, just need to buy some bits.
V2, V4 and A1 are modelling the PWM logic output with a 3.3V supply. This is low pass filtered by R4, R5 and C2 to give about 3mA peak-to-peak ripple in R1.
I'll breadboard this when I get a chance, just need to buy some bits.
-
muehlpower
- Posts: 698
- Joined: Fri Oct 11, 2019 10:51 am
- Location: Germany Fürstenfeldbruck
- Has thanked: 14 times
- Been thanked: 142 times
Re: Controlling an analog dash
I removed all of the original mechanics from my analog dash and replaced them with stepper motors. Needs a little more mechanical skill, but now I have full control and low power consumption. I found the necessary information on this page: https://realsimcontrol.com/io_step.html
There is also a special watch stepper that I used to replace my watch.
There is also a special watch stepper that I used to replace my watch.
-
clanger9

- Posts: 203
- Joined: Mon Oct 28, 2019 7:41 am
- Location: Chester, UK
- Been thanked: 1 time
- Contact:
Re: Controlling an analog dash
Excellent, thanks for that pointer. I'm looking at a stepper motor solution for my (mechanical) rev counter. This seems like the way to go...
-
DaveH
- Posts: 93
- Joined: Sat Jun 13, 2020 9:04 am
- Location: Hull, UK
- Has thanked: 1 time
- Been thanked: 11 times
Re: Controlling an analog dash
I breadboarded the circuit described earlier. It works great, but the gauge behaves strangely in that when you reduce the current, the pointer doesn't come down to the same place as when it's going up. I can drop it below where I want it to be then bring it back up again, but this isn't ideal.
It's also nonlinear, but I can work with that.
It's also nonlinear, but I can work with that.