Controlling an analog dash

Introduction and miscellaneous that we haven't created categories for, yet
LRBen
Posts: 477
Joined: Thu Jul 04, 2019 6:35 pm
Location: Somerset, UK
Has thanked: 43 times
Been thanked: 109 times

Re: Controlling an analog dash

Post by LRBen »

I'm currently working on the dash dials on my project. It is looking pretty simple in theory.
My RPM is controlled by square waves, the motor temp and fuel temp gauges can be controlled via PWM. Thanks to Clangers wiring diagrams I was able to confirm that I can control some gauges with pwm and a transistor on my arduino.

My plan is to use a teensy 3.2 to read the canbus signals from OpenBMS and Openinverter, and then send out the relevant signals.
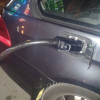
From the looks of the wiring diagram for my car the dash gauges connect to the ECU which then grounds the signal wires in order to control the gauges. This makes the practical part easier as I am just going to tap into ECU connector and then all I need to do is to PWM that signal to ground. No need to get the dashboard out.

I made a start today on the plan for the control unit. I'm a complete novice when it comes to this sort of stuff, but I think transistors are just about making sense in my head now. I was unsure about the 1k resistor values for a teensy, since the voltage is 3.3v rather than the 5v for the regular arduino, but from my limited understanding that resistor is just there to make sure the voltage doesn't get near the Emitter-Base Breakdown Voltage?

Regarding canbus connections, from what I can gather I only need a transceiver if I want to send canbus messages, the teensy should be able to receive them without any additional hardware.
2021-03-21 18_15_23-Eeschema — MG F VCU.sch [_] — C__Users_benay_OneDrive_Documents_MG F VCU.png
It's pretty simple on the inputs and outputs side, just the two canbus wires and then three signal wires from the dash. I also added in some controls for the dc-dc on my gen 2 prius inverter. Figured it might be handy to have some control over when that dc-dc starts and the output can be controlled with a 0-5v signal. Not sure if the transistors are really the correct tool for the job there, but for now they are just place holders.

I have some transistors on order now, once they arrive I will breadboard all this out and throw some test code on the teensy and see what happens in the car.
Dilbert
Posts: 410
Joined: Mon Aug 12, 2019 7:21 pm
Location: Dublin, Ireland
Been thanked: 4 times

Re: Controlling an analog dash

Post by Dilbert »

Use some SPI Digi Pots, these are a digital variable resistor, which could be used to simulate temp sensor, fuel sensor etc... these are very cheap.

http://synthhacker.blogspot.com/2015/10 ... gipot.html

some people have managed to get gauges working with a PWM signal, but for resistance signals i'd use digipot
LRBen
Posts: 477
Joined: Thu Jul 04, 2019 6:35 pm
Location: Somerset, UK
Has thanked: 43 times
Been thanked: 109 times

Re: Controlling an analog dash

Post by LRBen »

Those look interesting, I'll order a couple and see how I get on.
jon volk
Posts: 572
Joined: Wed Apr 10, 2019 7:47 pm
Location: Connecticut
Been thanked: 2 times

Re: Controlling an analog dash

Post by jon volk »

Your tach is ground pulsed? Ive only ever encountered ones that a 12v variable frequency signal.
Formerly 92 E30 BMW Cabrio with Tesla power
LRBen
Posts: 477
Joined: Thu Jul 04, 2019 6:35 pm
Location: Somerset, UK
Has thanked: 43 times
Been thanked: 109 times

Re: Controlling an analog dash

Post by LRBen »

jon volk wrote: Tue Mar 23, 2021 5:03 pm Your tach is ground pulsed? Ive only ever encountered ones that a 12v variable frequency signal.
You might be right. I'm going from guesses on the wiring diagrams. I find out in the next couple of weeks when I do some testing in car. Won't be too much trouble to switch around some wires if the ground pulse doesn't work.
DaveH
Posts: 91
Joined: Sat Jun 13, 2020 9:04 am
Location: Hull, UK
Has thanked: 1 time
Been thanked: 8 times

Re: Controlling an analog dash

Post by DaveH »

You can’t just connect the CAN straight to the Teensy. Even if you just use the receiver, you have a single input on the Teensy and CAN is a differential pair. Also you can easily destroy the Teensy by connecting directly to vehicle wiring. You might be able to bodge it with some transistors etc but it’s easier just to use the device designed for the job.
LRBen
Posts: 477
Joined: Thu Jul 04, 2019 6:35 pm
Location: Somerset, UK
Has thanked: 43 times
Been thanked: 109 times

Re: Controlling an analog dash

Post by LRBen »

DaveH wrote: Tue Mar 23, 2021 9:36 pm You can’t just connect the CAN straight to the Teensy. Even if you just use the receiver, you have a single input on the Teensy and CAN is a differential pair. Also you can easily destroy the Teensy by connecting directly to vehicle wiring. You might be able to bodge it with some transistors etc but it’s easier just to use the device designed for the job.
Fair enough, I'll use a CAN transceiver.
jon volk wrote: Tue Mar 23, 2021 5:03 pm Your tach is ground pulsed? Ive only ever encountered ones that a 12v variable frequency signal.
Just realised that I was being a bit stupid over that tach. In all the notes before I made that wiring diagram I had the tach controlled by a 12v square wave, two waves per rpm. Then I forgot all about that little detail for a few days.

I did some testing today in the car just to confirm the correct wires for fuel and temp gauges. I'll put in the teensy tomorrow and mess around with the pwm. Digipots haven't arrived yet so I'll have to make do for now.
jon volk
Posts: 572
Joined: Wed Apr 10, 2019 7:47 pm
Location: Connecticut
Been thanked: 2 times

Re: Controlling an analog dash

Post by jon volk »

I use a Teensy to drive my tach with pwm at 50% duty cycle and use analogwritefrequency() function to modify said square wave.
Formerly 92 E30 BMW Cabrio with Tesla power
arber333
Posts: 3265
Joined: Mon Dec 24, 2018 1:37 pm
Location: Slovenia
Has thanked: 80 times
Been thanked: 234 times
Contact:

Re: Controlling an analog dash

Post by arber333 »

My EVdisplay has one output via which i can drive regular fuel gage. While original setup uses Nmos to pull gage needle from higher resistance (150R for american cars) down to GND via PWM i figured Peugeot fuel gage is wired in reverse.

So how to find out what the values are for my car? Simple, i made a small variable pot and wired it into my dash. I used 500R variable pot and tried limit values. I got 16R for "tank full" and 340R for "tank empty". Linearily before needle reaches empty it shows yellow light when still near 310R which is good because i can anticipate empty condition before my battery is actually empty.

Now i needed to make transistor setup that will pull PWM inversly from the original EVdisplay setup. I chose to use original setup first with IRF510 transistor and both resistors. Of course i still needed to use SFH615 optocoupler because EVdisplay is NOT isolated from main battery! So i got inverse function empty when full and full when empty.

Next i added another Pmos to my design. IRF4905 is capable Pmos about proportional to IRF510. Together they make negative PWM signal which pulls less duty when battery gets drained. This means the more PWM EVdisplay is showing the less duty pulls the gage to GND. That way i get inverse effect.

My wiring in the contact box. Output of EVdisplay i use to connect to opto and then convert PWM signal to 12V.

EDIT: My Pmos wiring didnt quite work out. I wonder why... I had since replaced Pmos with a simpler PNP BD244C transistor and some arranged resistors. What i needed to take into account was different PWM behaviour of cars gage circuit at 8Khz that PWM was operating on.
Results were a bit different with 47R value for FULL and 460R for EMPTY thus R2 vas set at 415R. I add circuit below...
IMG_20210328_135953.jpg
Attachments
fuel gauge.jpg
IMG_20210327_170206.jpg
IMG_20210327_171205.jpg
LRBen
Posts: 477
Joined: Thu Jul 04, 2019 6:35 pm
Location: Somerset, UK
Has thanked: 43 times
Been thanked: 109 times

Re: Controlling an analog dash

Post by LRBen »

jon volk wrote: Sat Mar 27, 2021 1:39 pm I use a Teensy to drive my tach with pwm at 50% duty cycle and use analogwritefrequency() function to modify said square wave.
That function just clicked for me after looking at it for a few days. All makes sense now! That should work pretty well. I have some PNP transistors coming this week as I think the NPN resistors are only able to function on the ground side from what I can tell.

I managed to get the fuel and temperature gauges working with the NPN transistors and PWM over the weekend. I did get the tacho to work here and there with manual pulses. So I have identified all the wires that I need to use.
arber333
Posts: 3265
Joined: Mon Dec 24, 2018 1:37 pm
Location: Slovenia
Has thanked: 80 times
Been thanked: 234 times
Contact:

Re: Controlling an analog dash

Post by arber333 »

I am adding some additional pics. I have setup my system in such a way there is logic behind the needle position. It now goes through positions of Full, 3/4, 1/2, 1/4 and Empty/reserve with reasonable accuracy. Pics show 43% SOF with a little over 50% of needle travel.

However the function is a little slow and if you would drive all the way i expect the function would show with a little time delay unless you stop.
Attachments
IMG_20210330_171417.jpg
IMG_20210330_171320.jpg
LRBen
Posts: 477
Joined: Thu Jul 04, 2019 6:35 pm
Location: Somerset, UK
Has thanked: 43 times
Been thanked: 109 times

Re: Controlling an analog dash

Post by LRBen »

I had some success with this back in March and managed to get my tacho working pretty well. Should be pretty simple to send the correct rpm to the tacho now from the OI board canbus messages.


I have just started to do the coding for my VCU, mixing in all the separate scripts I have made so far for testing individual parts. So now I am figuring out how to more precisely control the resistance gauges like fuel and temperature. Unfortunately I didn't have much luck with digipots as the resistance steps were far too large for the gauges to use. The resistance ranges for the fuel is 5ohms full, 105 ohms empty. Temperature is 142 ohms cold and 16.9ohms head gasket failure hot. So pretty small resistances.

Is there a ratio or rule for pwm frequency to ohms equivalent? Or is it more of a fine tuning trial and error for each case?
DaveH
Posts: 91
Joined: Sat Jun 13, 2020 9:04 am
Location: Hull, UK
Has thanked: 1 time
Been thanked: 8 times

Re: Controlling an analog dash

Post by DaveH »

I haven't had a chance to start on mine yet, but you basically want to pull just enough current through the gauge with your output full on (100% PWM) to make it read maximum (this is the full scale current). The resistance of the fuel sender with a full tank is 5 ohms, so if you use a 5 ohm resistor in series with your PWM output and don't change the supply voltage on your instrument panel, it should work. Say the panel voltage is 5V, you will be drawing 1 amp through the gauge at 100% PWM. Now, the resistance for empty is 105 ohms, which means you need just under 5% of the current through the gauge to read empty (put it another way, the resistance range is 21:1). So if you set the PWM to 5% you should get empty, and anywhere between 5% and 100% will give you a linear range between empty and full.

Similarly for your temp gauge, but with a different starting resistance and bottom end % (16.9 ohms / 12%).

The effect of the PWM is to scale the current down when taken on average. It doesn't matter what the frequency is, except that if it's really low you will see your gauges oscillate up and down.
LRBen
Posts: 477
Joined: Thu Jul 04, 2019 6:35 pm
Location: Somerset, UK
Has thanked: 43 times
Been thanked: 109 times

Re: Controlling an analog dash

Post by LRBen »

That seems so simple now you have said it. Thanks for that! I would have been messing around for ages to try and get it close enough with no resistors.
DaveH
Posts: 91
Joined: Sat Jun 13, 2020 9:04 am
Location: Hull, UK
Has thanked: 1 time
Been thanked: 8 times

Re: Controlling an analog dash

Post by DaveH »

If you want to match the range of your gauges to use PWM from 0% to 100%, just use 2 resistors as arber333 did (plus the transistor). R2 should be the same as the sender resistance for max reading (i.e. 5 ohms for your fuel gauge). The sum of R2 and R3 should equal the sender resistance for min reading (i.e. R3 = 100 ohms for your fuel gauge). Worth doing for a little extra effort.

If the gauge scale doesn't map linearly to PWM percentage, you will need to tweak it with some interpolation or similar.

Let us know if this all works. I was planning to use my fuel gauge until I managed to fry it yesterday because I forgot to ground the instrument panel :oops: It's an old bimetallic one though, and they are really crude, so I might just get a VDO cockpit gauge to match the others I have. These are proper moving magnet gauges.
Greenbeast
Posts: 115
Joined: Sat Dec 26, 2020 5:44 pm

Re: Controlling an analog dash

Post by Greenbeast »

thanks for that, i'll be back on this at some point this year
User avatar
Bigpie
Posts: 1595
Joined: Wed Apr 10, 2019 8:11 pm
Location: South Yorkshire, UK
Has thanked: 75 times
Been thanked: 304 times

Re: Controlling an analog dash

Post by Bigpie »

Screenshot 2021-08-16 at 5.13.29 pm.png
I'm trying to control my fuel gauge but it's not stable. I'm currently just using an UNO to generate a PWM signal, but will be moving over to the STM32 that's already in the car once I've got it sorted.


Any suggestions?
VW Beetle 2003
Outlander front generator
Prius Gen 3 inverter (EVBMW logic board)
Outlander charger
3x Golf GTE batteries
Chademo Charging
Outlander water heater
User avatar
Jack Bauer
Posts: 3563
Joined: Wed Dec 12, 2018 5:24 pm
Location: Ireland
Has thanked: 1 time
Been thanked: 87 times
Contact:

Re: Controlling an analog dash

Post by Jack Bauer »

That's why I went with digital pots in the vcu design.
I'm going to need a hacksaw
User avatar
Bigpie
Posts: 1595
Joined: Wed Apr 10, 2019 8:11 pm
Location: South Yorkshire, UK
Has thanked: 75 times
Been thanked: 304 times

Re: Controlling an analog dash

Post by Bigpie »

That's a better idea than what I was thinking of trying next :D a pot and a servo
VW Beetle 2003
Outlander front generator
Prius Gen 3 inverter (EVBMW logic board)
Outlander charger
3x Golf GTE batteries
Chademo Charging
Outlander water heater
DaveH
Posts: 91
Joined: Sat Jun 13, 2020 9:04 am
Location: Hull, UK
Has thanked: 1 time
Been thanked: 8 times

Re: Controlling an analog dash

Post by DaveH »

In what way isn’t it stable? It looks stable on the video.
arber333
Posts: 3265
Joined: Mon Dec 24, 2018 1:37 pm
Location: Slovenia
Has thanked: 80 times
Been thanked: 234 times
Contact:

Re: Controlling an analog dash

Post by arber333 »

Bigpie wrote: Mon Aug 16, 2021 4:21 pm Screenshot 2021-08-16 at 5.13.29 pm.png
I'm trying to control my fuel gauge but it's not stable. I'm currently just using an UNO to generate a PWM signal, but will be moving over to the STM32 that's already in the car once I've got it sorted.
Any suggestions?
2N2222 is not strong enough. You need to use Nmos to quickly show GND to the dial. Now you are probably getting shark teeth...
User avatar
Bigpie
Posts: 1595
Joined: Wed Apr 10, 2019 8:11 pm
Location: South Yorkshire, UK
Has thanked: 75 times
Been thanked: 304 times

Re: Controlling an analog dash

Post by Bigpie »

DaveH wrote: Mon Aug 16, 2021 5:20 pm In what way isn’t it stable? It looks stable on the video.
It was a fixed PWM but the needle was sweeping.
Would an IRF520 be up to the job? I have a couple of those laying around?
VW Beetle 2003
Outlander front generator
Prius Gen 3 inverter (EVBMW logic board)
Outlander charger
3x Golf GTE batteries
Chademo Charging
Outlander water heater
arber333
Posts: 3265
Joined: Mon Dec 24, 2018 1:37 pm
Location: Slovenia
Has thanked: 80 times
Been thanked: 234 times
Contact:

Re: Controlling an analog dash

Post by arber333 »

Bigpie wrote: Mon Aug 16, 2021 5:44 pm
DaveH wrote: Mon Aug 16, 2021 5:20 pm In what way isn’t it stable? It looks stable on the video.
It was a fixed PWM but the needle was sweeping.
Would an IRF520 be up to the job? I have a couple of those laying around?
Your resistor could be too small or too large. What make is the car? Is it US or EU made?
Or you might have to use one PNP transistor before Nmos to reverse PWM duty.
EDIT: I see you drive it with Arduino so you can also reverse duty if needed.
DaveH
Posts: 91
Joined: Sat Jun 13, 2020 9:04 am
Location: Hull, UK
Has thanked: 1 time
Been thanked: 8 times

Re: Controlling an analog dash

Post by DaveH »

arber is right, 2N2222 is too weedy for this application. For the amount of current you can source from your Uno, there isn't enough gain to drive the gauge properly. It just about works but you need something better. You can use an NMOS FET, or a darlington pair should also work. IRF520 is massive overkill but will work fine for testing.
User avatar
Bigpie
Posts: 1595
Joined: Wed Apr 10, 2019 8:11 pm
Location: South Yorkshire, UK
Has thanked: 75 times
Been thanked: 304 times

Re: Controlling an analog dash

Post by Bigpie »

It's a 2003 VW beetle, for UK market made in Mexico will try with the irf520
VW Beetle 2003
Outlander front generator
Prius Gen 3 inverter (EVBMW logic board)
Outlander charger
3x Golf GTE batteries
Chademo Charging
Outlander water heater
Post Reply