[WIP] Voltswagen T2 -76

Tell us about the project you do with the open inverter
Cera
Posts: 64
Joined: Thu Feb 10, 2022 10:08 am
Location: Finland
Has thanked: 20 times
Been thanked: 20 times

Re: Voltswagen T2 -76

Post by Cera »

Hm. Also I have these with the battery pack for contactors, but now I also learned that without economizer circuit these are no good?

Image

Need to start looking for alternatives...

Although I also have the original TM3 BMS, shunt, and all other bits that belong to the battery pack (except the physical housing) so I might be able to get around with these somehow especially seeing lots of progress being made on TM3 BMS hardware lately. :o
User avatar
Bratitude
Posts: 783
Joined: Thu Jan 02, 2020 7:35 pm
Location: Canada
Has thanked: 57 times
Been thanked: 170 times
Contact:

Re: Voltswagen T2 -76

Post by Bratitude »

they are useful for sure! id recommend using the HV controller. its actually quick simple to get all the data you need from it. id 0x401 and 0x332. heck even just a obd dongle and scanmytesla phone app gives a nice simple battery interface
https://bratindustries.net/ leaf motor couplers, adapter plates, custom drive train components
Cera
Posts: 64
Joined: Thu Feb 10, 2022 10:08 am
Location: Finland
Has thanked: 20 times
Been thanked: 20 times

Re: Voltswagen T2 -76

Post by Cera »

Zombie is alive :)

Image

Image

Thanks to local hackerspace people for soldering the most difficult chip and teaching me how to solder the rest on my own. :)

I also received Pimoroni HyperPixel 2.1" display finally for testing if this'll fit my plans for dashboard setup.

Image

And of course, Xeyes:

Image

Front suspension is still "on the table", facing slight issues with torsion arms being quite badly damaged and I haven't been able to source replacements yet. Otherwise leaf springs, spindles, and the beam body are in pretty nice shape;

Image

Image

The current issue:

Image

Current plan is to clean the axle beam properly inside out, then use an endoscope to check the inner bushings on which the scratched section of the torsion arms rides on to see how damaged they are. Apparently replacing those is not easy, parts aren't being made anymore and damaging the bakelite sleeve on which the bushings sit risks making the whole beam unusable so gah! it's bit.. demotivating. (see https://www.thesamba.com/vw/forum/viewt ... p?t=695301 for why)

I might just end up tossing it back together with these scratched torsion arms and a few kilo's of grease, then refuse to acknowledge I ever saw anything damaged there. :lol:
User avatar
VWJoe
Posts: 55
Joined: Wed Feb 16, 2022 8:39 am
Has thanked: 7 times
Been thanked: 9 times

Re: Voltswagen T2 -76

Post by VWJoe »

Cera wrote: Wed Mar 08, 2023 2:13 pm

Current plan is to clean the axle beam properly inside out, then use an endoscope to check the inner bushings on which the scratched section of the torsion arms rides on to see how damaged they are. Apparently replacing those is not easy, parts aren't being made anymore and damaging the bakelite sleeve on which the bushings sit risks making the whole beam unusable so gah! it's bit.. demotivating. (see https://www.thesamba.com/vw/forum/viewt ... p?t=695301 for why)

I might just end up tossing it back together with these scratched torsion arms and a few kilo's of grease, then refuse to acknowledge I ever saw anything damaged there. :lol:
Classic case of lack of grease in the front beam. Putting them back as they are would likely result in the Van failing a vehicle testing due to play in the arms. Removing and replacing the inner bearings is not easy.

You could try these a lot easier to fit. https://www.heritagepartscentre.com/uk/ ... -beam.html

You may be able to use the original arm as long they are on burrs on them.
Cera
Posts: 64
Joined: Thu Feb 10, 2022 10:08 am
Location: Finland
Has thanked: 20 times
Been thanked: 20 times

Re: Voltswagen T2 -76

Post by Cera »

VWJoe wrote: Wed Mar 08, 2023 3:34 pm Classic case of lack of grease in the front beam. Putting them back as they are would likely result in the Van failing a vehicle testing due to play in the arms. Removing and replacing the inner bearings is not easy.

You could try these a lot easier to fit. https://www.heritagepartscentre.com/uk/ ... -beam.html

You may be able to use the original arm as long they are on burrs on them.
Yeah... :(

I've been considering those urethane bushing kits, but I've not heard/read about anyone using them so I dunno. I'm bit afraid they won't last very long. But if I'll end up using these same arms then I'll most likely go with those.

Bus-ok does sell the inner bushings: https://www.bus-ok.de/T2b-Metallbuchse- ... genprodukt

But that still leaves me with the difficult work in replacing those as well as finding replacement torsion arms.
User avatar
VWJoe
Posts: 55
Joined: Wed Feb 16, 2022 8:39 am
Has thanked: 7 times
Been thanked: 9 times

Re: Voltswagen T2 -76

Post by VWJoe »

Cera wrote: Wed Mar 08, 2023 3:44 pm Yeah... :(

I've been considering those urethane bushing kits, but I've not heard/read about anyone using them so I dunno. I'm bit afraid they won't last very long. But if I'll end up using these same arms then I'll most likely go with those.

Bus-ok does sell the inner bushings: https://www.bus-ok.de/T2b-Metallbuchse- ... genprodukt

But that still leaves me with the difficult work in replacing those as well as finding replacement torsion arms.
I've driven a few Vdub with them on (but not owned), it does tighten the handling and I've not heard any bad things said about them which by now would have been voiced.
alexbeatle
Posts: 155
Joined: Sun Jan 03, 2021 6:12 am
Has thanked: 46 times
Been thanked: 15 times

Re: Voltswagen T2 -76

Post by alexbeatle »

Cera wrote: Wed Mar 08, 2023 2:13 pm Zombie is alive :)


Current plan is to clean the axle beam properly inside out, then use an endoscope to check the inner bushings on which the scratched section of the torsion arms rides on to see how damaged they are. Apparently replacing those is not easy, parts aren't being made anymore and damaging the bakelite sleeve on which the bushings sit risks making the whole beam unusable so gah! it's bit.. demotivating. (see https://www.thesamba.com/vw/forum/viewt ... p?t=695301 for why)

I might just end up tossing it back together with these scratched torsion arms and a few kilo's of grease, then refuse to acknowledge I ever saw anything damaged there. :lol:
Hello VW bus buddy. I'm converting a '72 one.

Have you had a chance to test fit the Pimoroni HyperPixel 2.1" to the dashboard? It would look beautiful!

johu: removed outrageous quote, please quote precisely
Cera
Posts: 64
Joined: Thu Feb 10, 2022 10:08 am
Location: Finland
Has thanked: 20 times
Been thanked: 20 times

Re: [WIP] Voltswagen T2 -76

Post by Cera »

Long time no update so lets throw something here, work still in progress, still mostly just restoration phase first :)

I learned how to use lathe and made the tools necessary to remove the bushings and bearings from the front beam:

Image

Image

Image

Sandblasted the whole thing:

Image

Epoxy primer:

Image

Polyurethane top:

Image

"New" torsion arms from Deutschland! Nobody makes them new but sometimes refurbished are available still it seems :)

Image

New bushings & bearings:

Image

Again one custom tool from the -70's reincarnated for hammering them into place.

Image

Image

Disassembled the steering box, cleaned and sandblasted the parts:

Image

Image

Exploded the steering box for refurbish. Bearings are apparently also unobtainium, I took mine to a local bearing store and they checked them saying they're all still in perfect condition and recommended using the old ones. Sold me new seals and O-rings though :)

Image

That's basically where I'm at now. Front beam is waiting for a tiny parts kit for refurbishing the auxillary steering lever pin. Hopefully will receive them soon, then it's time to mount the beam back to the vehicle after some months :)

Also planning the brakes a bit. The original vacuum booster mounts to the front beam, mine is completely toast and I'd need to replace the whole master cylinder with booster. Looking for Bosch iBooster for electric brake booster now as it'll be much cheaper, much neater to replace the vacuum system entirely. :) Needs an adapter plate still, but the bolt holes seem very close to the original one.

Once the front beam goes back into vehicle, it's time for the rear and with that, also finally into the fun stuff and mounting the Leaf motor. :)
User avatar
motorcircus
Posts: 6
Joined: Mon Jan 10, 2022 9:55 am
Location: Finland
Been thanked: 2 times
Contact:

Re: [WIP] Voltswagen T2 -76

Post by motorcircus »

Incredible work, well done!
I used a Volvo V70 electric brake booster on my VW T2 EV-conversion. Works pretty good in creating the pressure. It is the one part in the bus that makes the most noise tho. Don't know how silent the others are. I could have done a better job soundproofing and installing dampers to the vacuum pump for sure.

I bought it from a scrapyard.

https://www.autopurkaamot.com/naytaosa. ... 2.4b+140hv

EDIT
I chose this model because it has dumb electronics, nothing to program. It had also the vacuum sensor which also was easy to hook up.
Just +12V and ground.

Another EDIT
Cost me 80€ for the vacuum pump + vacuum switch/sensor
Cera
Posts: 64
Joined: Thu Feb 10, 2022 10:08 am
Location: Finland
Has thanked: 20 times
Been thanked: 20 times

Re: [WIP] Voltswagen T2 -76

Post by Cera »

motorcircus wrote: Sat Aug 19, 2023 9:06 pm Incredible work, well done!
I used a Volvo V70 electric brake booster on my VW T2 EV-conversion. Works pretty good in creating the pressure. It is the one part in the bus that makes the most noise tho. Don't know how silent the others are. I could have done a better job soundproofing and installing dampers to the vacuum pump for sure.

EDIT
I chose this model because it has dumb electronics, nothing to program. It had also the vacuum sensor which also was easy to hook up.
Just +12V and ground.

Another EDIT
Cost me 80€ for the vacuum pump + vacuum switch/sensor
Yeah I considered that option too briefly, but the costs do ramp up significantly with replacing the og booster (200e) + master cylinder (150e?) then adding vacuum pumps, sensors, and aaaa no :D

Tesla (Bosch) iBooster replaces the whole vacuum system, as it's electronic assist it doesn't require any pumps etc. Also has failsafe mode dumb electronics where it works on full assist just by connecting 12V+ and no signal. (signal could be used for varying levels of assist based on speed, or auto brake I guess?)

250-ish eur for the whole, no loud pumps required :)

Would be a different story if I'd have usable vacuum boosters already, but mine has a hole in it due to rusting, so haha no.

Btw how's your Leaf gearbox holding up? :D have you changed the oils this summer? Any metal shavings in there?
User avatar
motorcircus
Posts: 6
Joined: Mon Jan 10, 2022 9:55 am
Location: Finland
Been thanked: 2 times
Contact:

Re: [WIP] Voltswagen T2 -76

Post by motorcircus »

Cera wrote: Sat Aug 19, 2023 9:35 pm Yeah I considered that option too briefly, but the costs do ramp up significantly with replacing the og booster (200e) + master cylinder (150e?) then adding vacuum pumps, sensors, and aaaa no :D

Tesla (Bosch) iBooster replaces the whole vacuum system, as it's electronic assist it doesn't require any pumps etc. Also has failsafe mode dumb electronics where it works on full assist just by connecting 12V+ and no signal. (signal could be used for varying levels of assist based on speed, or auto brake I guess?)

250-ish eur for the whole, no loud pumps required :)

Would be a different story if I'd have usable vacuum boosters already, but mine has a hole in it due to rusting, so haha no.

Btw how's your Leaf gearbox holding up? :D have you changed the oils this summer? Any metal shavings in there?
Yeah, makes sense!

One year and some 10 000 km after the ev conversion and everything is still working smoothly. Haven't even thought about changing the transmission oil but now you got me thinking. Maybe I will do it when the winter comes and let you know if there's anything.
Cera
Posts: 64
Joined: Thu Feb 10, 2022 10:08 am
Location: Finland
Has thanked: 20 times
Been thanked: 20 times

Re: [WIP] Voltswagen T2 -76

Post by Cera »

Yeah than sounds like running it in reverse is working fine. :)

I might follow your example and just toss mine in without any external oil pump at least in the beginning.

EDIT: hmm I clicked something and now my post title reads [FINISHED] which was not intentional. :D I can't find any button to remove that
henkiloasiakas
Posts: 1
Joined: Thu Aug 31, 2023 4:56 am
Been thanked: 1 time

Re: [WIP] Voltswagen T2 -76

Post by henkiloasiakas »

Greetings from Finland, I'll follow the thread. I've got this kind of plans with my VW T3 TD bus also. Now just searching every useful information about conversion until I'll start to order stuff.
Cera
Posts: 64
Joined: Thu Feb 10, 2022 10:08 am
Location: Finland
Has thanked: 20 times
Been thanked: 20 times

Re: [WIP] Voltswagen T2 -76

Post by Cera »

Another update on resto-build. :D this is still more "general VW building stuff" than interesting conversion stuff. But anyway.

While still at the front axle, did the auxiliary steering box refurbish. This steering lever connects the tie rods with the steering box. Febi reburbish kit, still had the centre pin stamped "Made in W.Germany". Good old stock. :D

Image

Image

Spring plates back into the tubes. Torsion arms connected. Then with mostly everything in place. Mounted the front axle with a help of motorcycle jack and had a friend to assist wiggling it into its place. This went pretty smoothly.

Image

Koni shocks, heavy duty sway bar, spindles, new wheel bearings, lots of rust removal and powder coating, and front end is done.

Image

Image

Image

8-) Happy with the results.

Then it was time to pull the other side of the vehicle apart. The darn wheel hub nuts put up a pretty decent fight. To make it worse, the vehicle of course has no brakes as it currently is. So the wheels were just spinning while trying to loosen this. Gah!

Image

Ended up renting a 1700Nm Makita cordless impact wrench for a day. It did the job in less than 5 seconds per wheel. :D

Image

What I lack in strength I make up for in stubborness and with scary machines. 8-)

After those it was pretty easy to explode the whole rear suspension. Everything's in decent shape except the brakes and the bearings etc.

Image

Clean.. sandblast.. powder coat.. I'm getting used to this theme!

Image

Image

Image

Image

Got the rear suspension parts pretty much done currently. Just trying to find a time to install them back onto the chassis. :)

Also since the electric motor - unlike the petrol engine - doesn't suck, I bought a Tesla M3 brake booster to replace the vacuum powered one. This for me was a much cheaper solution as I was going to redo the booster and the master cylinder anyway, so pricewise adding a external vacuum pump on top of those wouldn't have made any sense.

Image

It does have a bolt pattern very similar to the VW one. Just a few mm's narrower on horizontal so I'm getting away with just widening the mounting bolt holes a bit in that direction.

Image

The more annoying issue is that since it sits in an angle on the M3's firewall, the reservoir is tilted also.

Image

I've considered making a custom reservoir out of aluminium but then I found out that same master cylinder is also used in hybrid 18->21 Honda Accord, 19-> Honda Acura, etc. and those cars have a much better looking reservoir system which resembles how VW did theirs on this vehicle (dual reservoir, with the main one inside the cabin so you don't have to crawl under the vehicle to check the fluid level).

Sadly, however, those vehicles were only sold in the US market and never in the EU as far as I can find, so I doubt I'd be able to scavenge this reservoir system from local junk yards.

Image

EV Create sells this reservoir setup for 80-ish Eur (VAT inc.)+shipping which is a viable option, just an expensive one. I am considering buying this from them but it's a steep price for a plastic box and some hose. https://www.evcreate.com/shop/brakes-wh ... -ibooster/

Anyone in the US fancying tracking down this reservoir system from Honda brake booster let me know. :D :lol:

Next steps:

- Refit the rear suspension, also need to check the adjustment on the torsion bars/spring plates.
- Rear brakes. I have all the parts laying around for Vanagon (T3) rear brakes. Those turned out to be bolt-on swap and much cheaper and easier to find than the T2 ones.
- Brake lines. I ordered a kit of pre-cut CuNi lines and steel braided brake hoses, so I should have everything ready for running the entirety of the brake lines finally. Trying to mount the booster and figure out the reservoir situation while at this, so I could have functioning brakes very soon.

As we say here in the North. "Slowly, like a granny in the snow." 8-)
User avatar
Romale
Posts: 448
Joined: Fri May 20, 2022 4:16 pm
Location: Romania
Has thanked: 208 times
Been thanked: 45 times

Re: [WIP] Voltswagen T2 -76

Post by Romale »

Cera wrote: Tue Oct 24, 2023 10:40 am


EV Create sells this reservoir setup for 80-ish Eur (VAT inc.)+shipping which is a viable option, just an expensive one. I am considering buying this from them but it's a steep price for a plastic box and some hose. https://www.evcreate.com/shop/brakes-wh ... -ibooster/

Anyone in the US fancying tracking down this reservoir system from Honda brake booster let me know. :D :lol:
look for an option from very old fiat or look for lada stores (vaz from Russia) . they have external brake tanks small for the hose and cost 1€
Screenshot_2023-10-24-15-47-30-02_40deb401b9ffe8e1df2f1cc5ba480b12.jpg
evil neodymium :twisted:
Cera
Posts: 64
Joined: Thu Feb 10, 2022 10:08 am
Location: Finland
Has thanked: 20 times
Been thanked: 20 times

Re: [WIP] Voltswagen T2 -76

Post by Cera »

Romale wrote: Tue Oct 24, 2023 12:47 pm look for an option from very old fiat or look for lada stores (vaz from Russia) . they have external brake tanks small for the hose and cost 1€
Yeah that's one option for sure.

Still would need something on top of the master cylinder though, and that's the trickier part than the remote reservoir. :? For the remote reservoir I'd like to use the VW original, since it has the original mounting screw holes in right places and does feature a hose outlet in the bottom.

I mean I now know how to lathe so making some aluminium plugs and drilling and tapping threads on those for the remote reservoir is an option I'm considering. That way it'd not matter what the remote reservoir is, as long as it'd have a connection for a hose.

But for safety I'd like to have some small reservoir directly connected to the master cylinder, then run the hose to that. That way if the hose is damaged and the fluid runs out from the main reservoir, there's at least some still sitting on top of the master cylinder.
alexbeatle
Posts: 155
Joined: Sun Jan 03, 2021 6:12 am
Has thanked: 46 times
Been thanked: 15 times

Re: Voltswagen T2 -76

Post by alexbeatle »

Cera wrote: Tue Oct 24, 2023 10:40 am
It does have a bolt pattern very similar to the VW one. Just a few mm's narrower on horizontal so I'm getting away with just widening the mounting bolt holes a bit in that direction.

Image
Just FYI.
I had to shift the mounting plate from the original brake booster ever so slightly. Cut the original welds, shift the plate, weld back. Reused the plate for the ibooster.
Otherwise the ibooster was interfering with the other parts.

Cera
Posts: 64
Joined: Thu Feb 10, 2022 10:08 am
Location: Finland
Has thanked: 20 times
Been thanked: 20 times

Re: [WIP] Voltswagen T2 -76

Post by Cera »

alexbeatle wrote: Thu Jan 11, 2024 4:33 pm Just FYI.
I had to shift the mounting plate from the original brake booster ever so slightly. Cut the original welds, shift the plate, weld back. Reused the plate for the ibooster.
Otherwise the ibooster was interfering with the other parts.
Good to know! Thanks!

I'm in the middle of painting the bus still :D but will look at this issue soon after.
Cera
Posts: 64
Joined: Thu Feb 10, 2022 10:08 am
Location: Finland
Has thanked: 20 times
Been thanked: 20 times

Re: [WIP] Voltswagen T2 -76

Post by Cera »

Image

Well. If you'd have told me a few years ago that I'd be painting a whole car on my own... :D

Image

Turned out better than I ever expected. VW original L90D "Pastellweiss" on top of custom shade of pastel violet. Not a perfect showroom surface, but hey it's the first (and hopefully last) car I've ever painted so what can one expect. :D

Scrubbing and oiling the old locks and hinges. Rusted ones I sandblasted and powder coated.

Image

Putting it together, so that I can reclaim the garage floor space all the detached doors and hatches are taking.

Image

Next up, CV shafts (I already have the adapter stubs from bratitude), Leaf gearbox, motor mounts, the fun stuff!

Also in search for the IVT shunt thingy for the Zombieverter purposes. If you have one laying around, let me know. :)
Jacobsmess
Posts: 473
Joined: Thu Mar 02, 2023 1:30 pm
Has thanked: 243 times
Been thanked: 59 times

Re: [WIP] Voltswagen T2 -76

Post by Jacobsmess »

Are you in the UK? I've a spare ISA Shunt for sale if interested
Cera
Posts: 64
Joined: Thu Feb 10, 2022 10:08 am
Location: Finland
Has thanked: 20 times
Been thanked: 20 times

Re: [WIP] Voltswagen T2 -76

Post by Cera »

Time for some updates again :) it's going to be a long and picture heavy one. :D

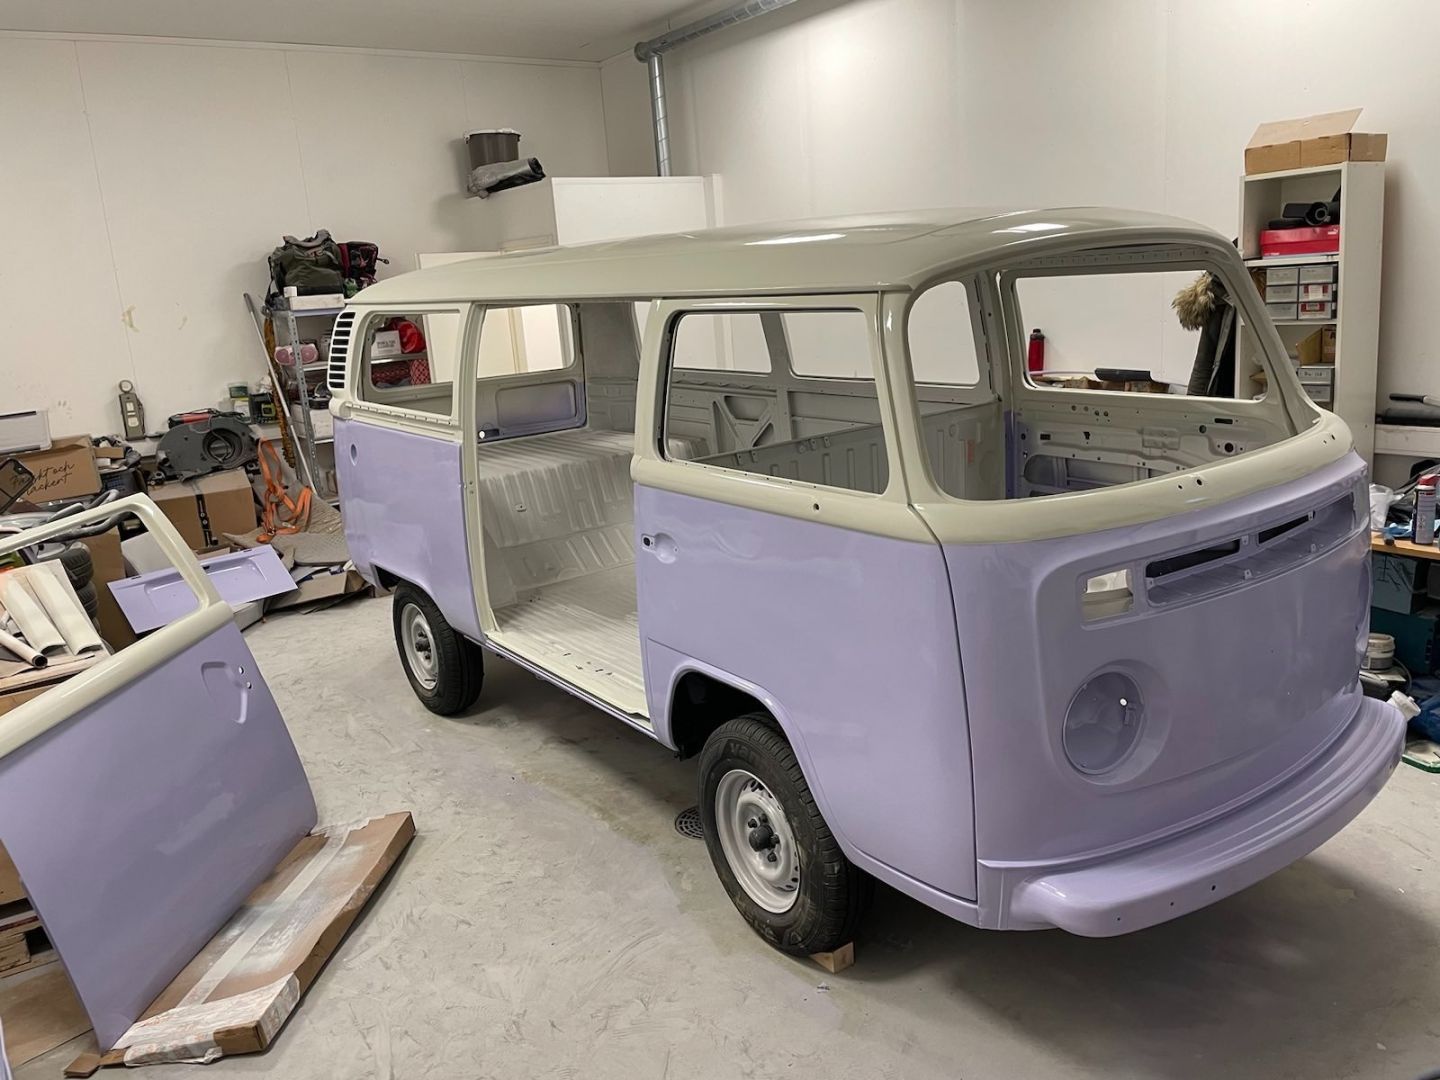
Normal restoration stuff is still taking most of the time, but now I have windshield, doors, dash, seats and all the car stuff mostly in place. 😄 Now it looks like a proper car!

Image

AC is working. There was some of the plastic hinges missing so I designed and made my own, files: https://www.thingiverse.com/thing:6563627

https://pixelfed.fi/storage/m/_v2/53013 ... yMZtj7.mp4

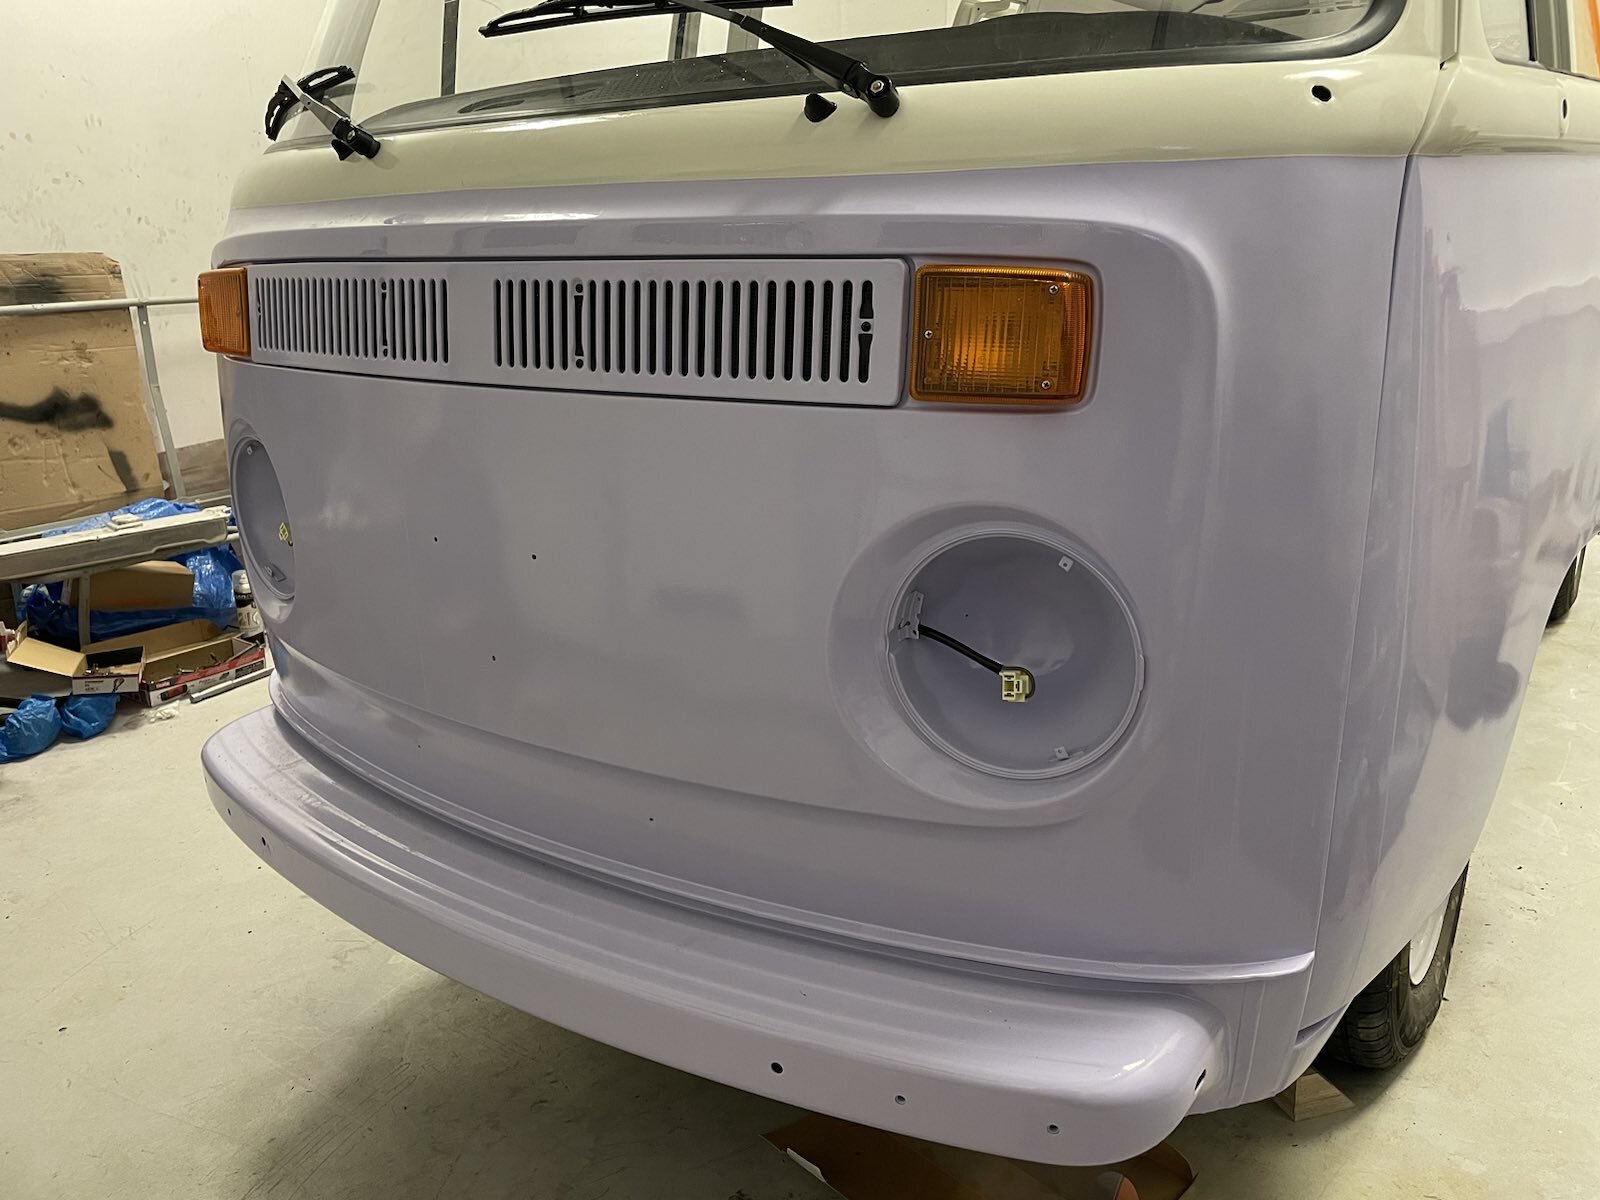
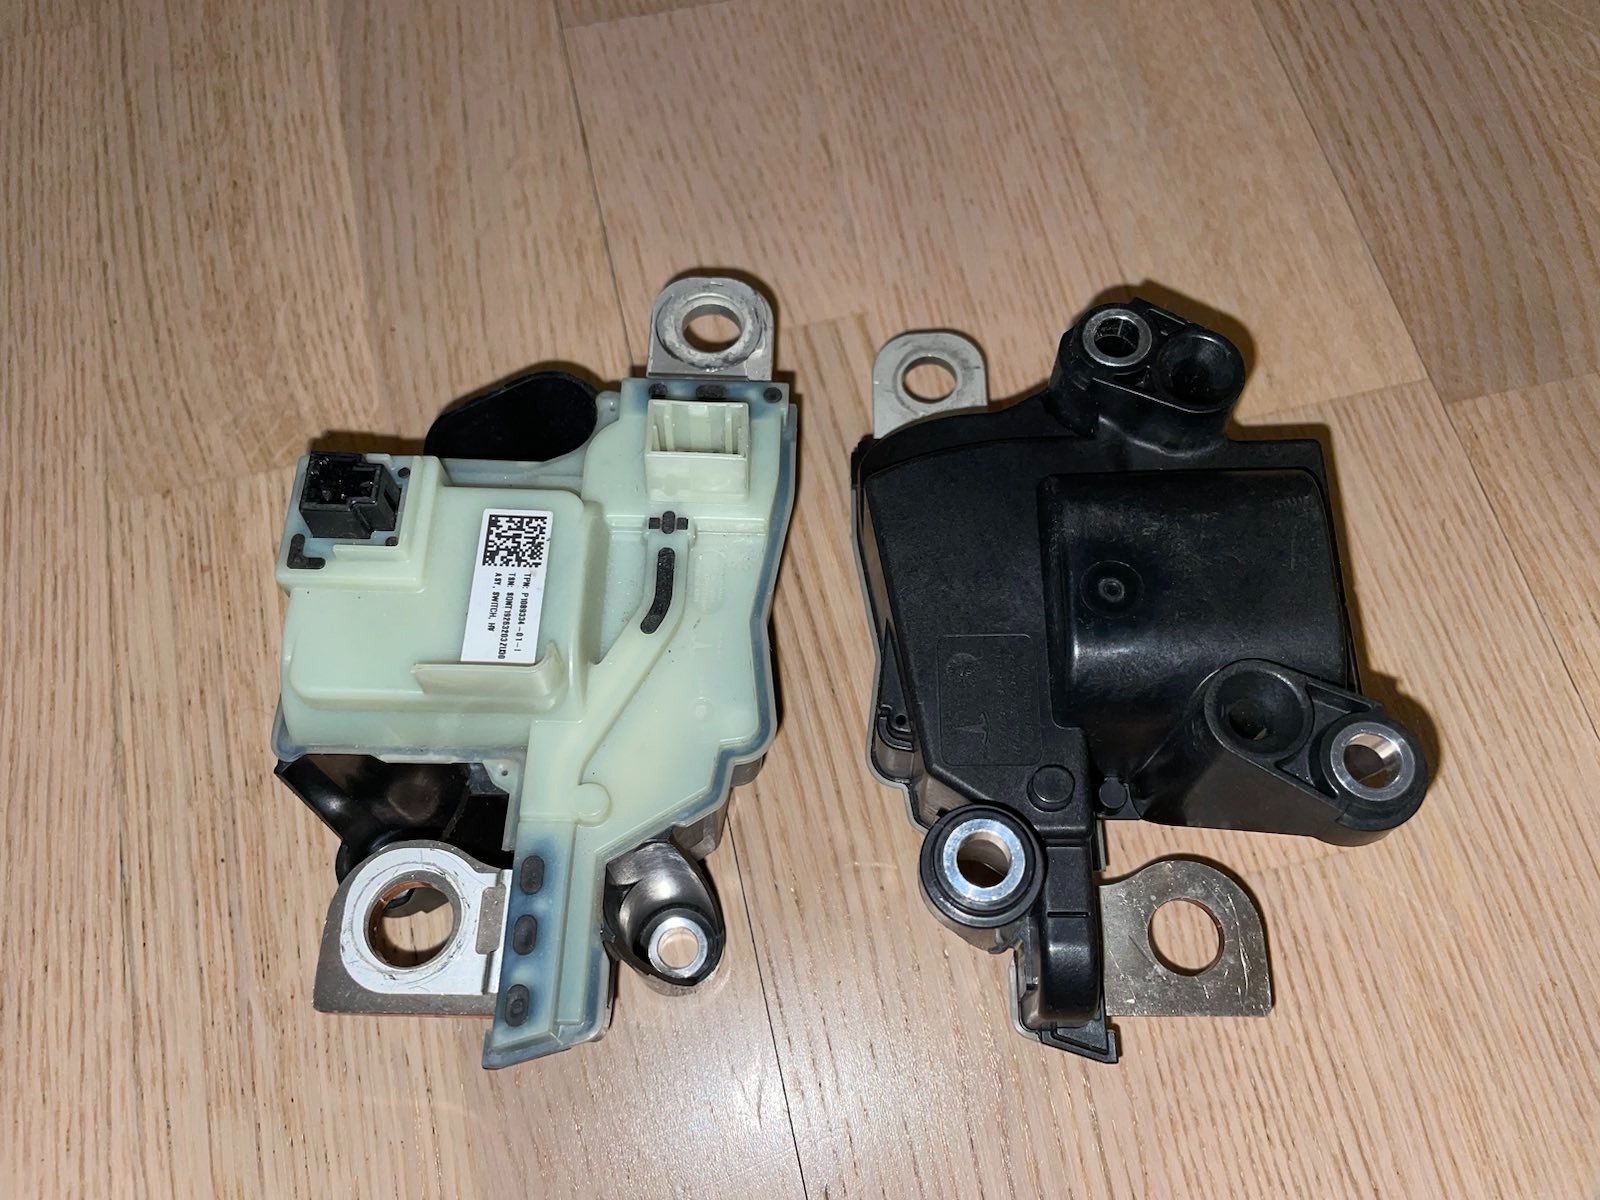
Also the original design for the windshield washer fluid uses pressure from the spare tire to move the fluid from the reservoir to the washer stalk, which acts as a valve, so when you pull the stalk spare tire pressure pushes the fluid through and onto the washer jets. I'm not too keen on the idea of having fluid where my ignition switch wiring is going to be (and 10cm from my fuse box) nor do I want to play around with the spare tire for pressure.

Image

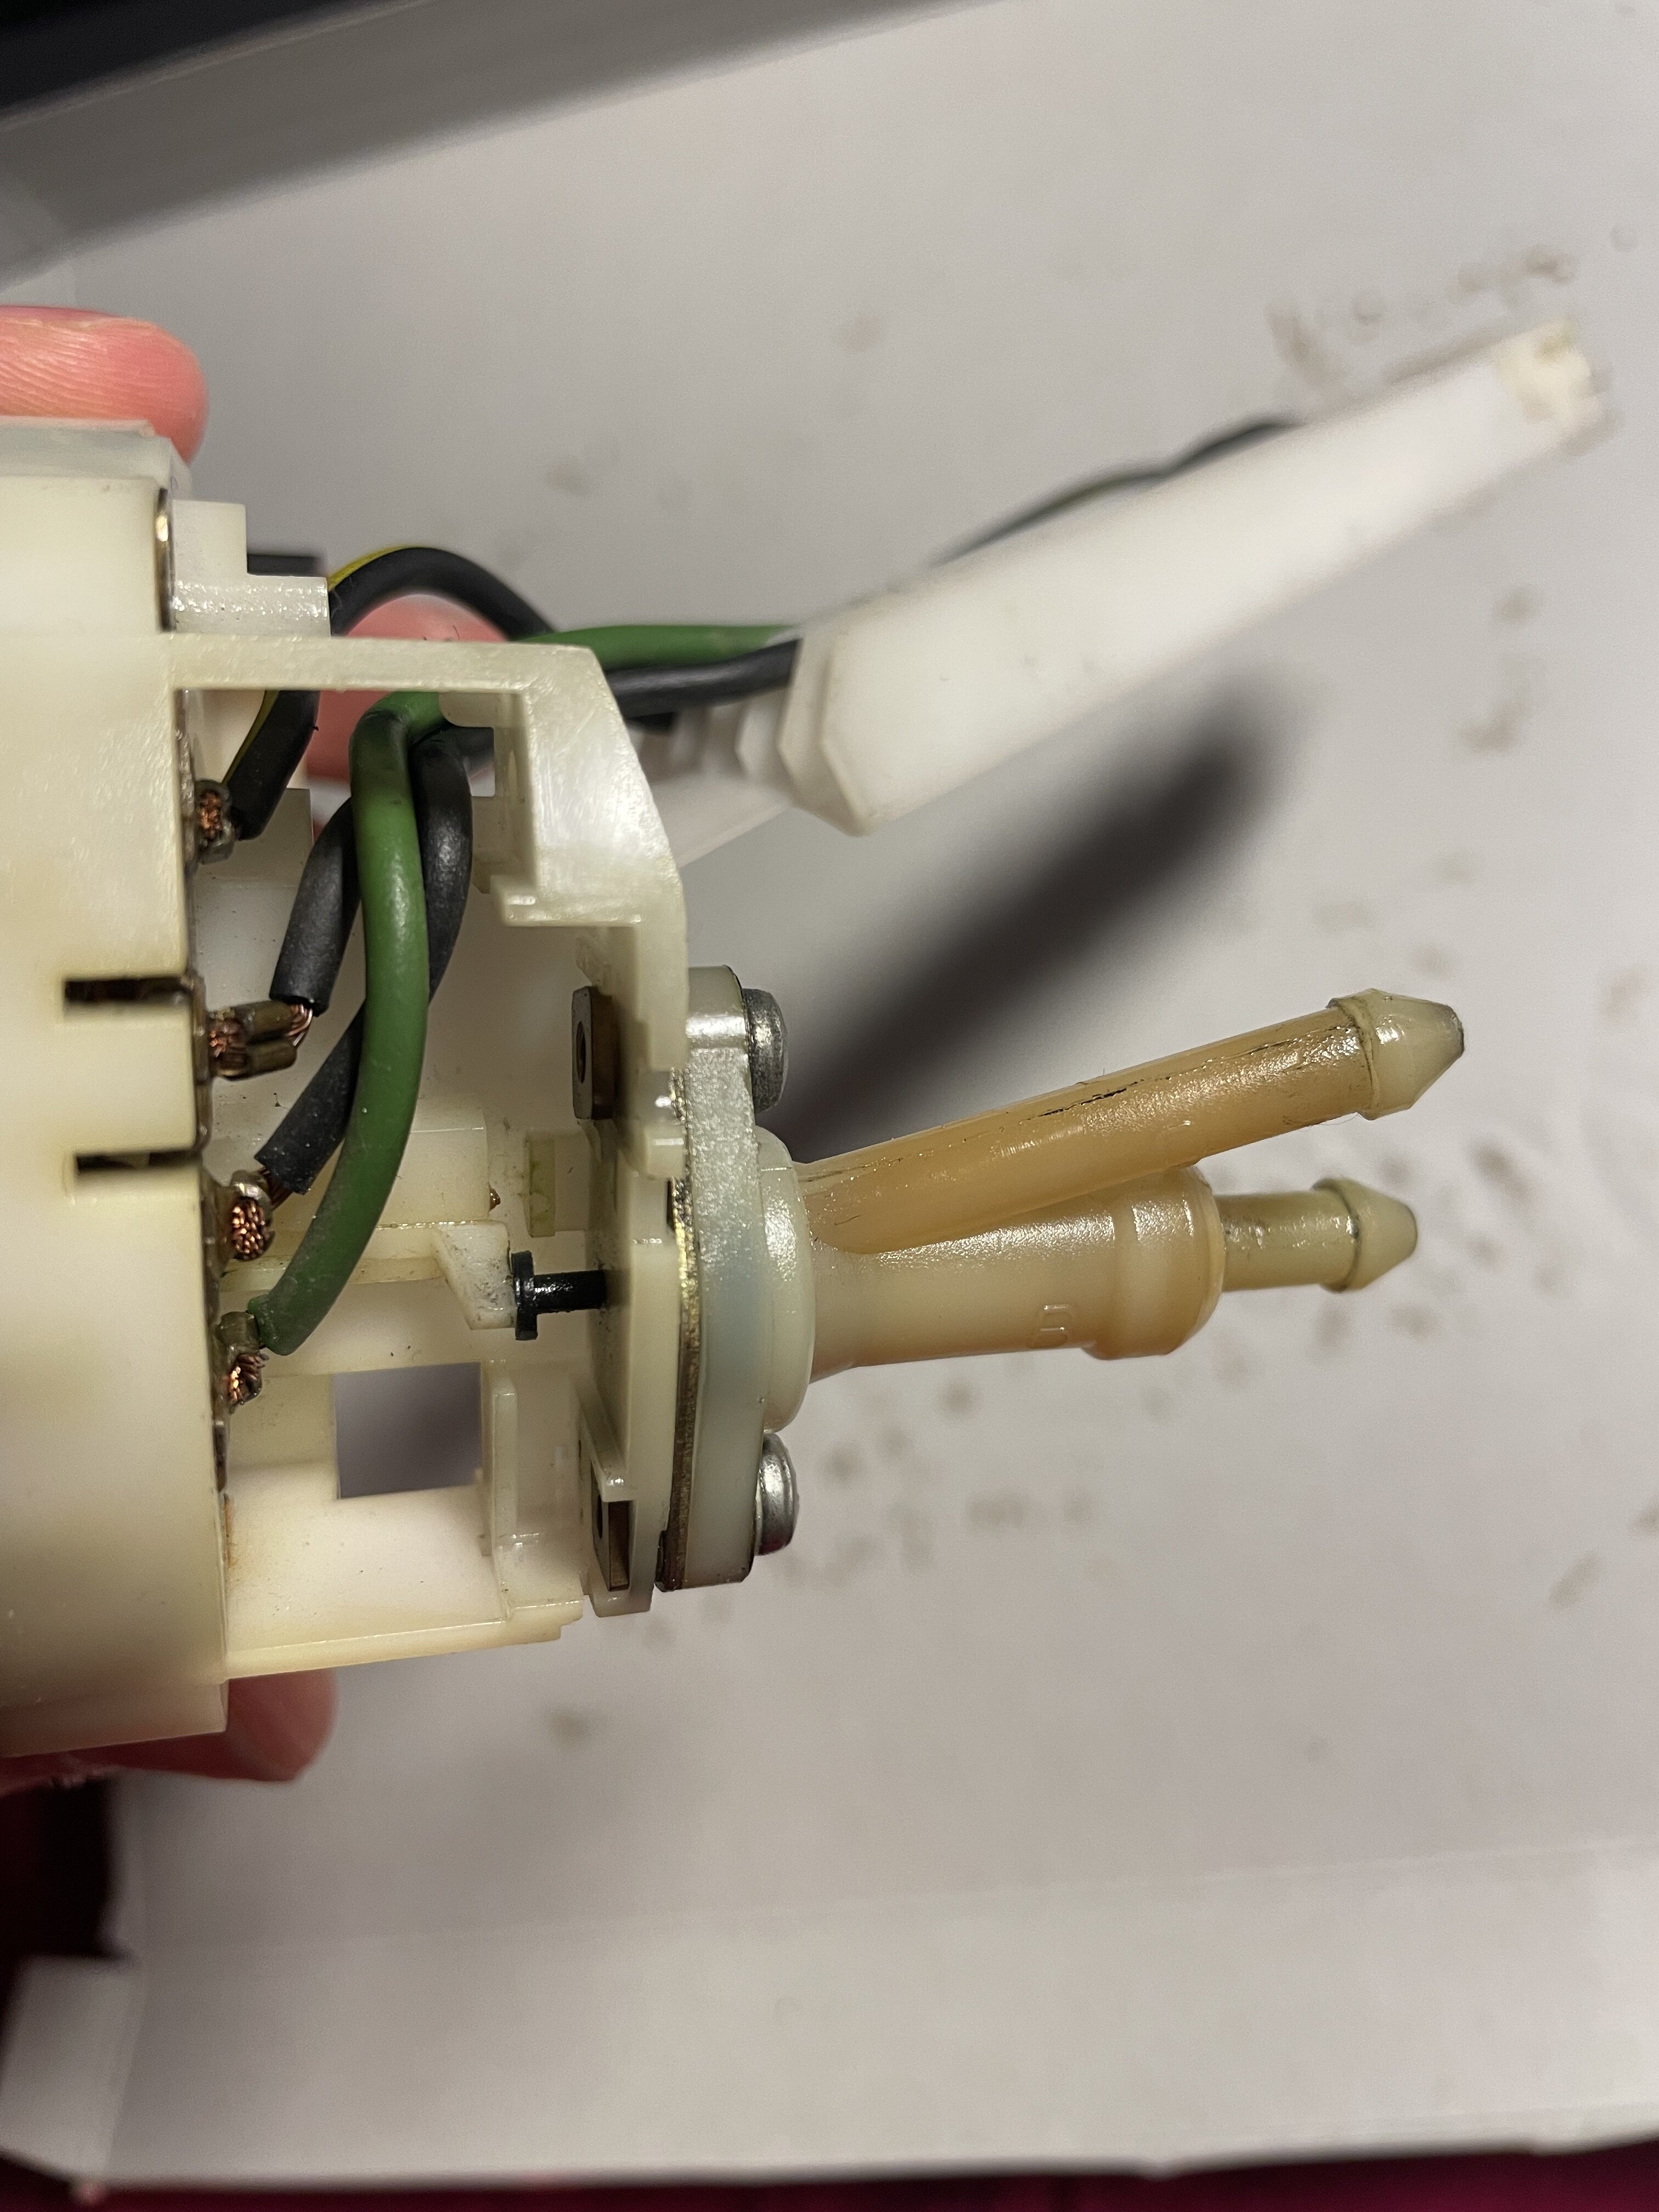
So I removed the valve, kept the black small piece in the middle which the stalk presses onto when pulled, and designed a bracket to accept a microswitch in its place. Files: https://www.thingiverse.com/thing:6561358

Image

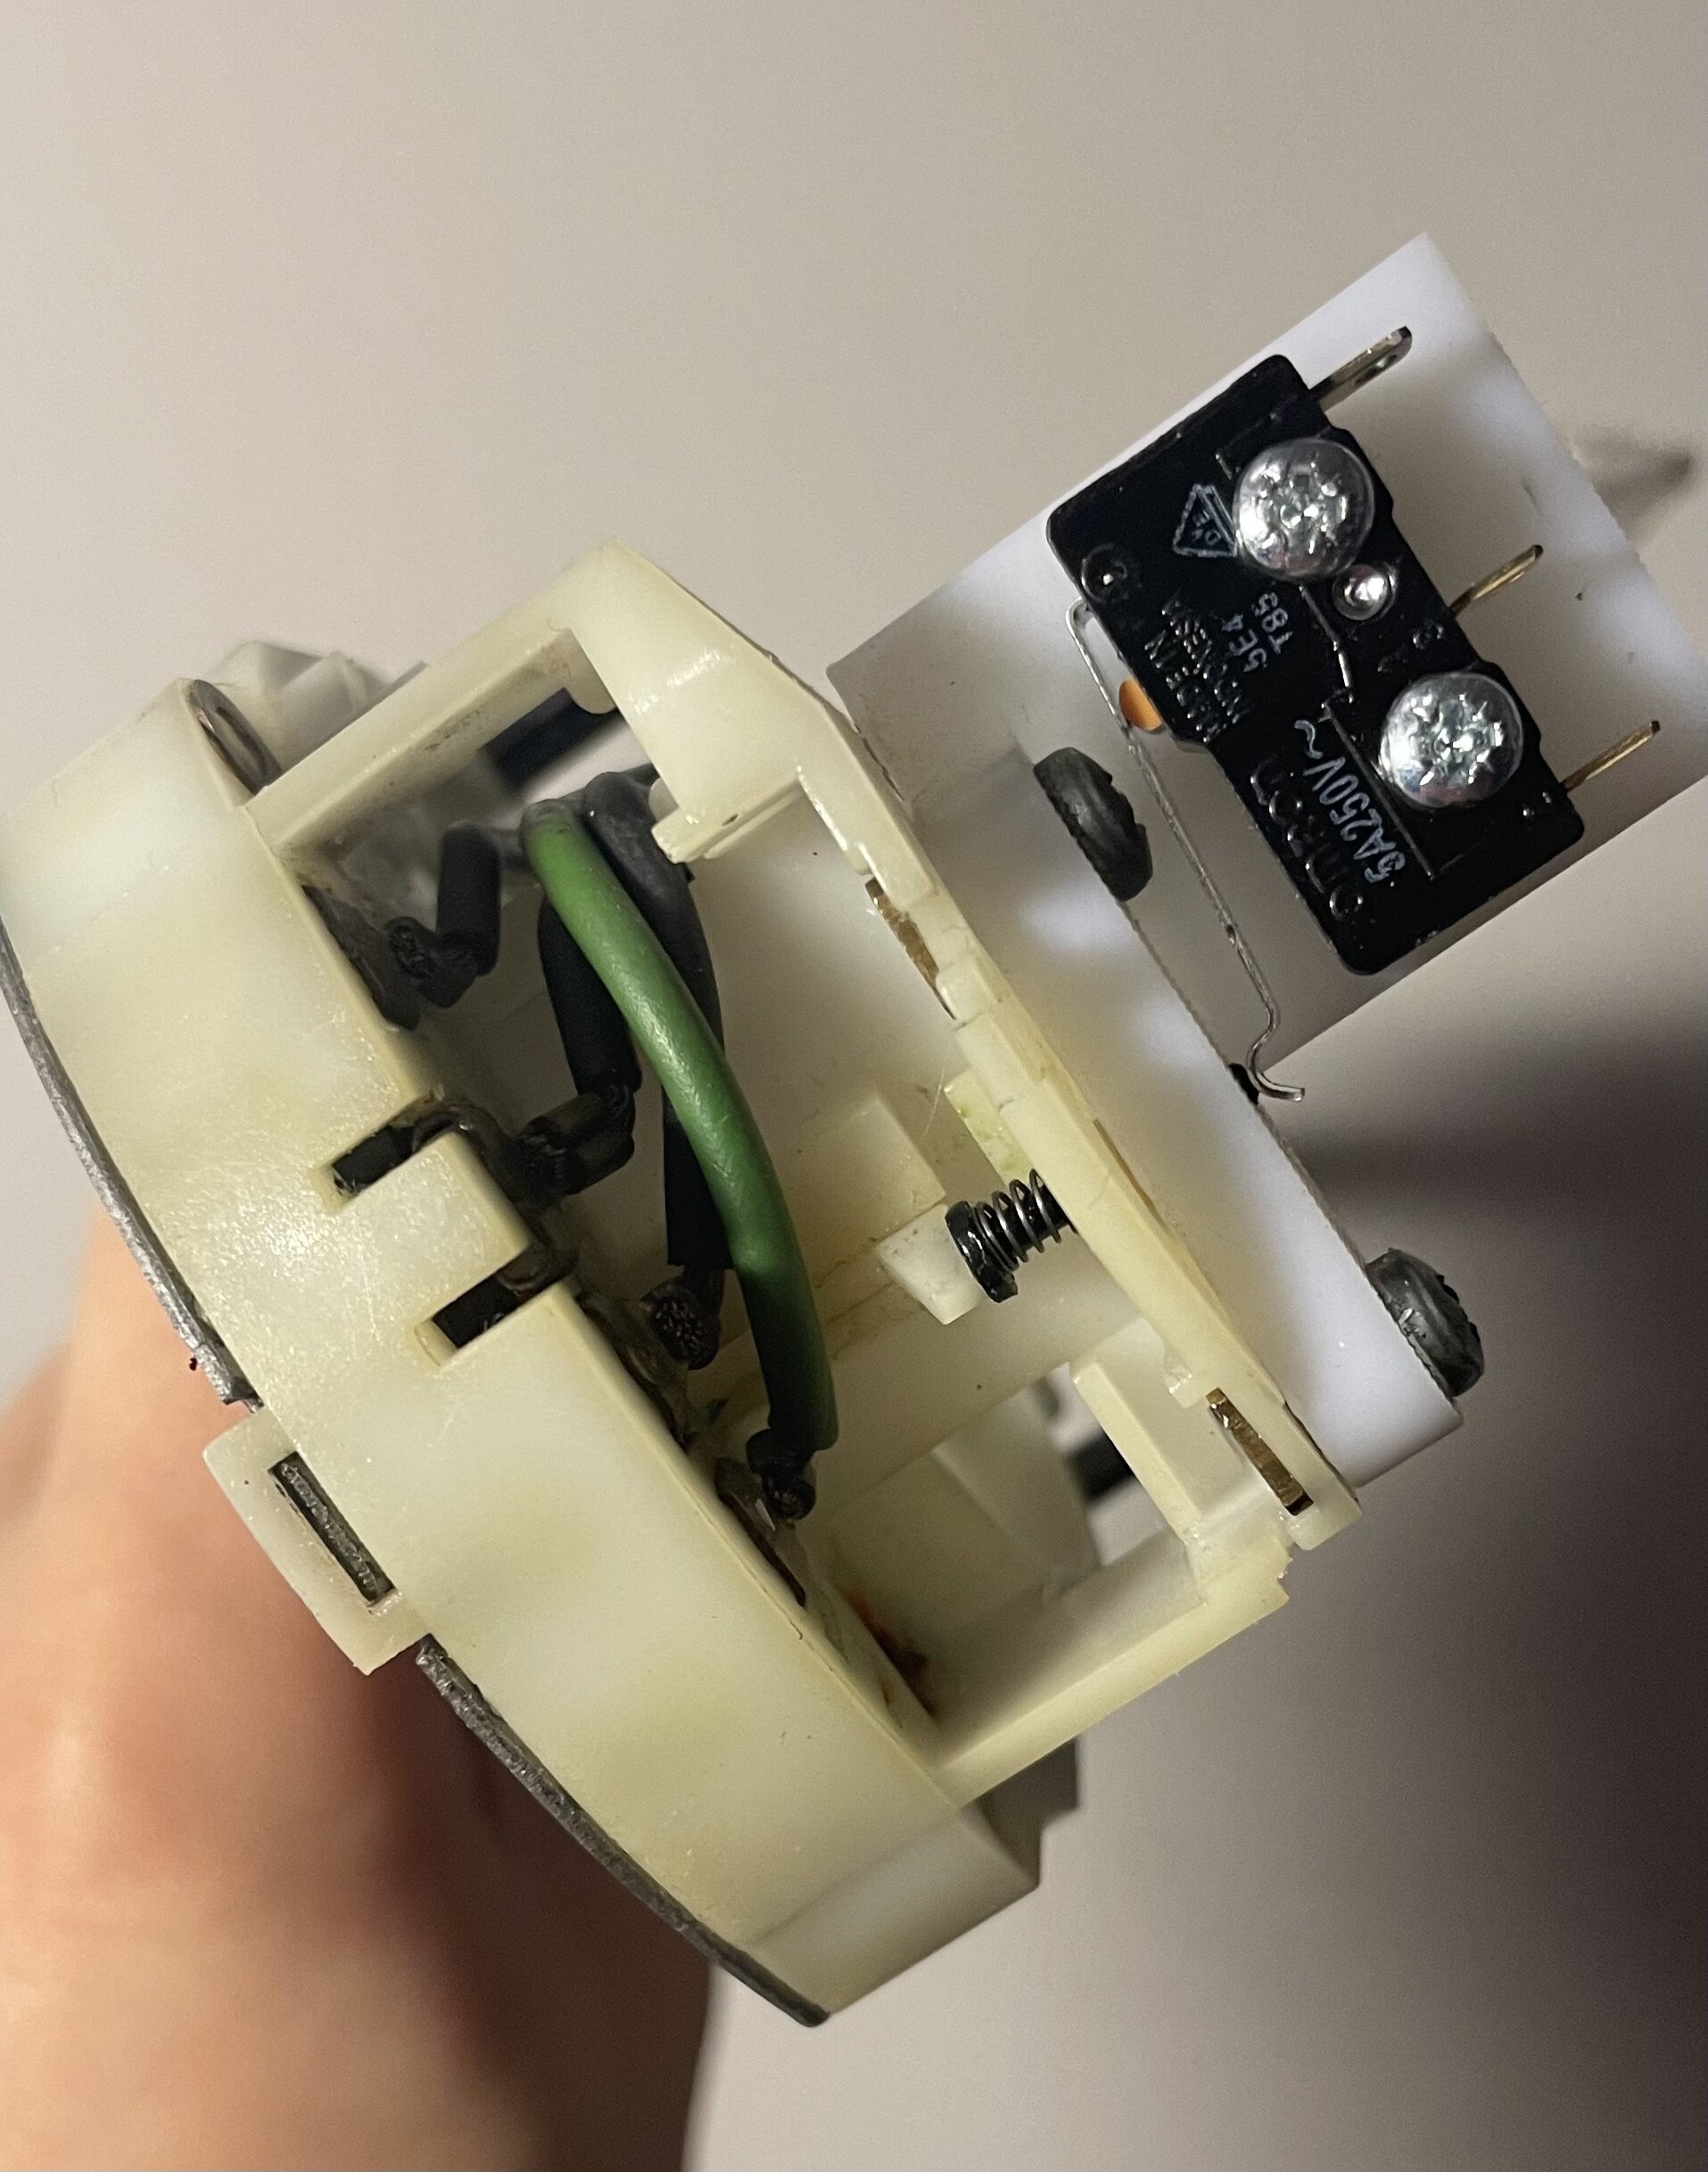
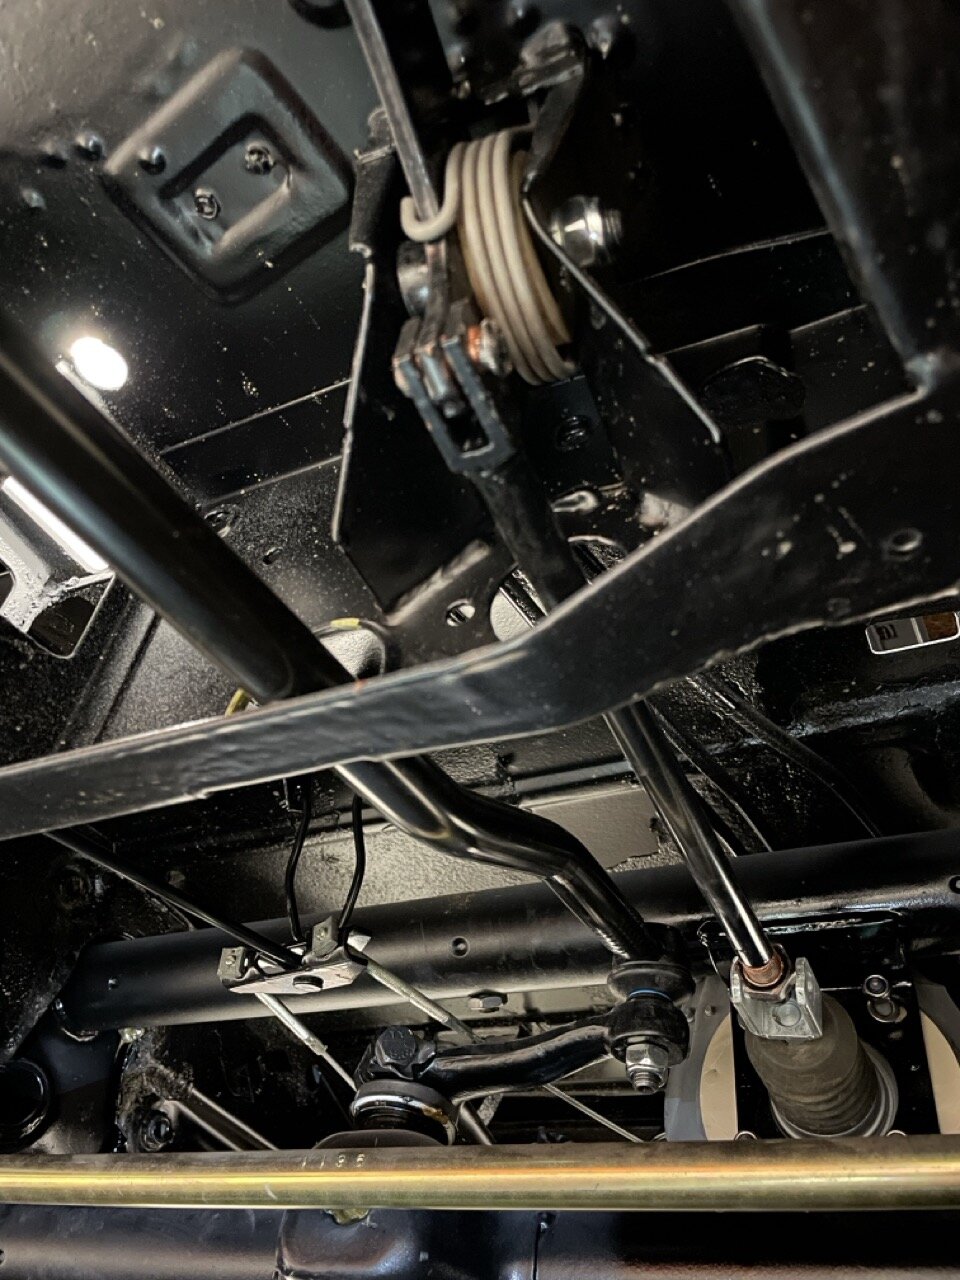
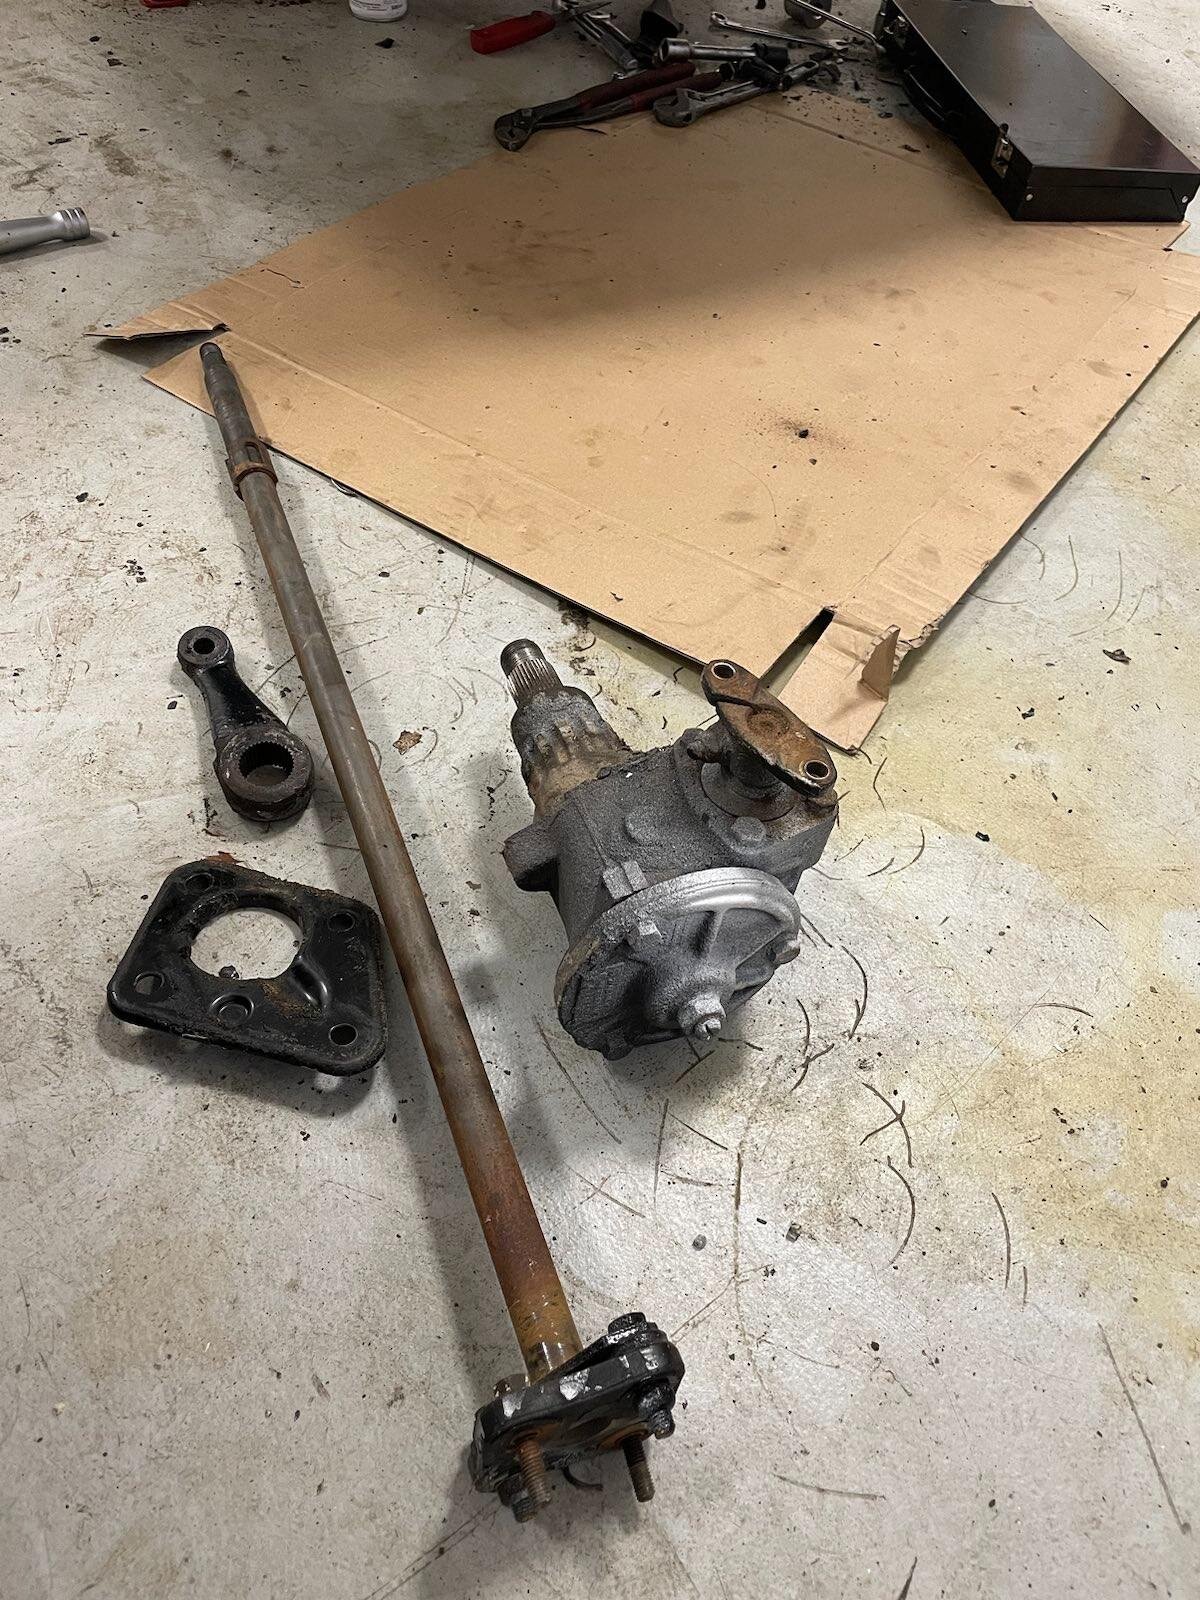
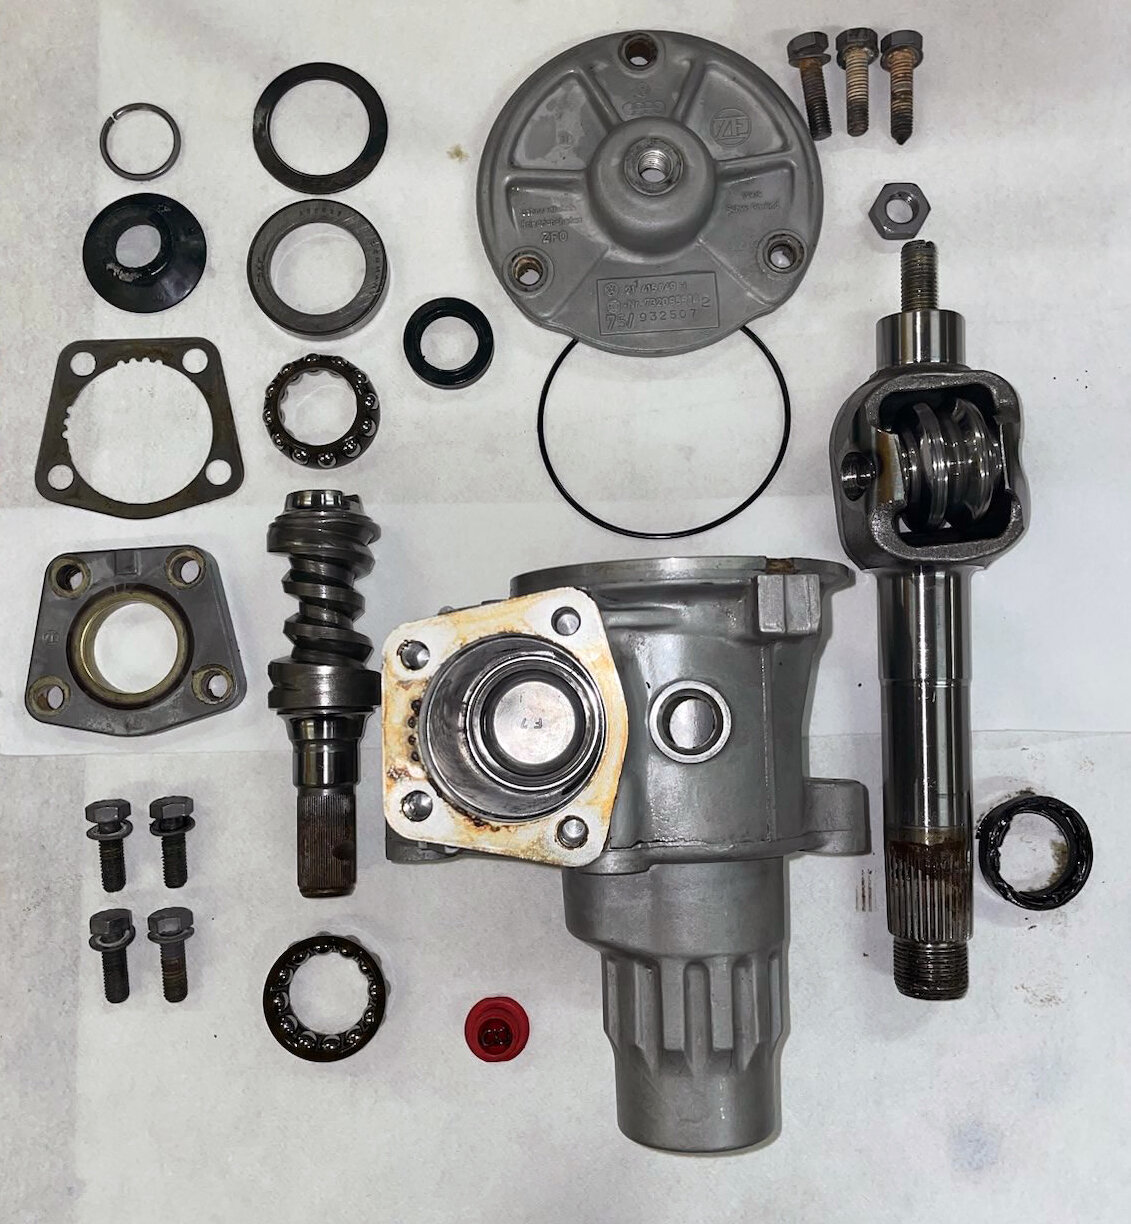
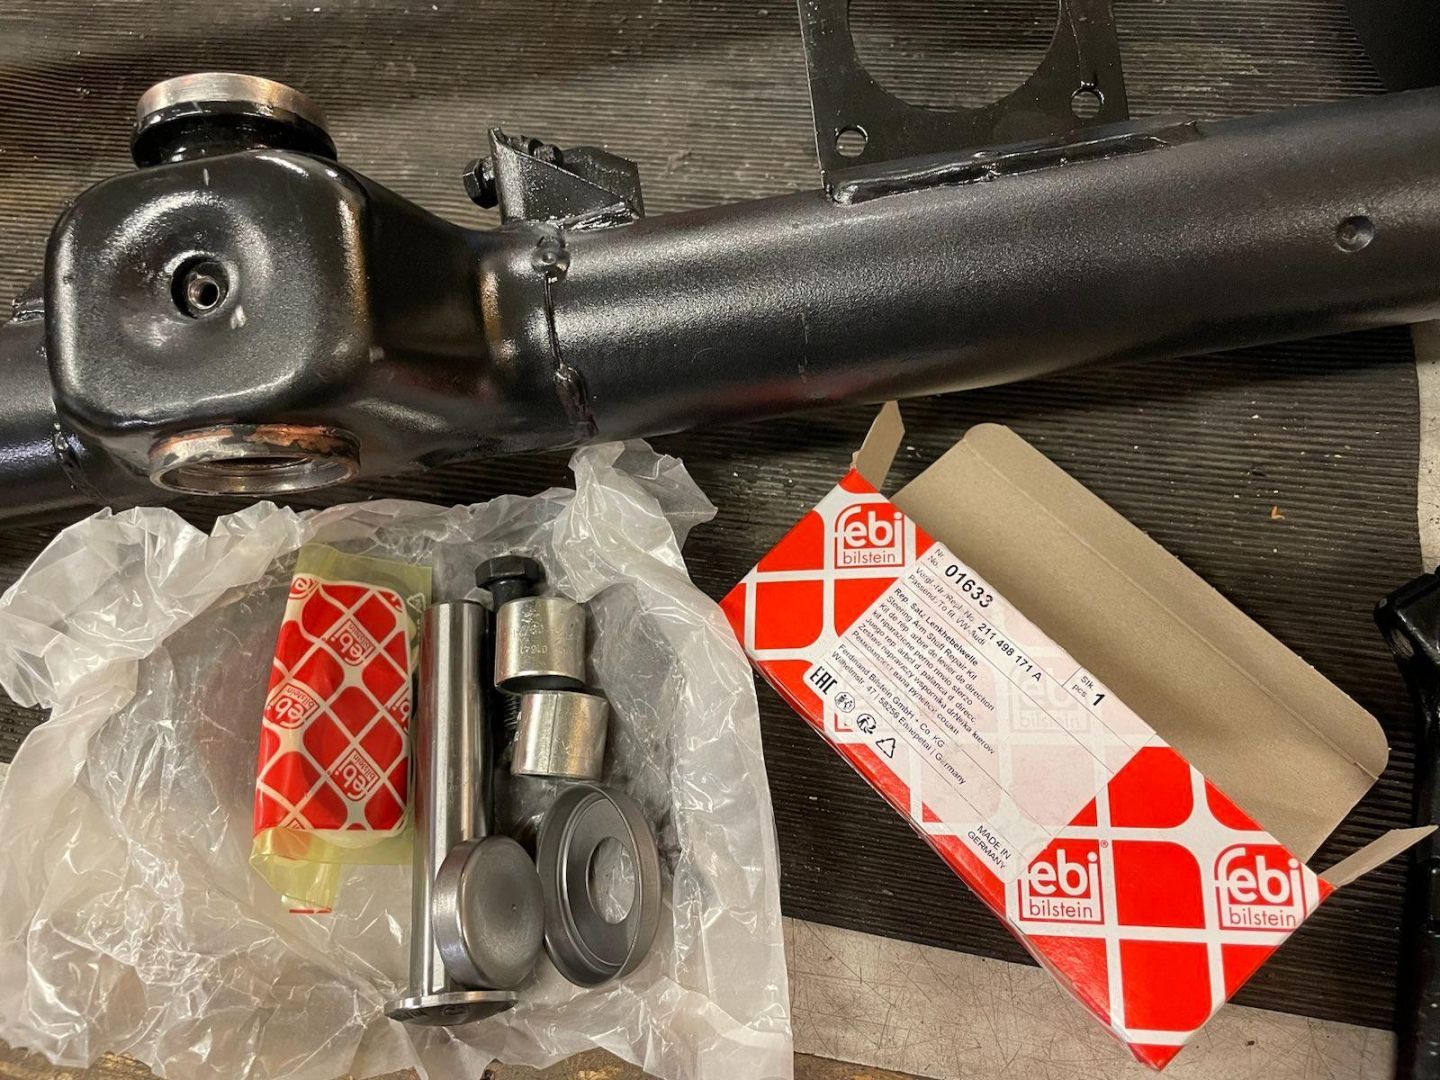
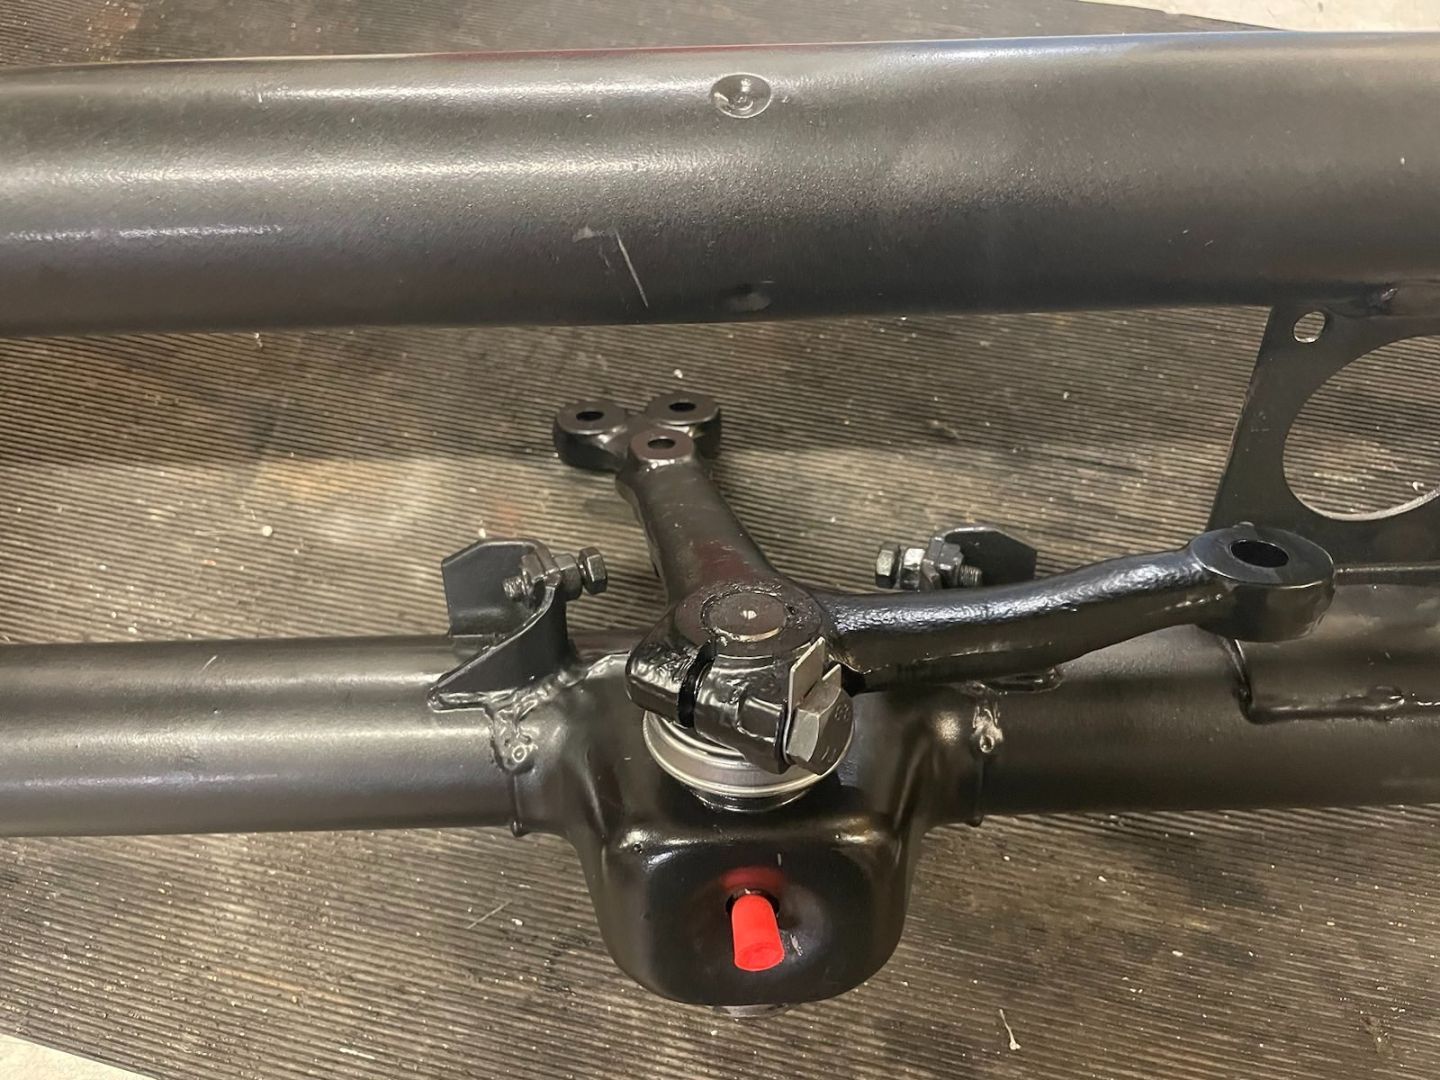
Put the steering box back together, designed a new dust shield to replace the cracked old one, printed out of flexible FPU. Files: https://www.thingiverse.com/thing:6568166

Image

Steering works :)

https://ceravyn.net/up/VW/IMG_4220.mp4

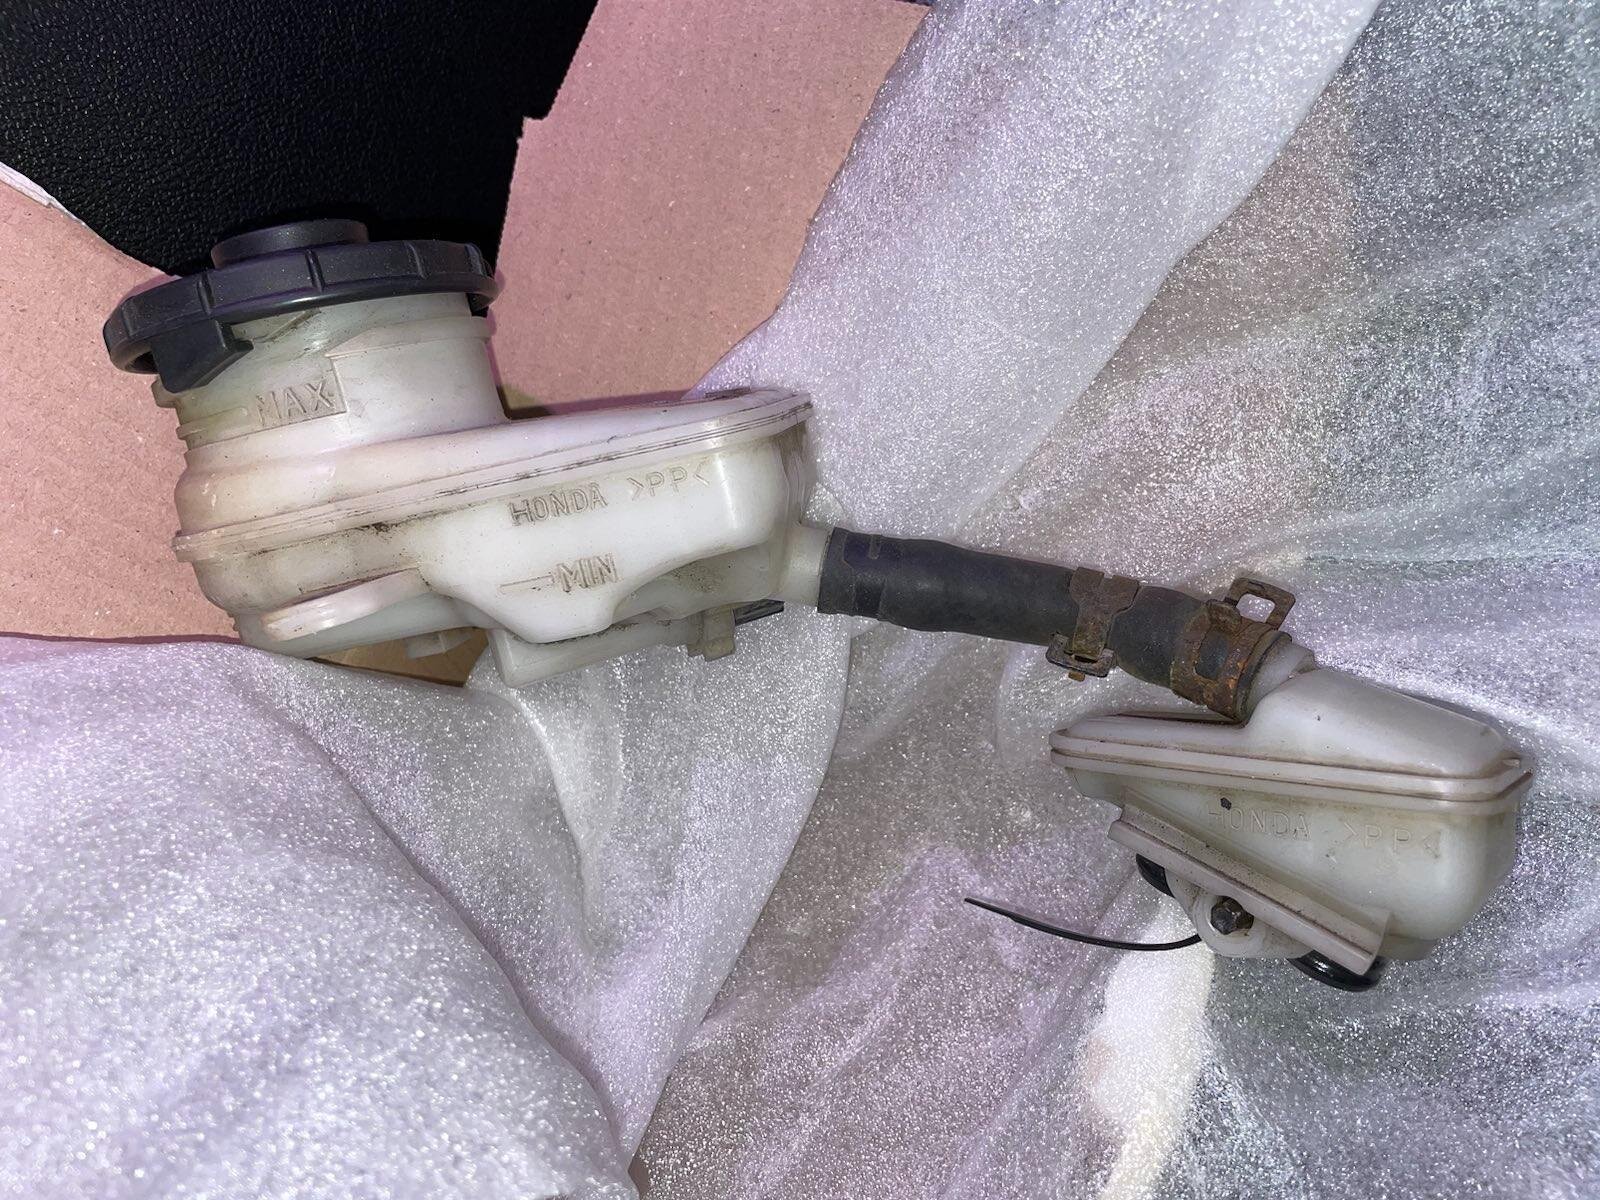
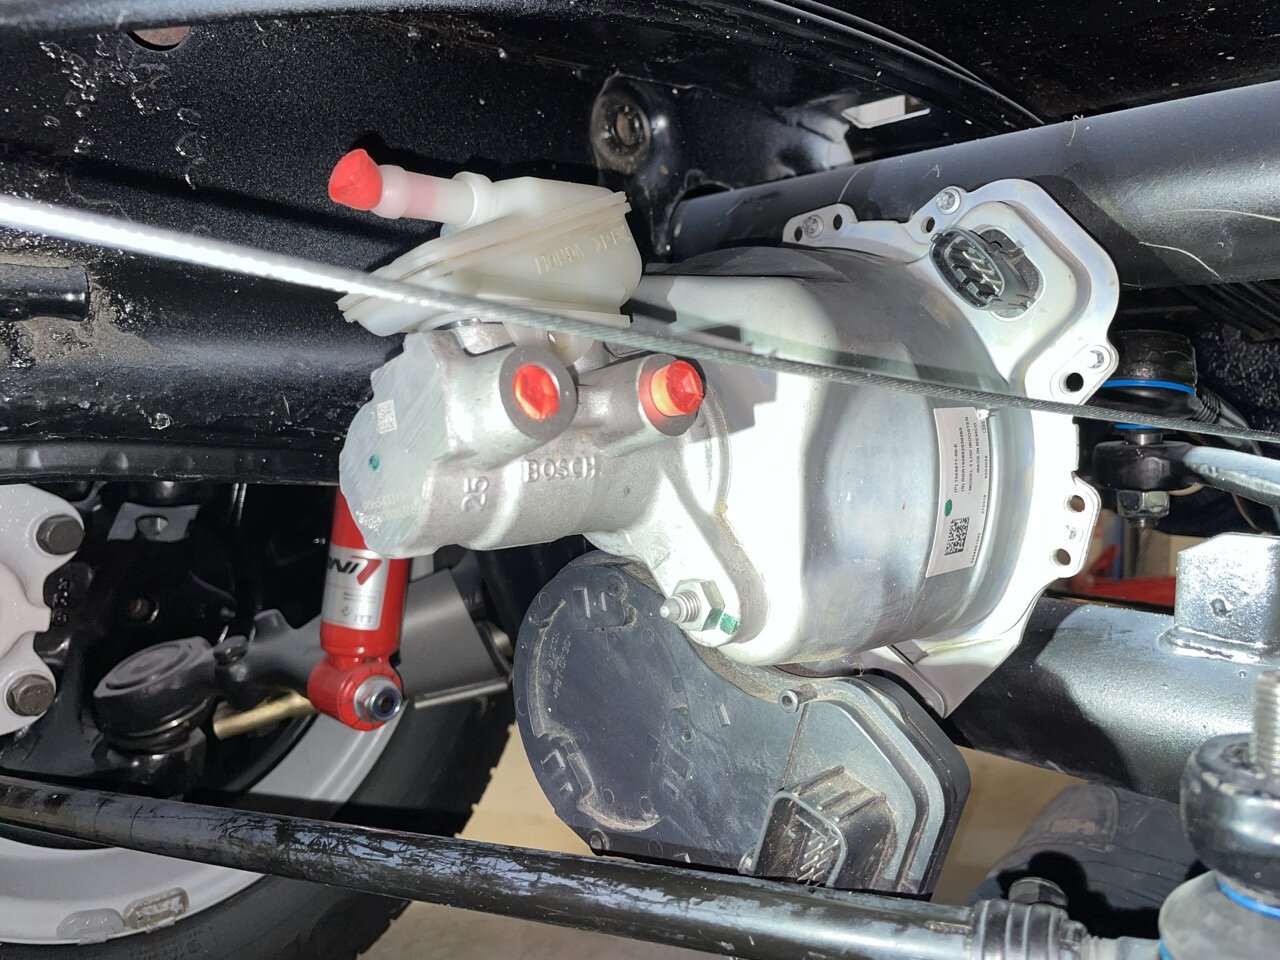
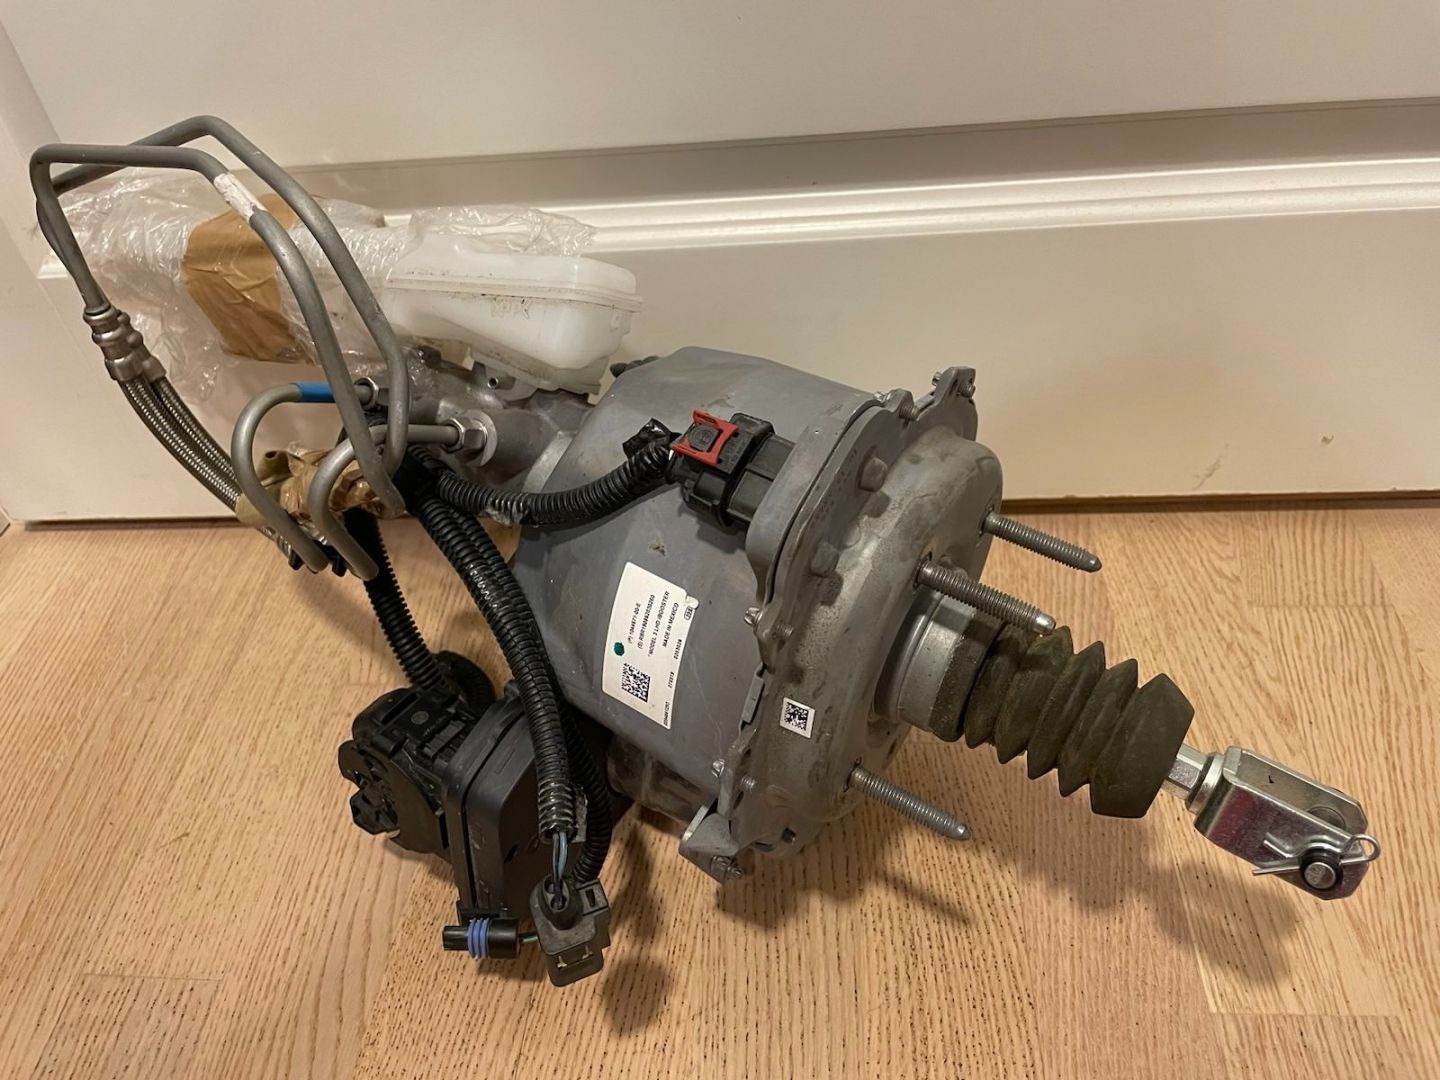
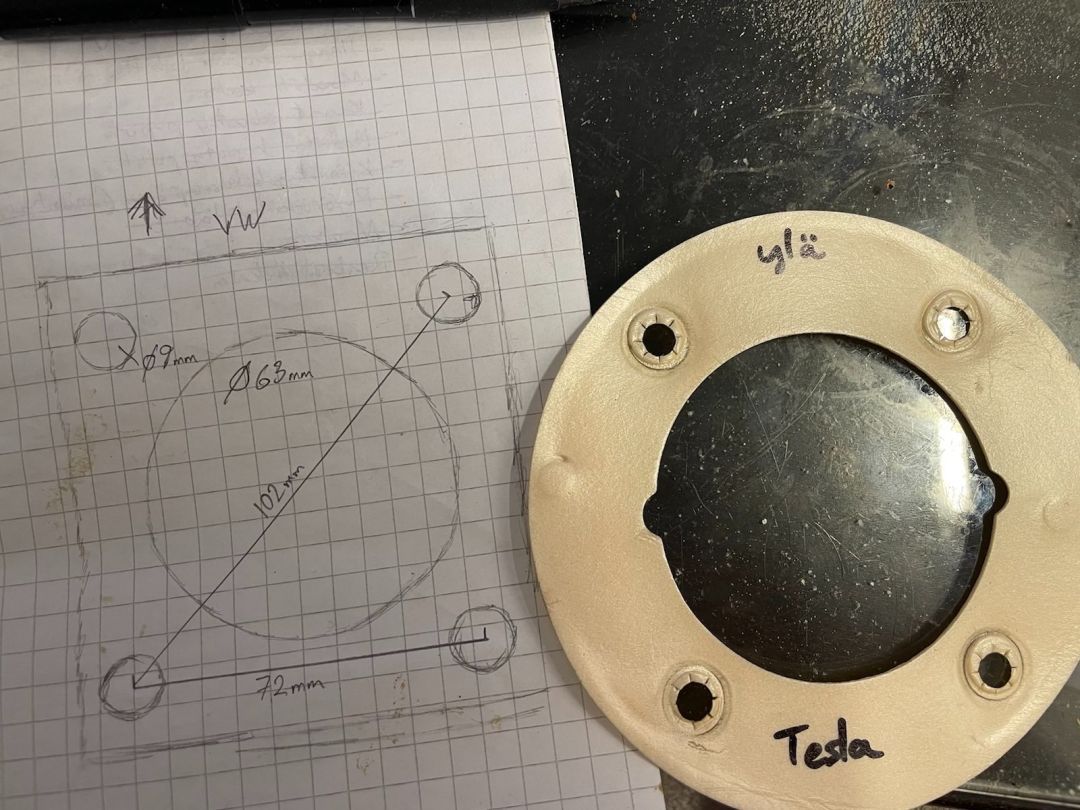
iBooster also found its place finally thanks to help from alexbeatle here. 😊

Bought the two-piece reservoir

Image

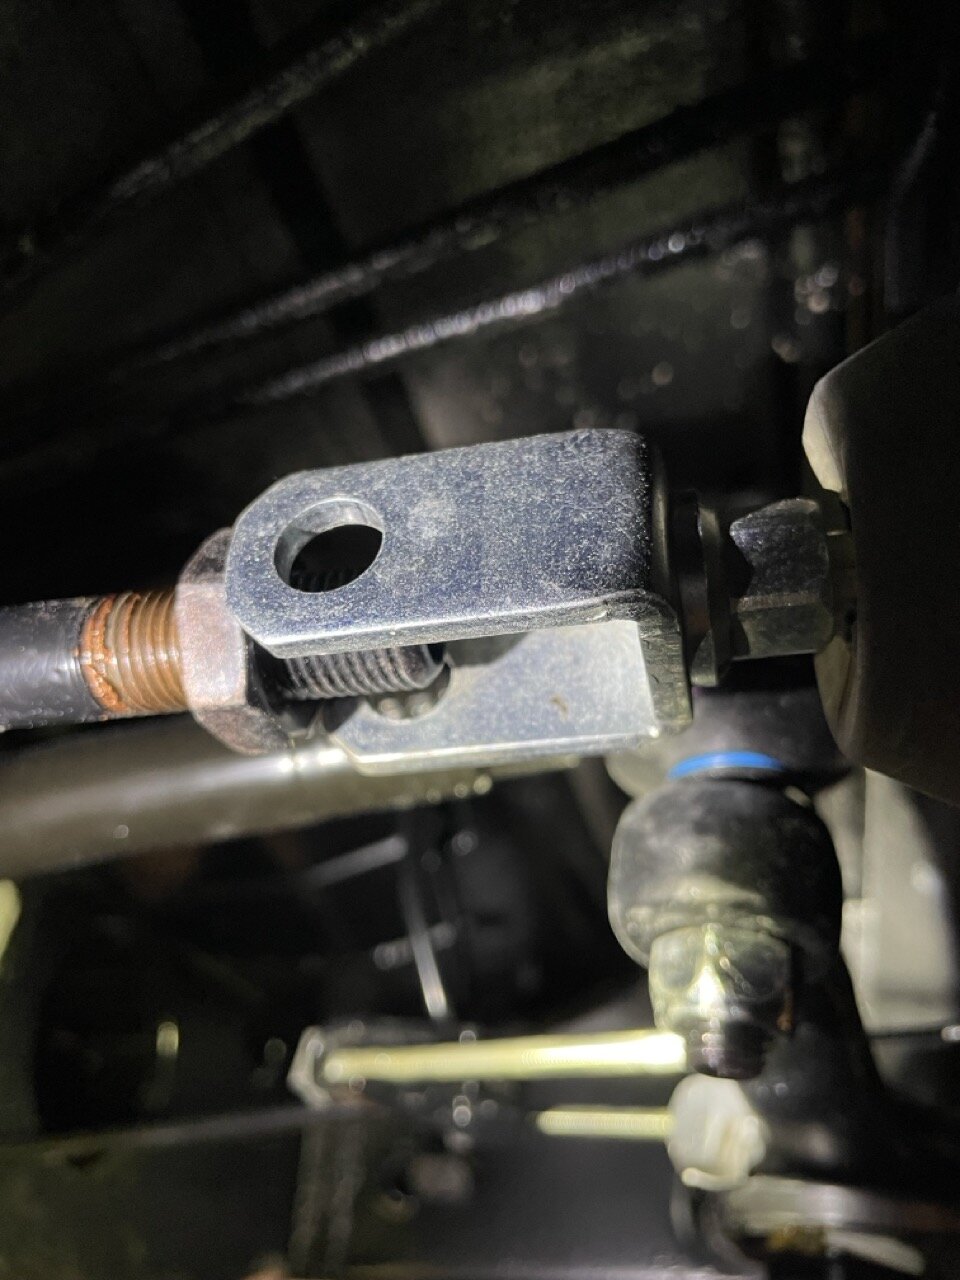
Widened the bolt pattern with a file juuust about 2mm and mounted the thing in there. Just to find out that the tie rod conflicts right where the motor connector is. :D There's no steering with this!

Image

I considered rotating the motor somehow to have the connectors facing the other way, but that'd have required manufacturing a new metal plate it mounts to.

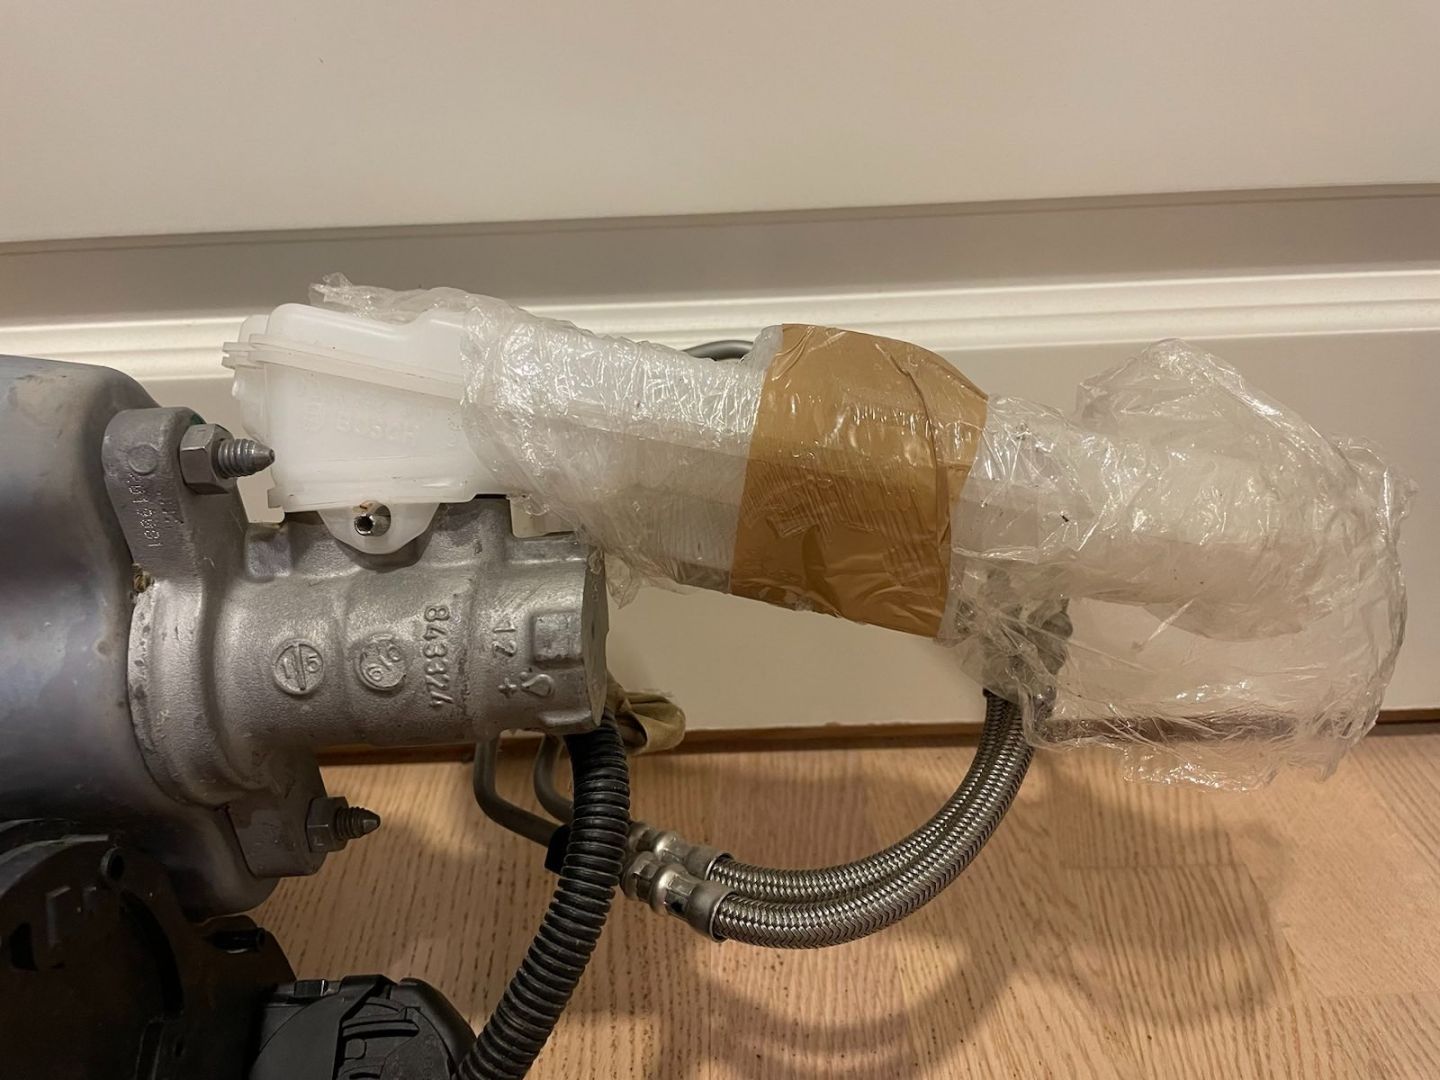
So I just unbolted the master cylinder (it's symmetrical mount and only has the round piston pushing on it from inside the booster) and installed it "upside down".

Then turned the whole thing 180° and now it looks like it was meant to fit there. :D

Image

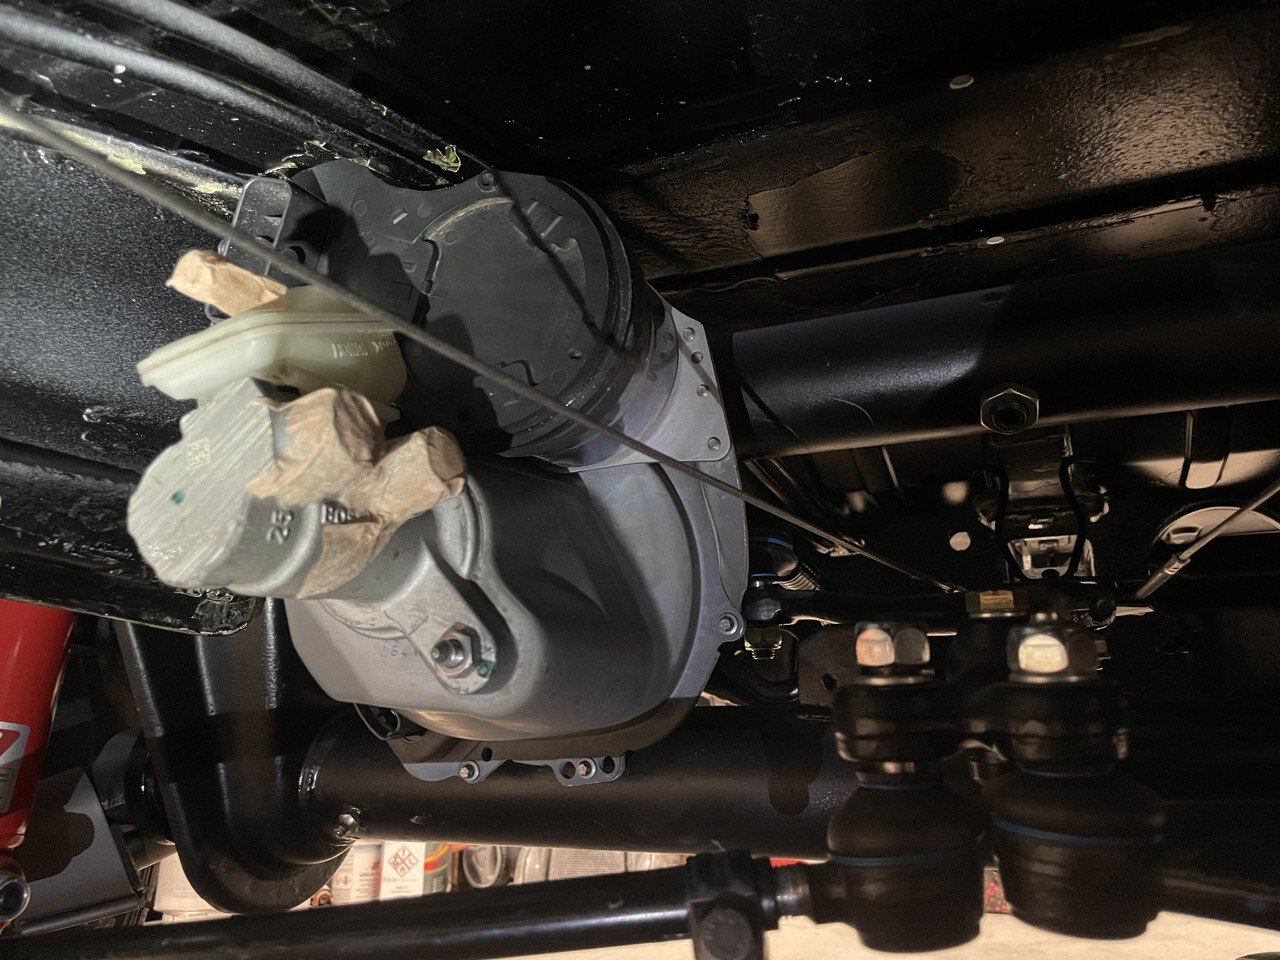
The connectors are now safely above all the moving parts and shielded from the road debris by the booster bulk.

The original pushrod is just about the right length too, but it needs an adapter made.

Image

Image

I tried to an uniball to the yoke - terrible idea in afterthought as it bends from too many places! Needs to have a rigid piece connecting the two. The thread on the VW original is M14x1.5 and the booster has M8 on the receiving end. Just a small cylindrical piece with tapped threads should work, but our lathe gave up just when I discovered this. So I'm not waiting to get that fixed first. :D

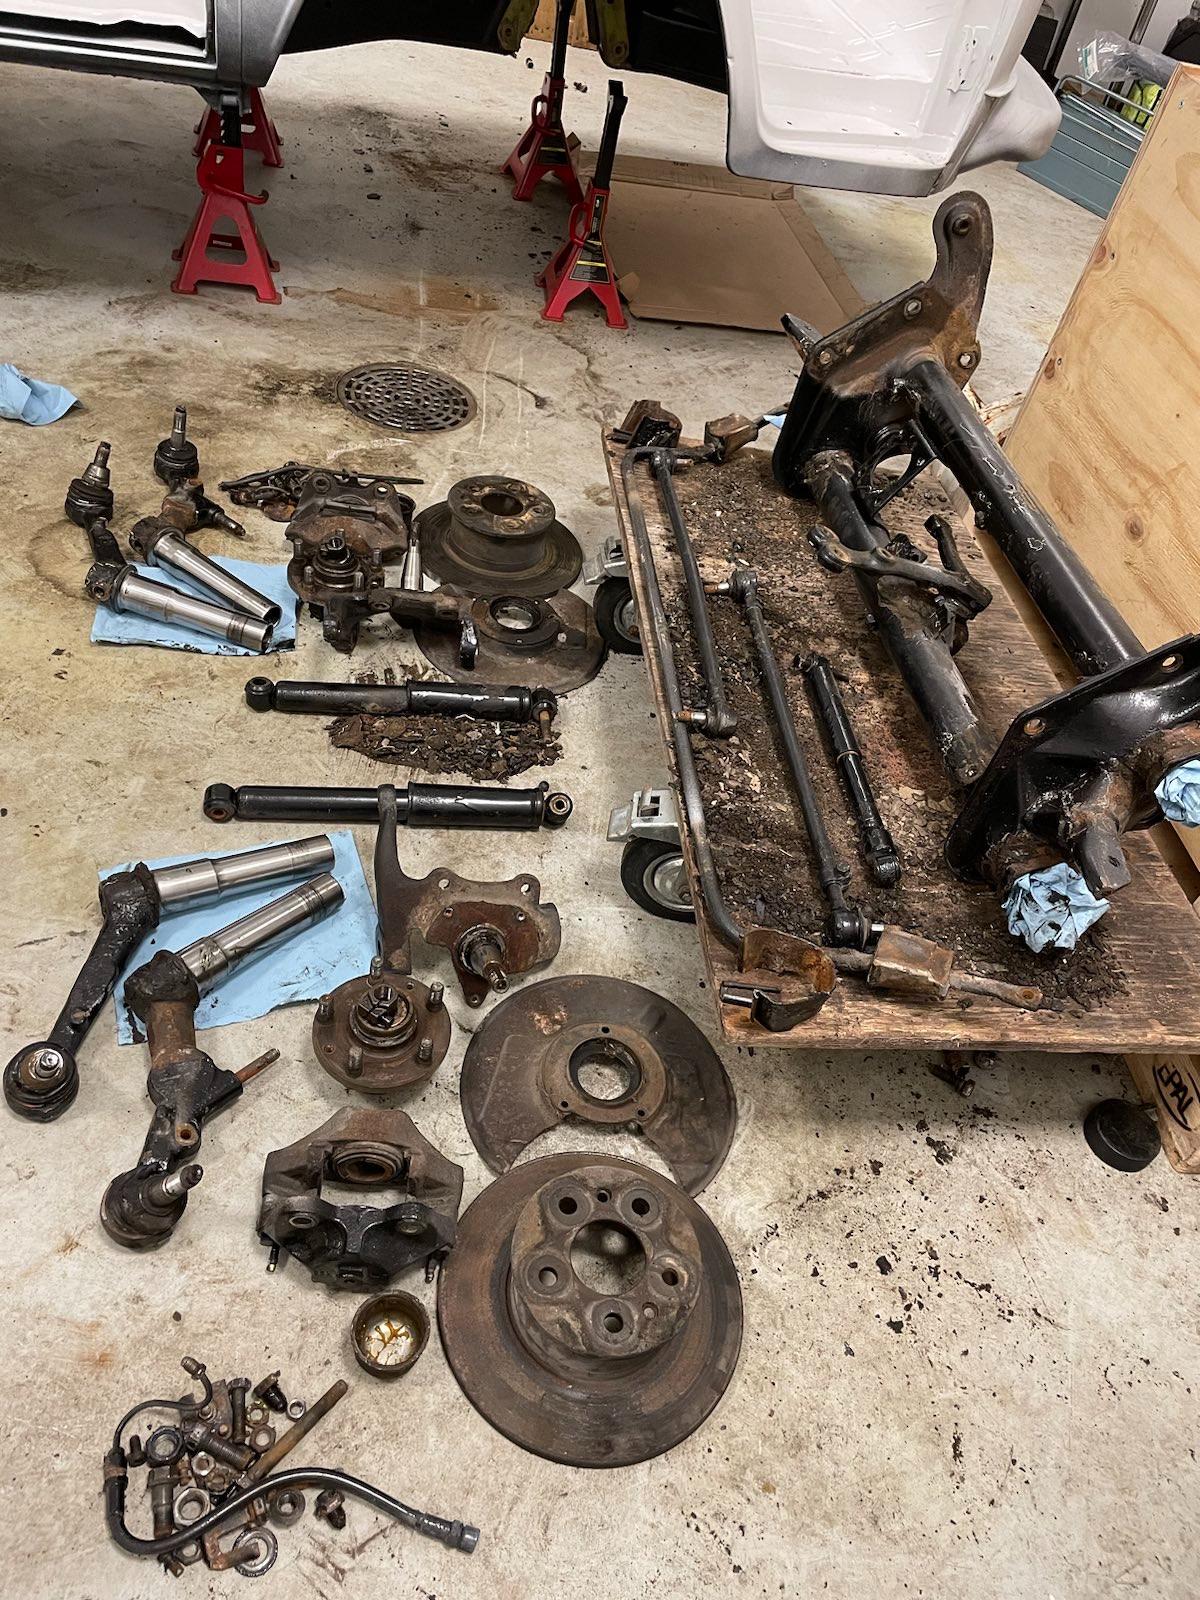
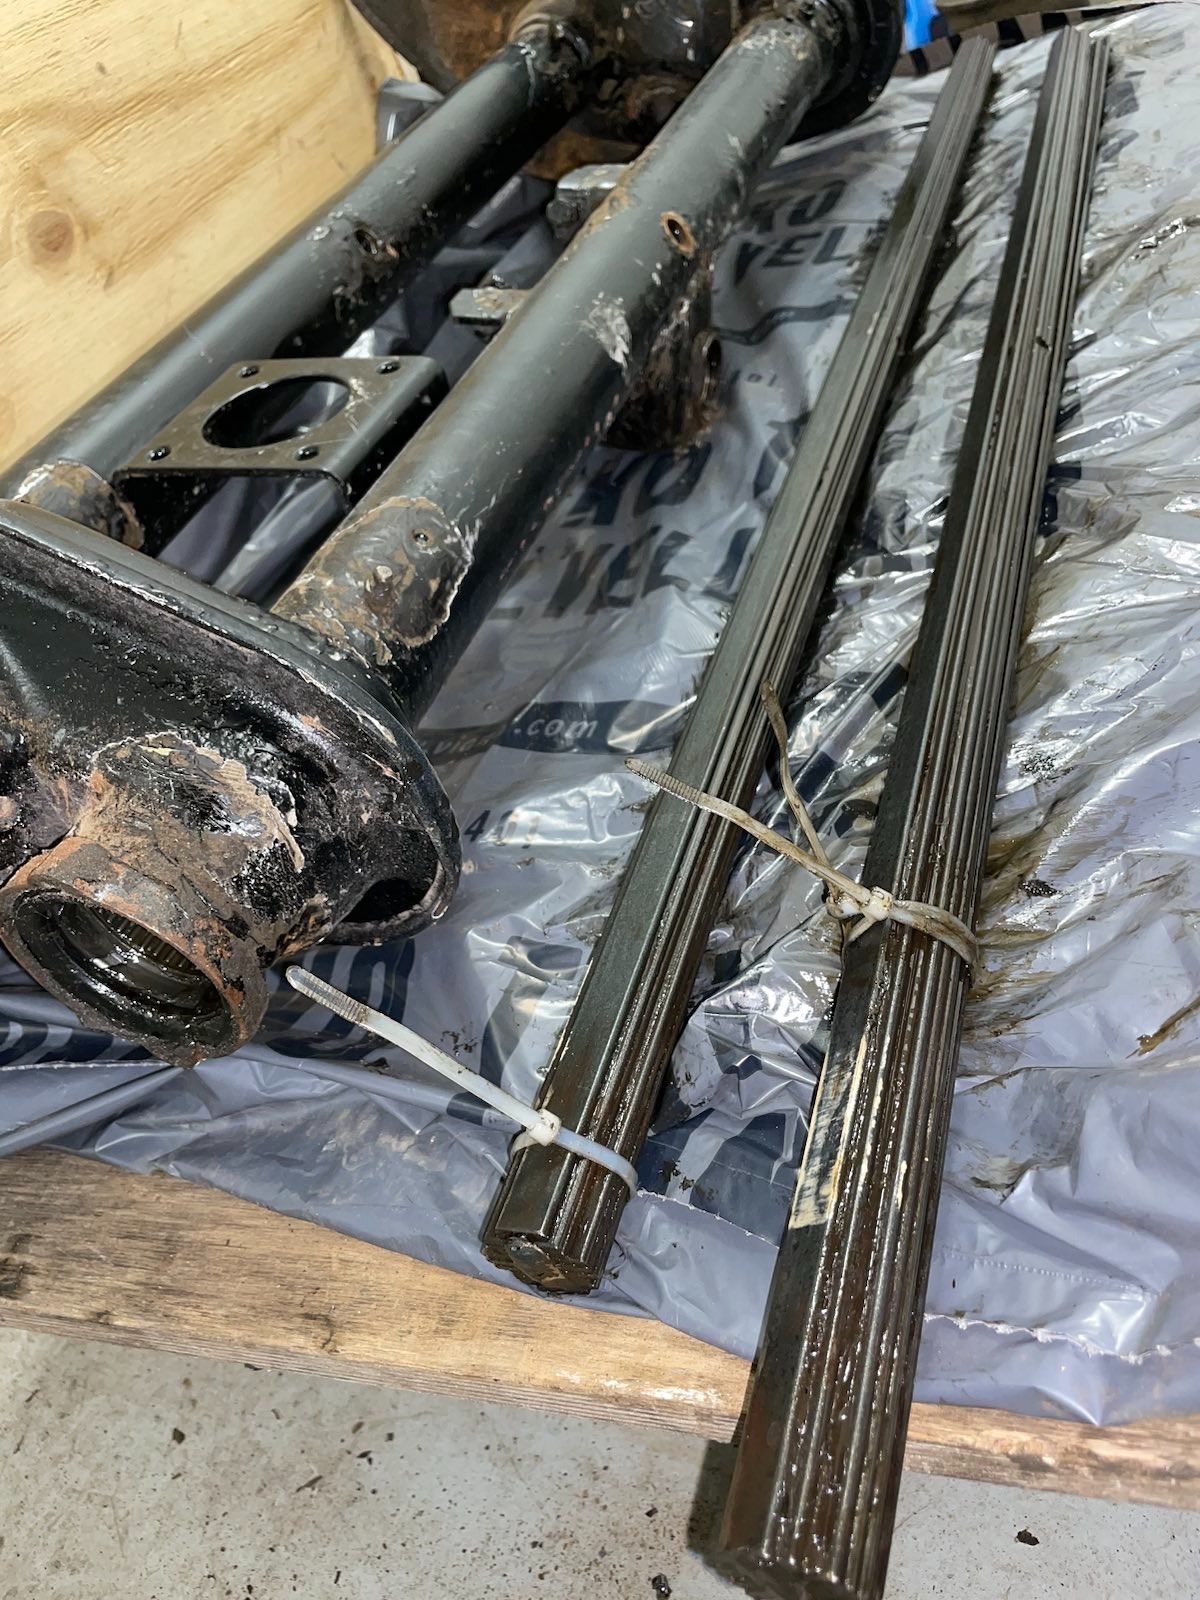
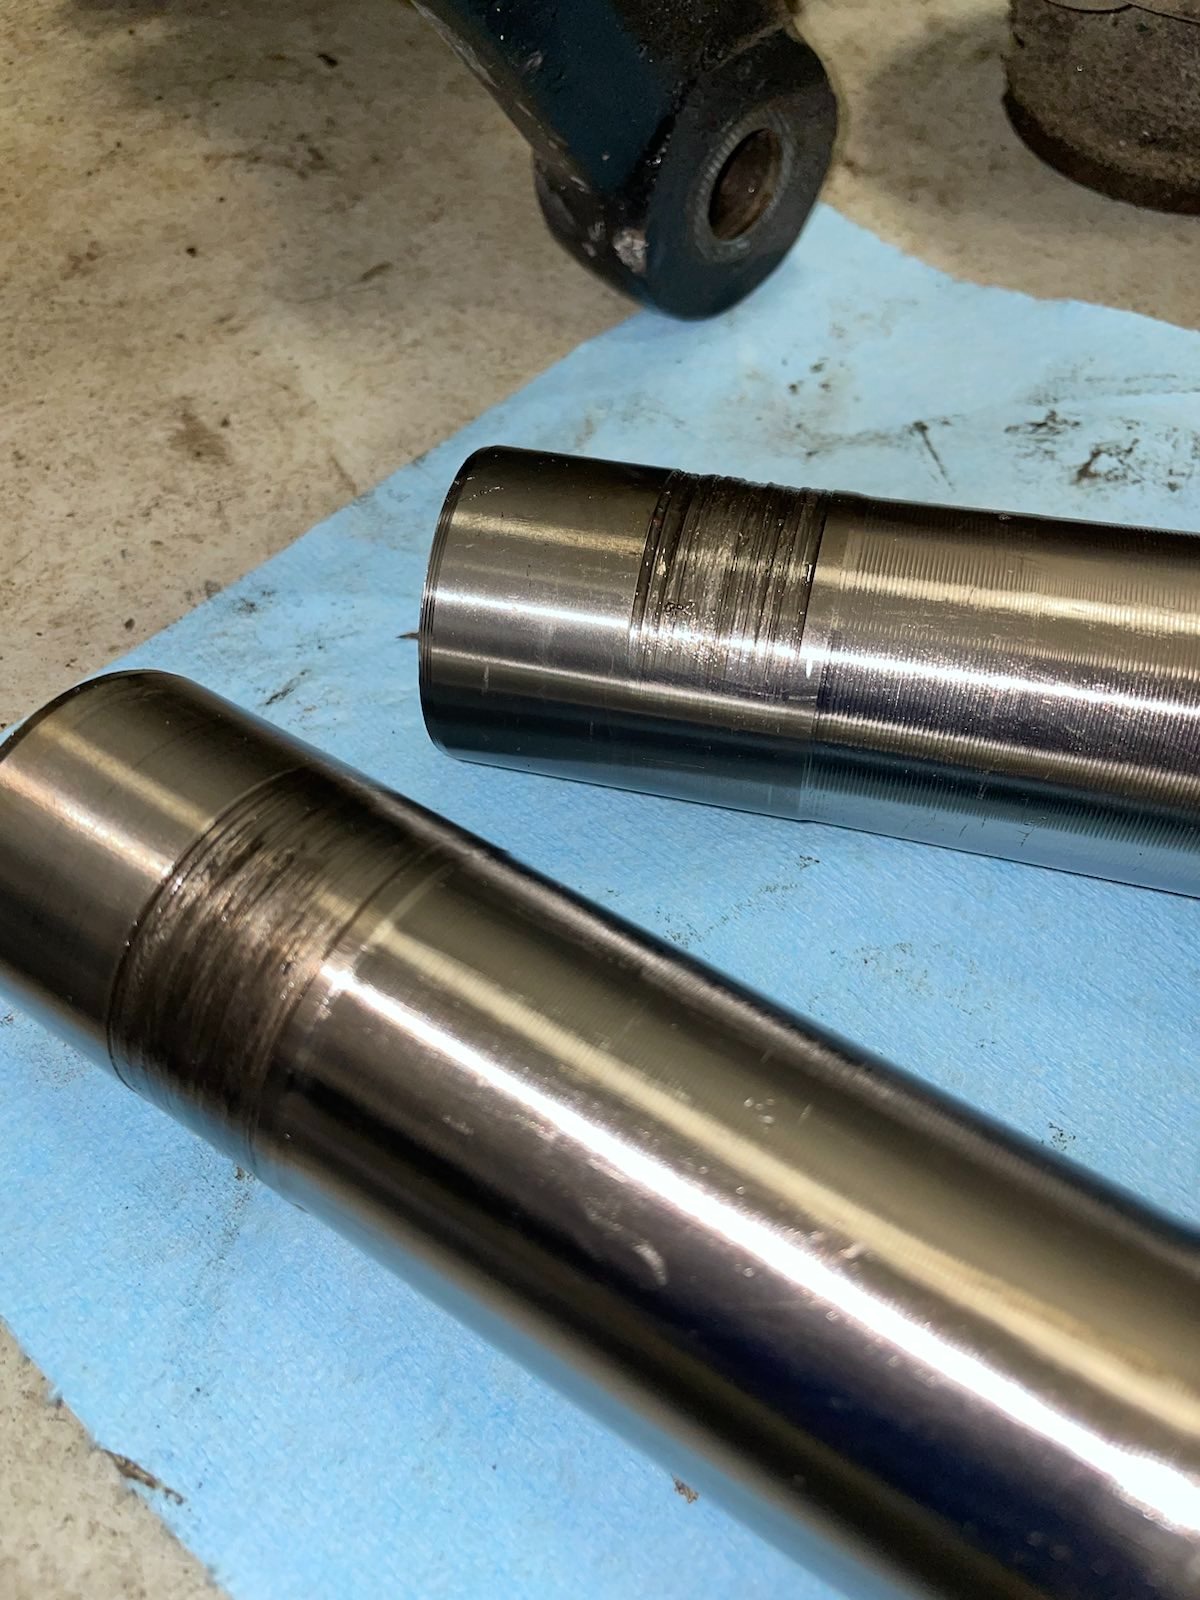
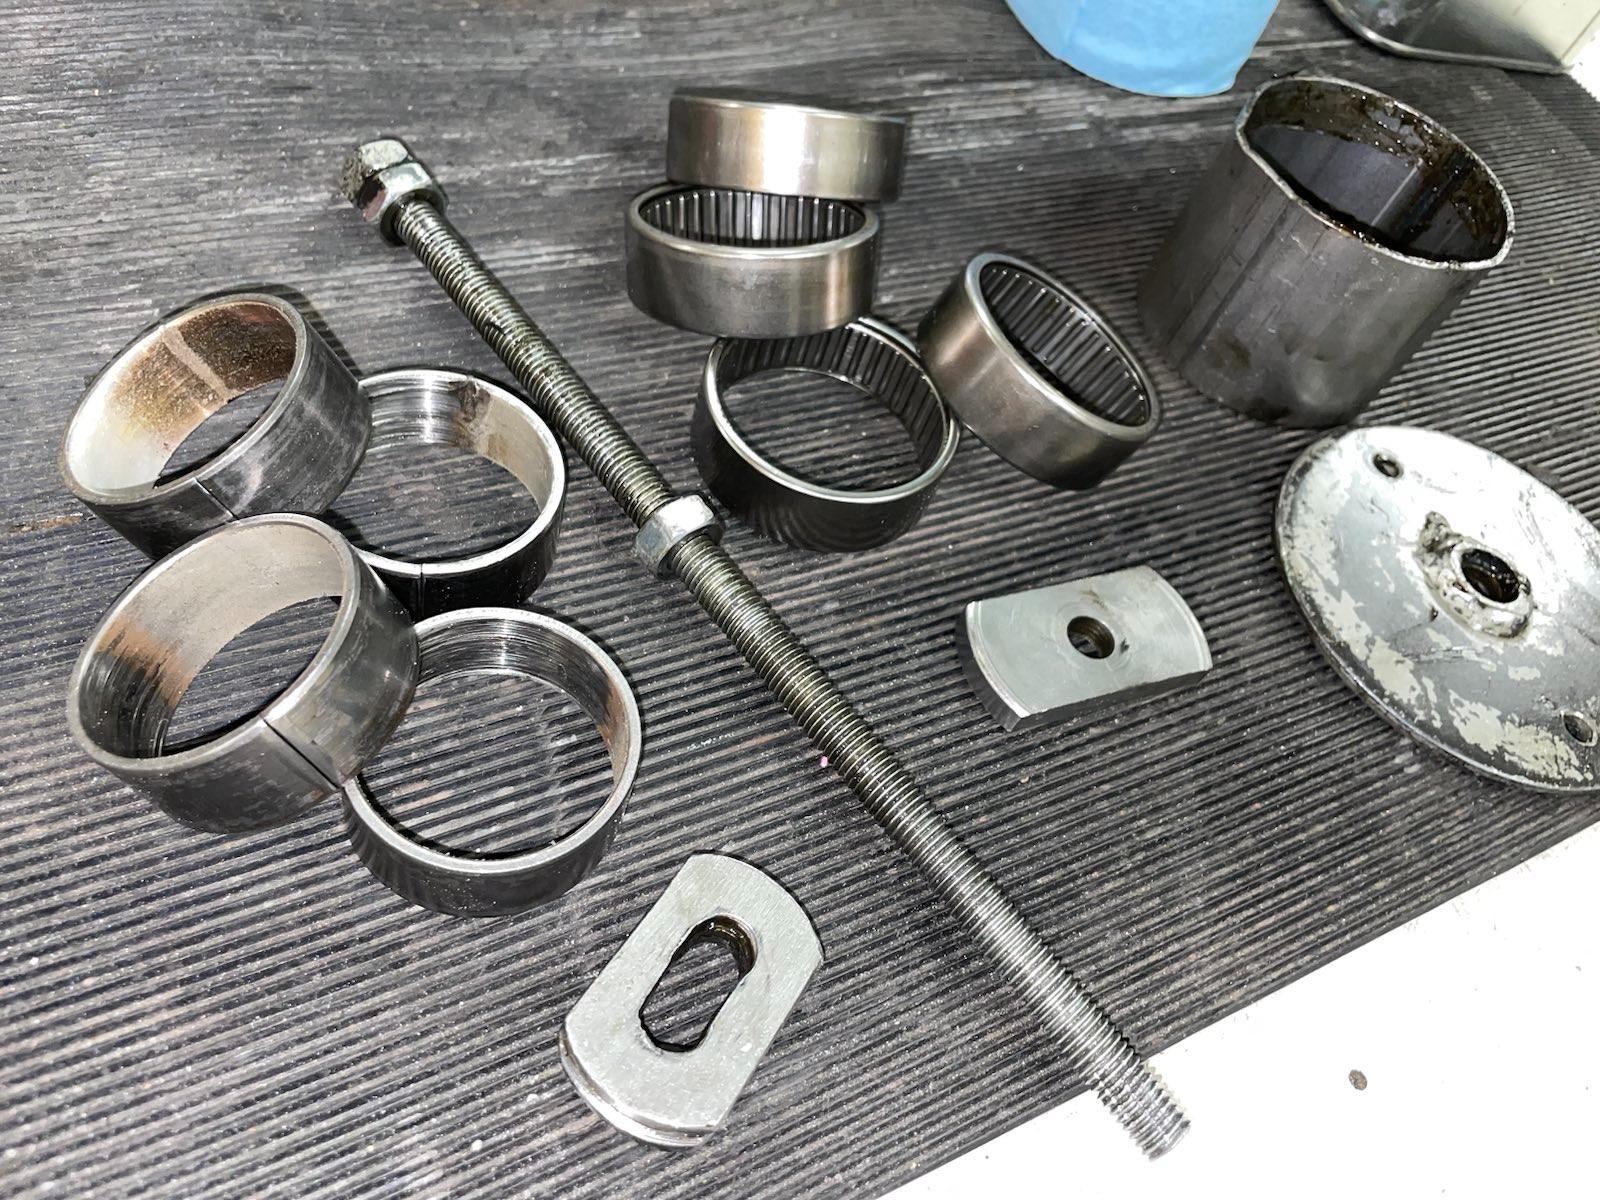
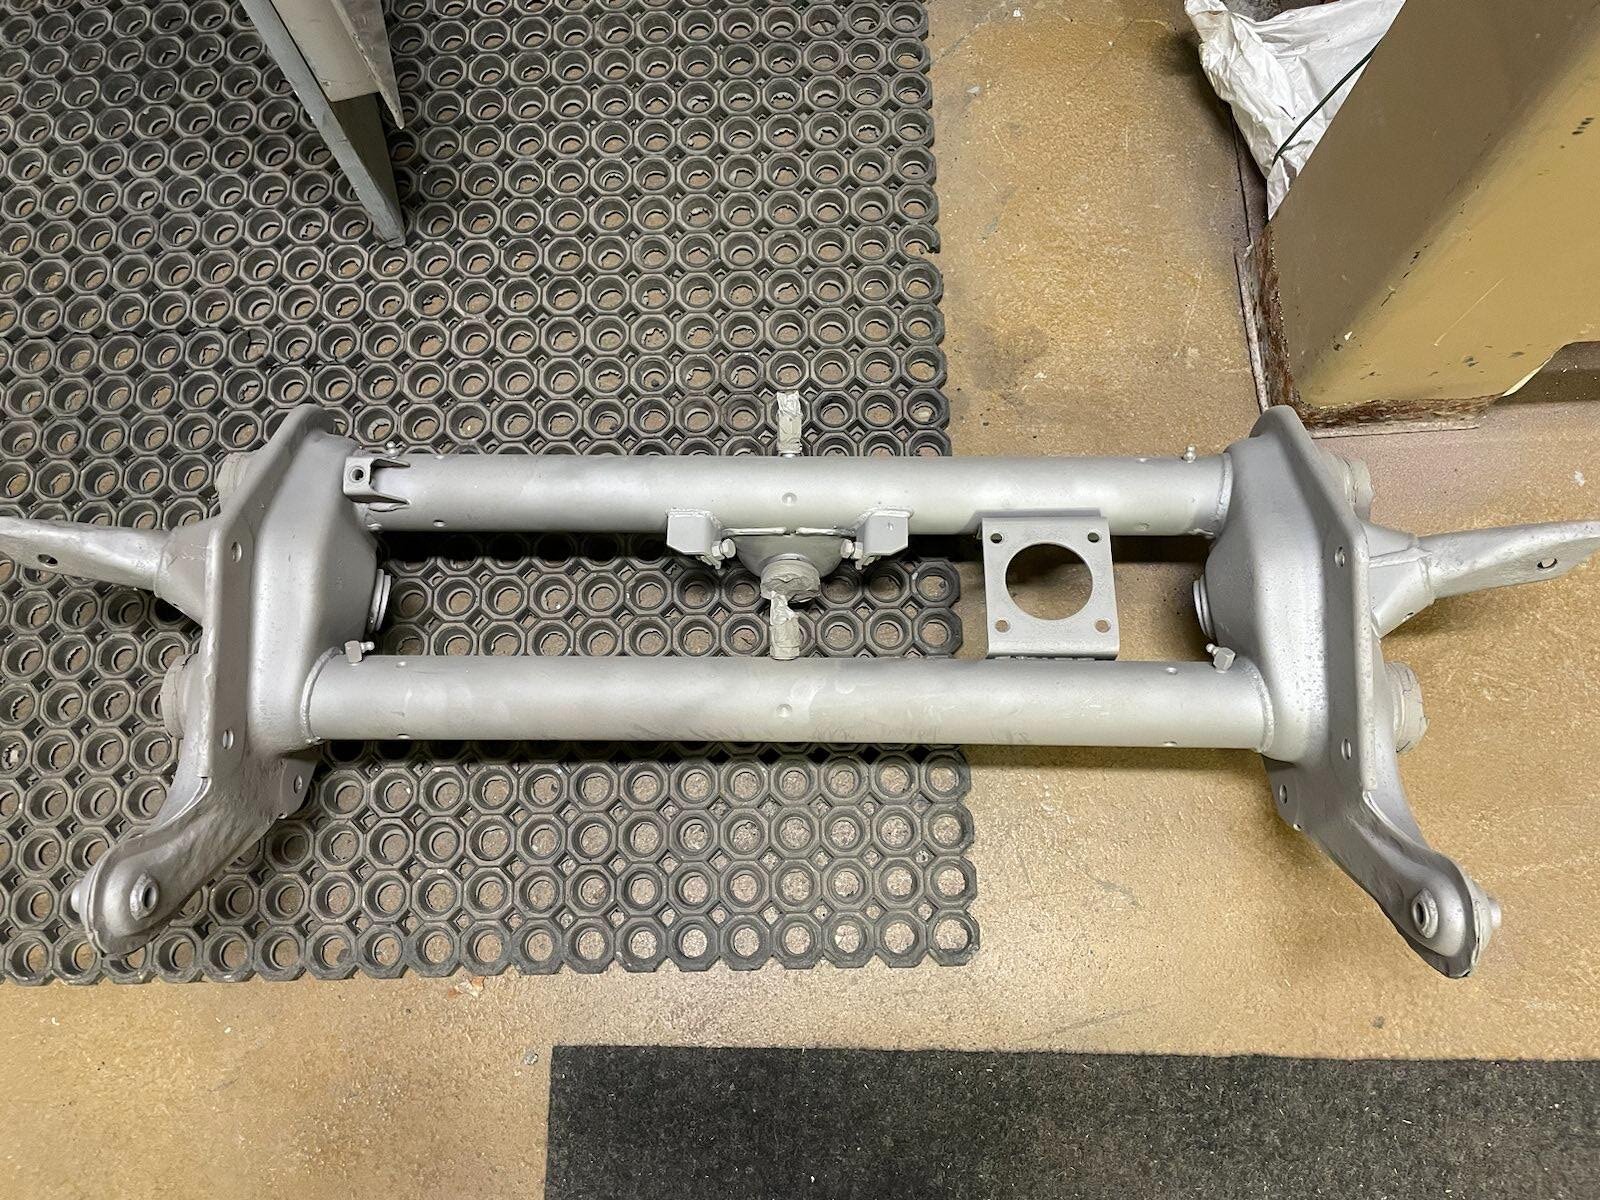
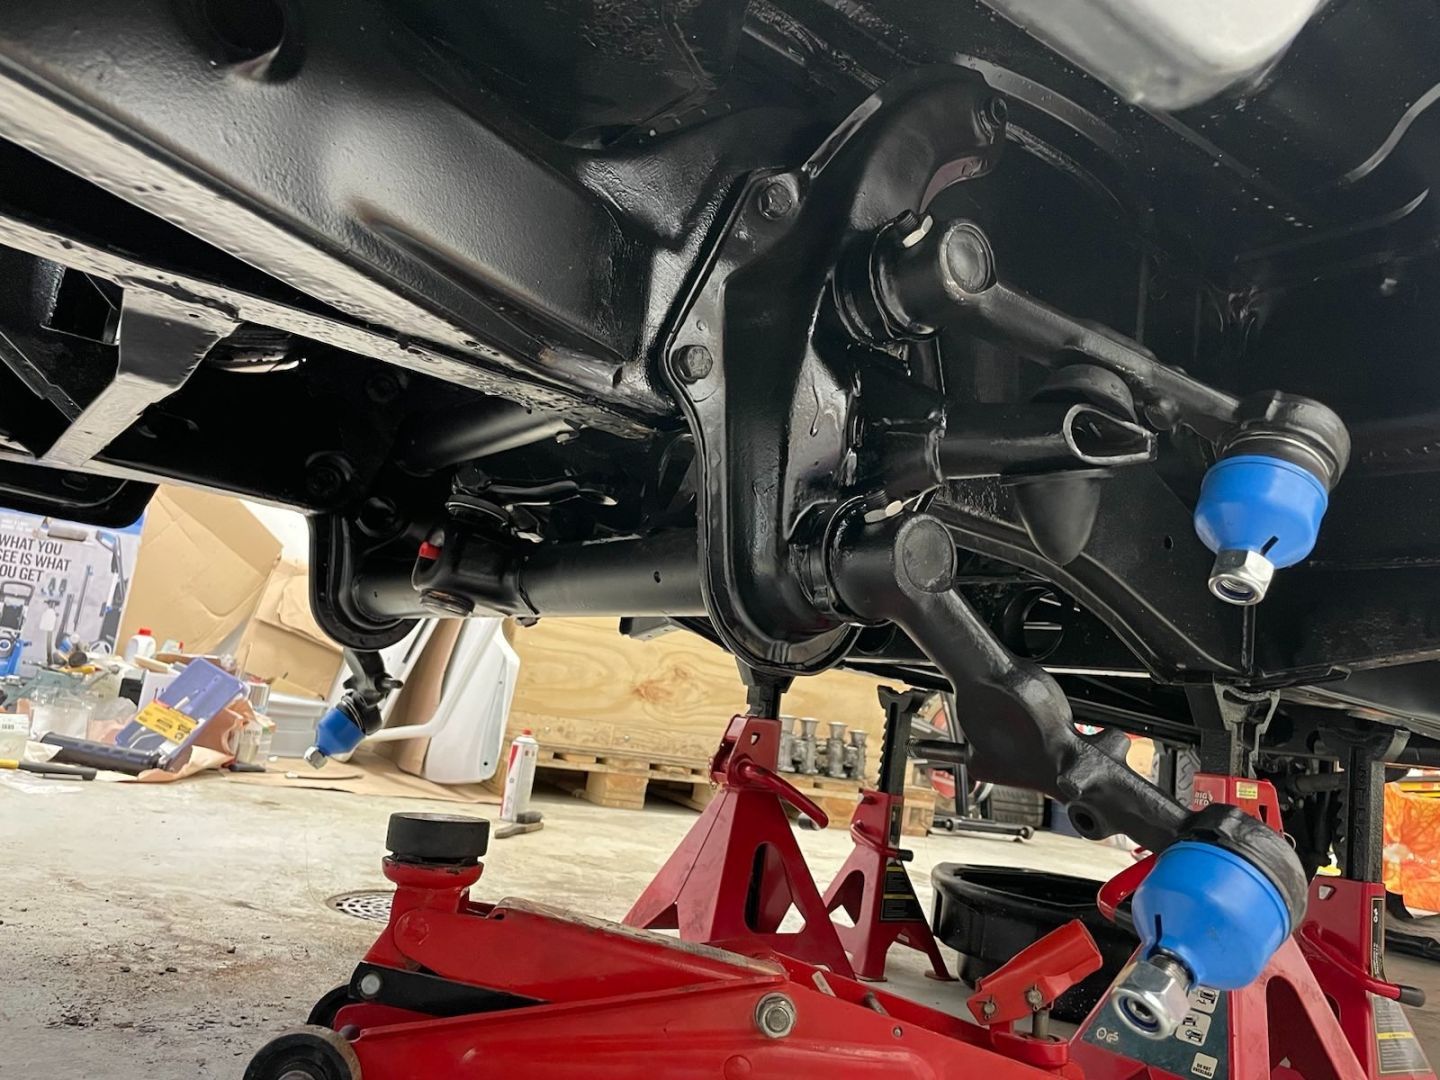
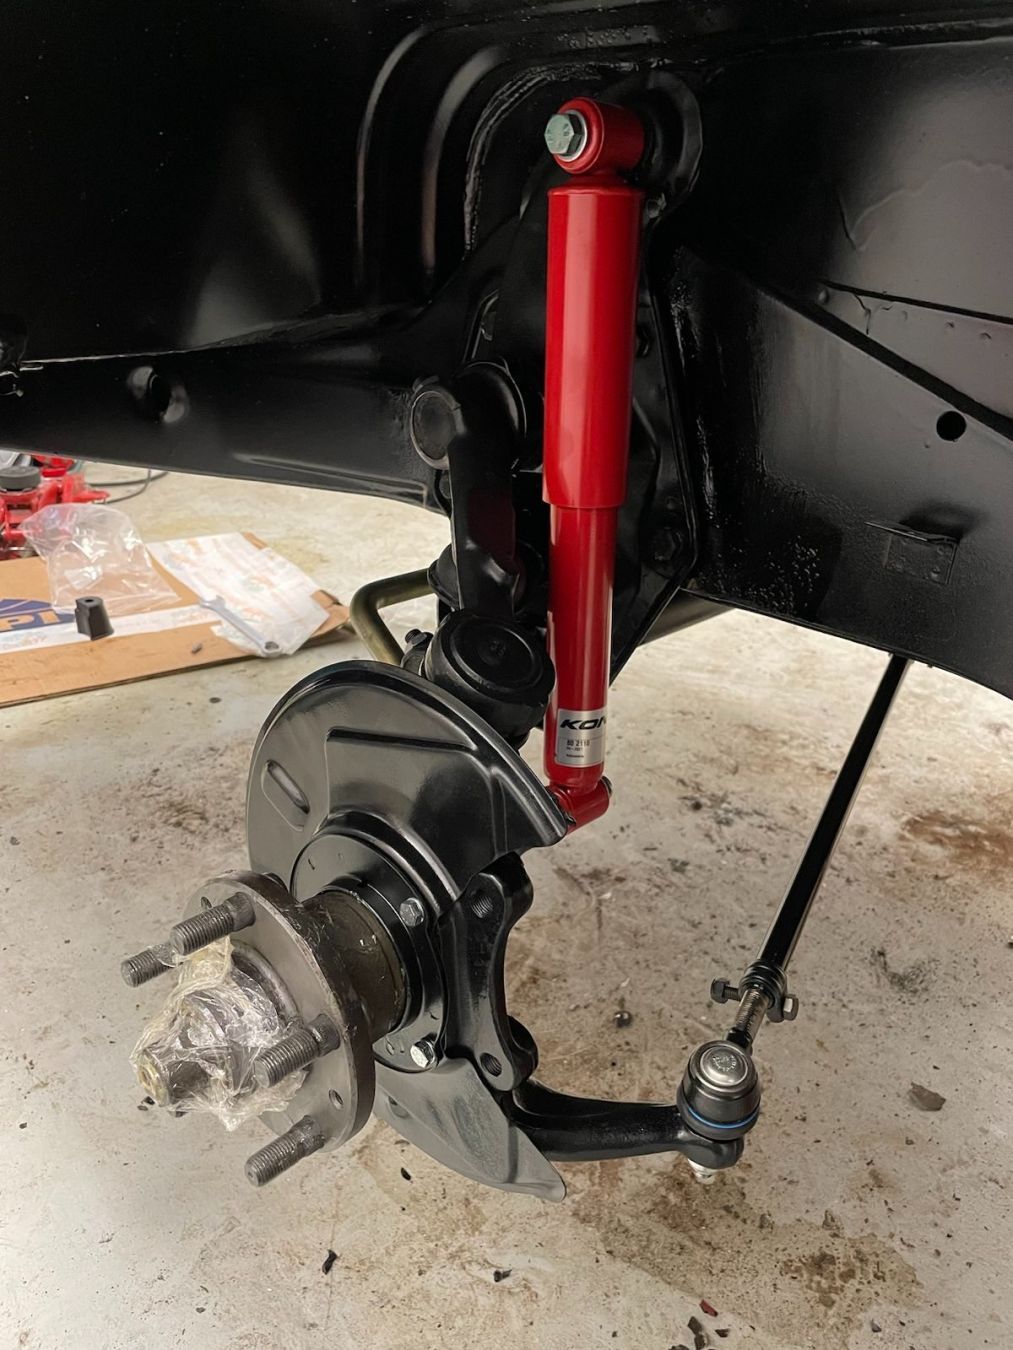
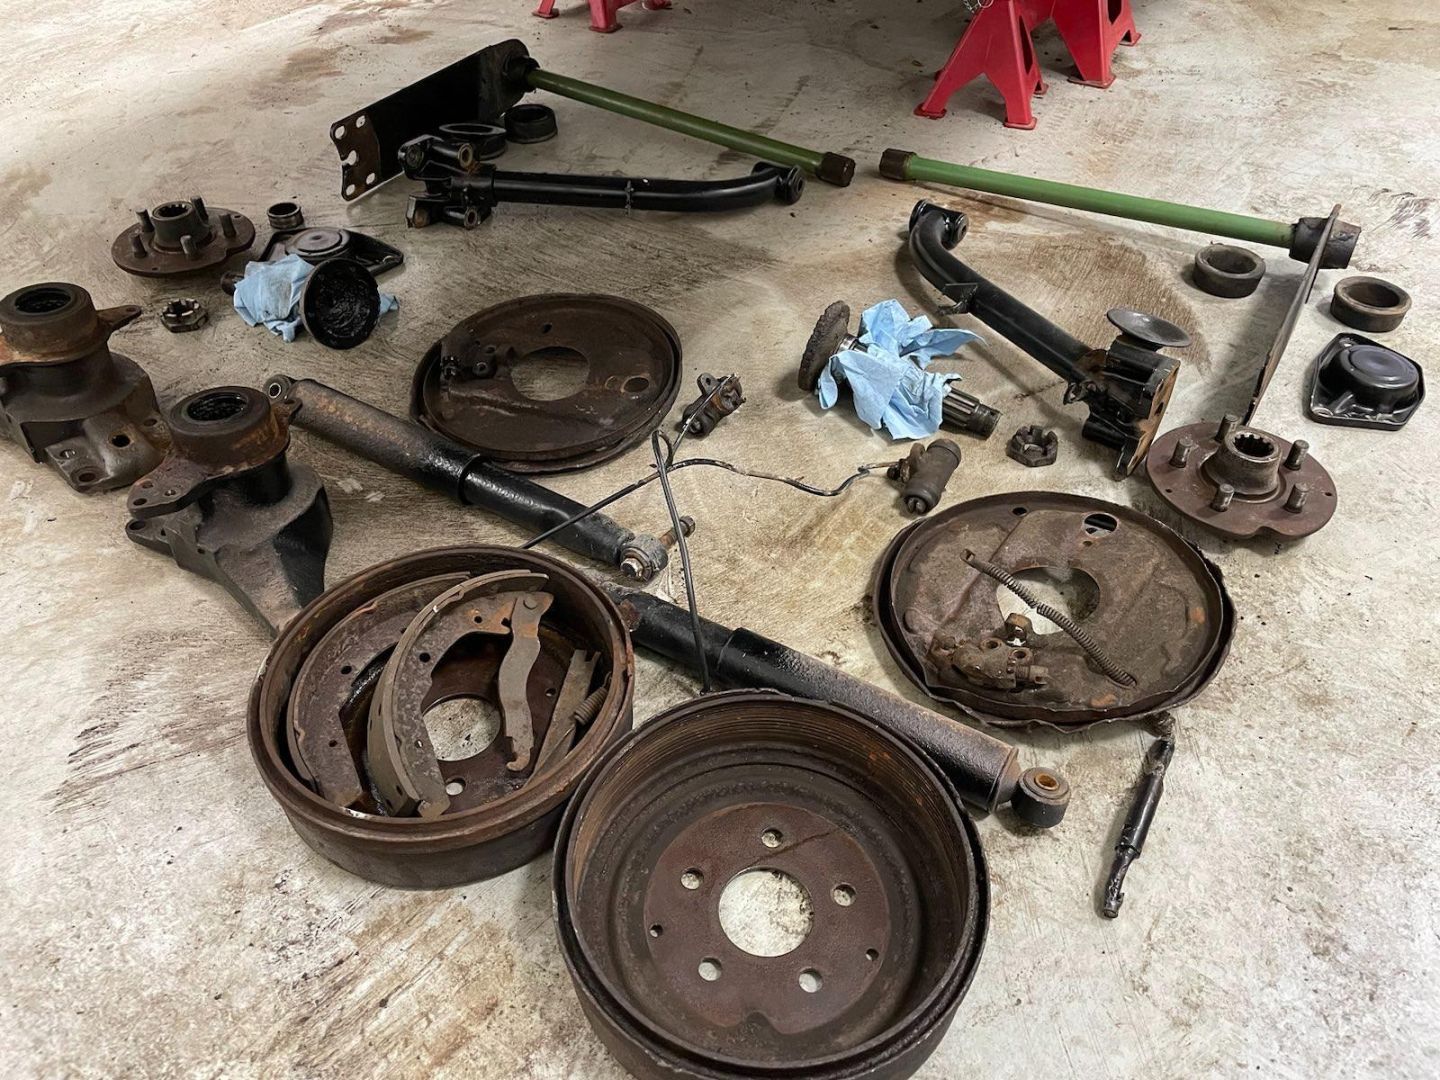
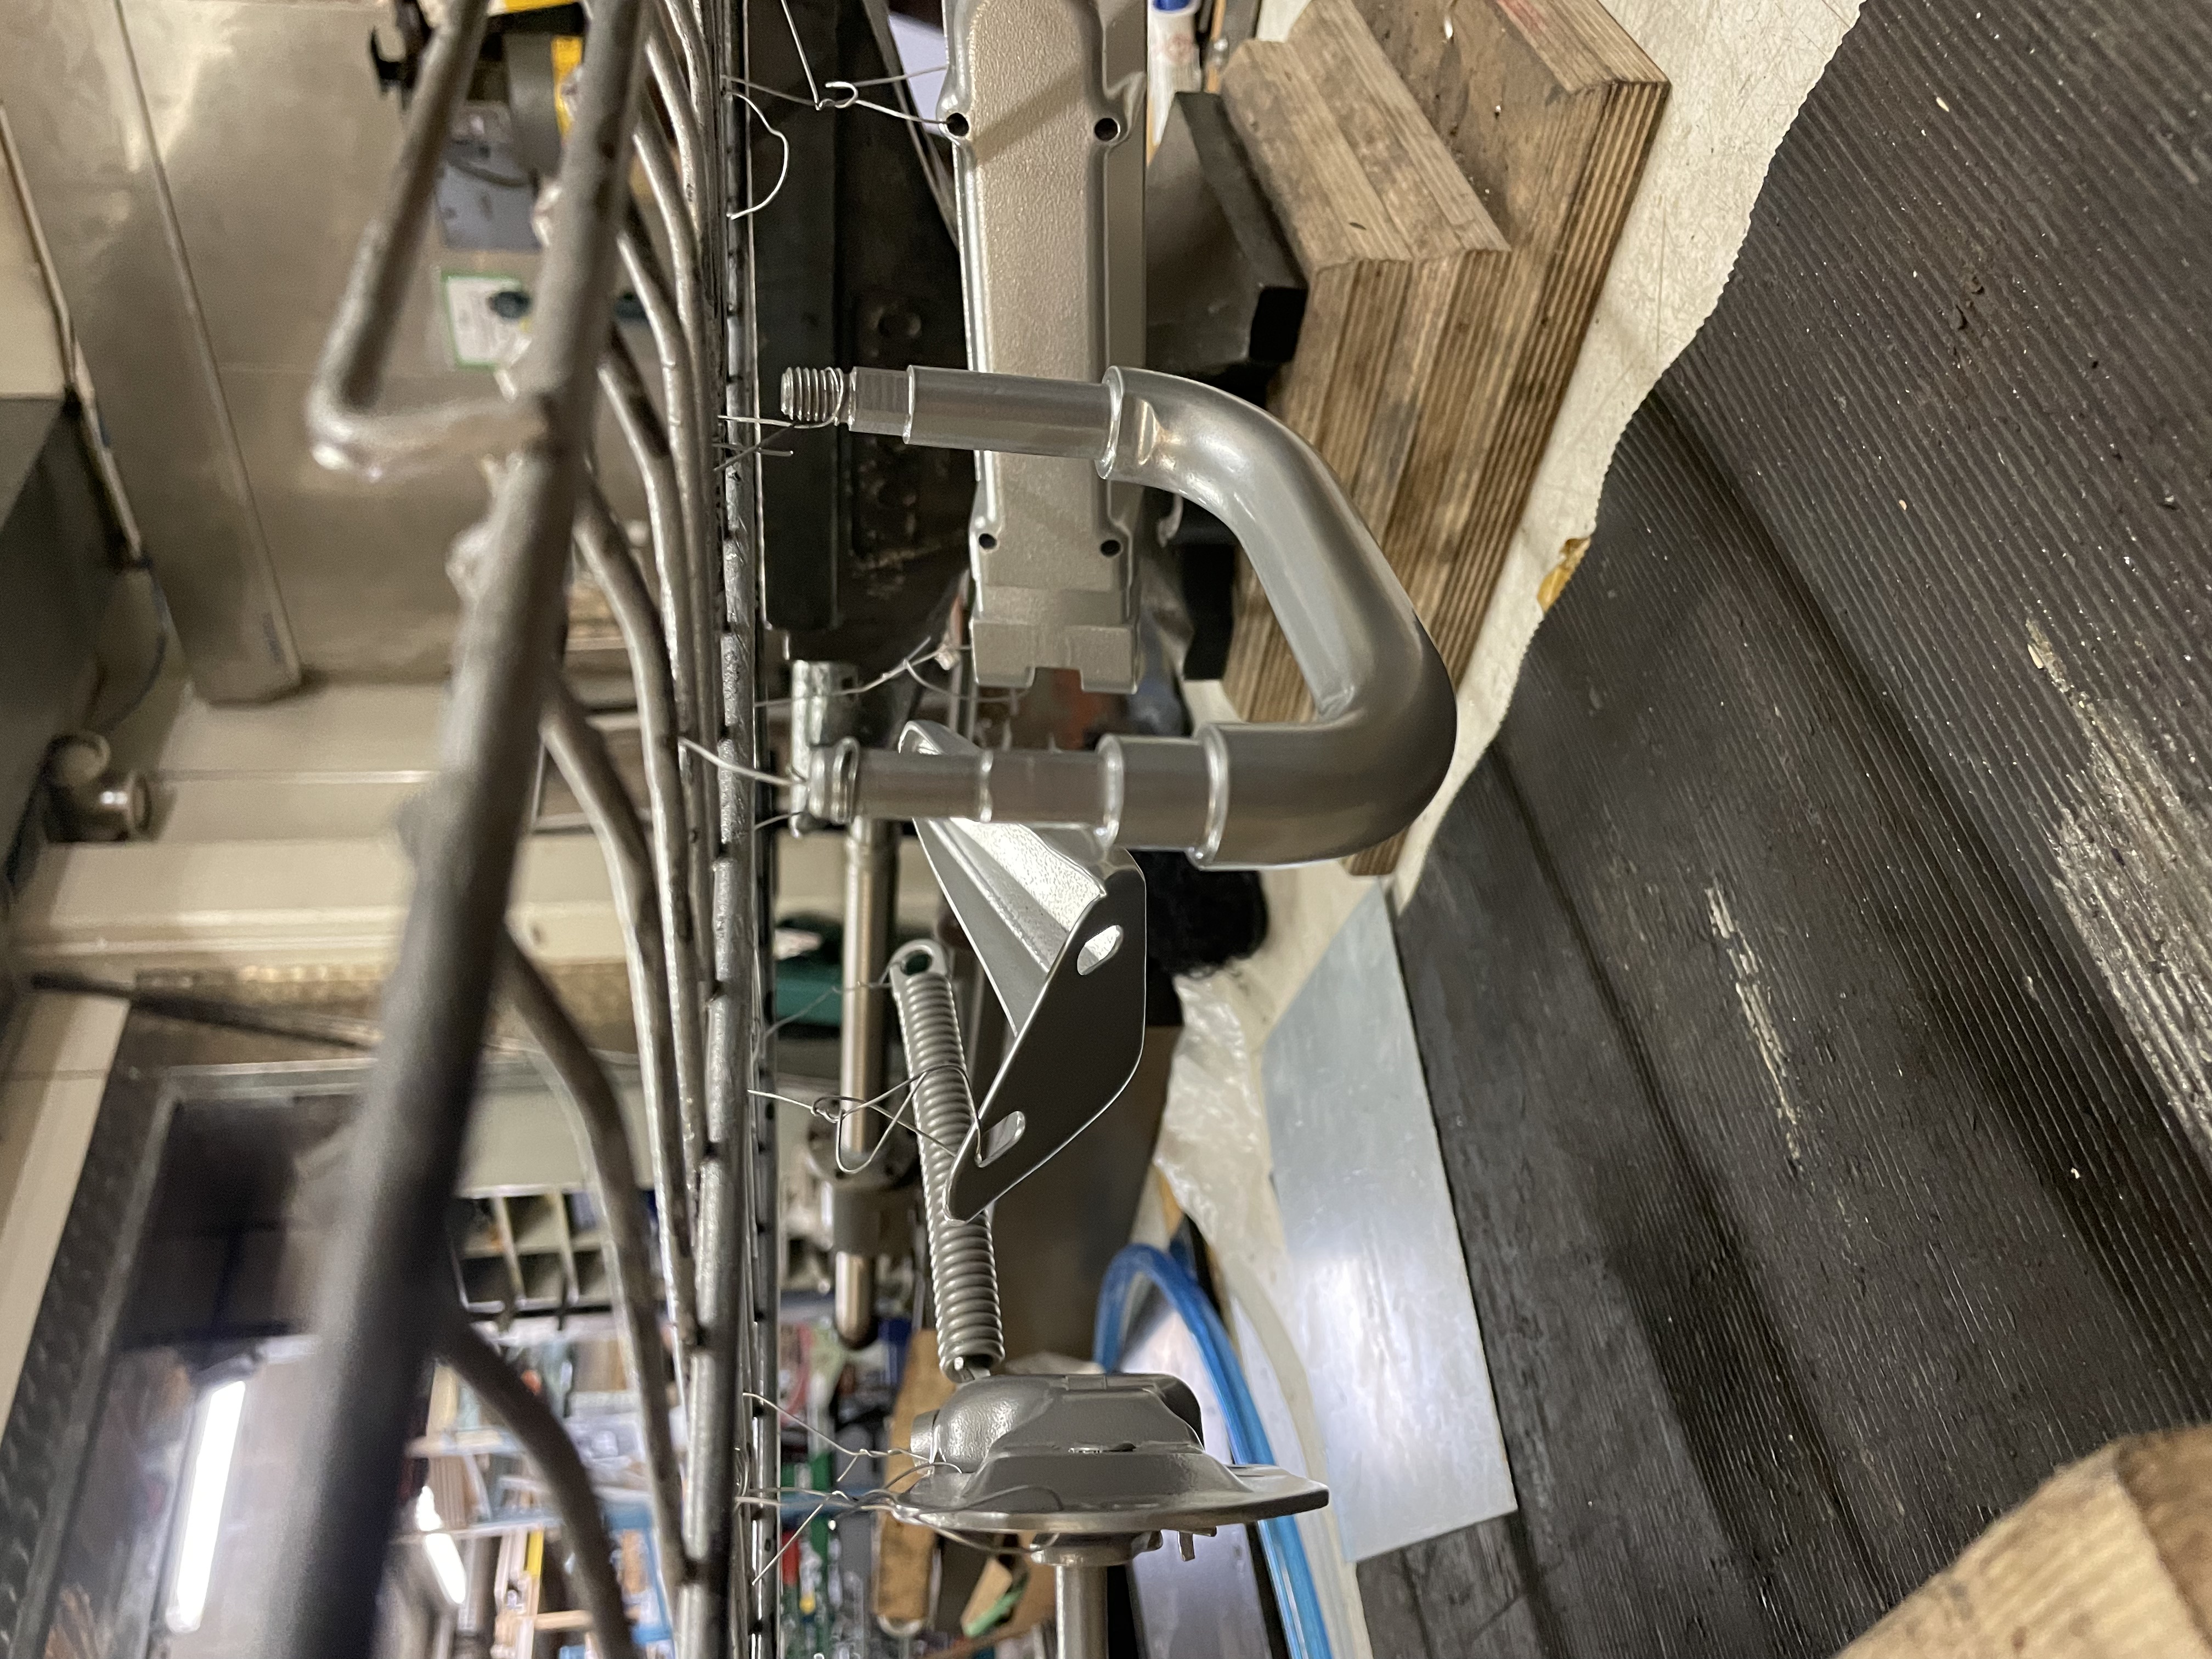
I also restored the original CV axles:

Image

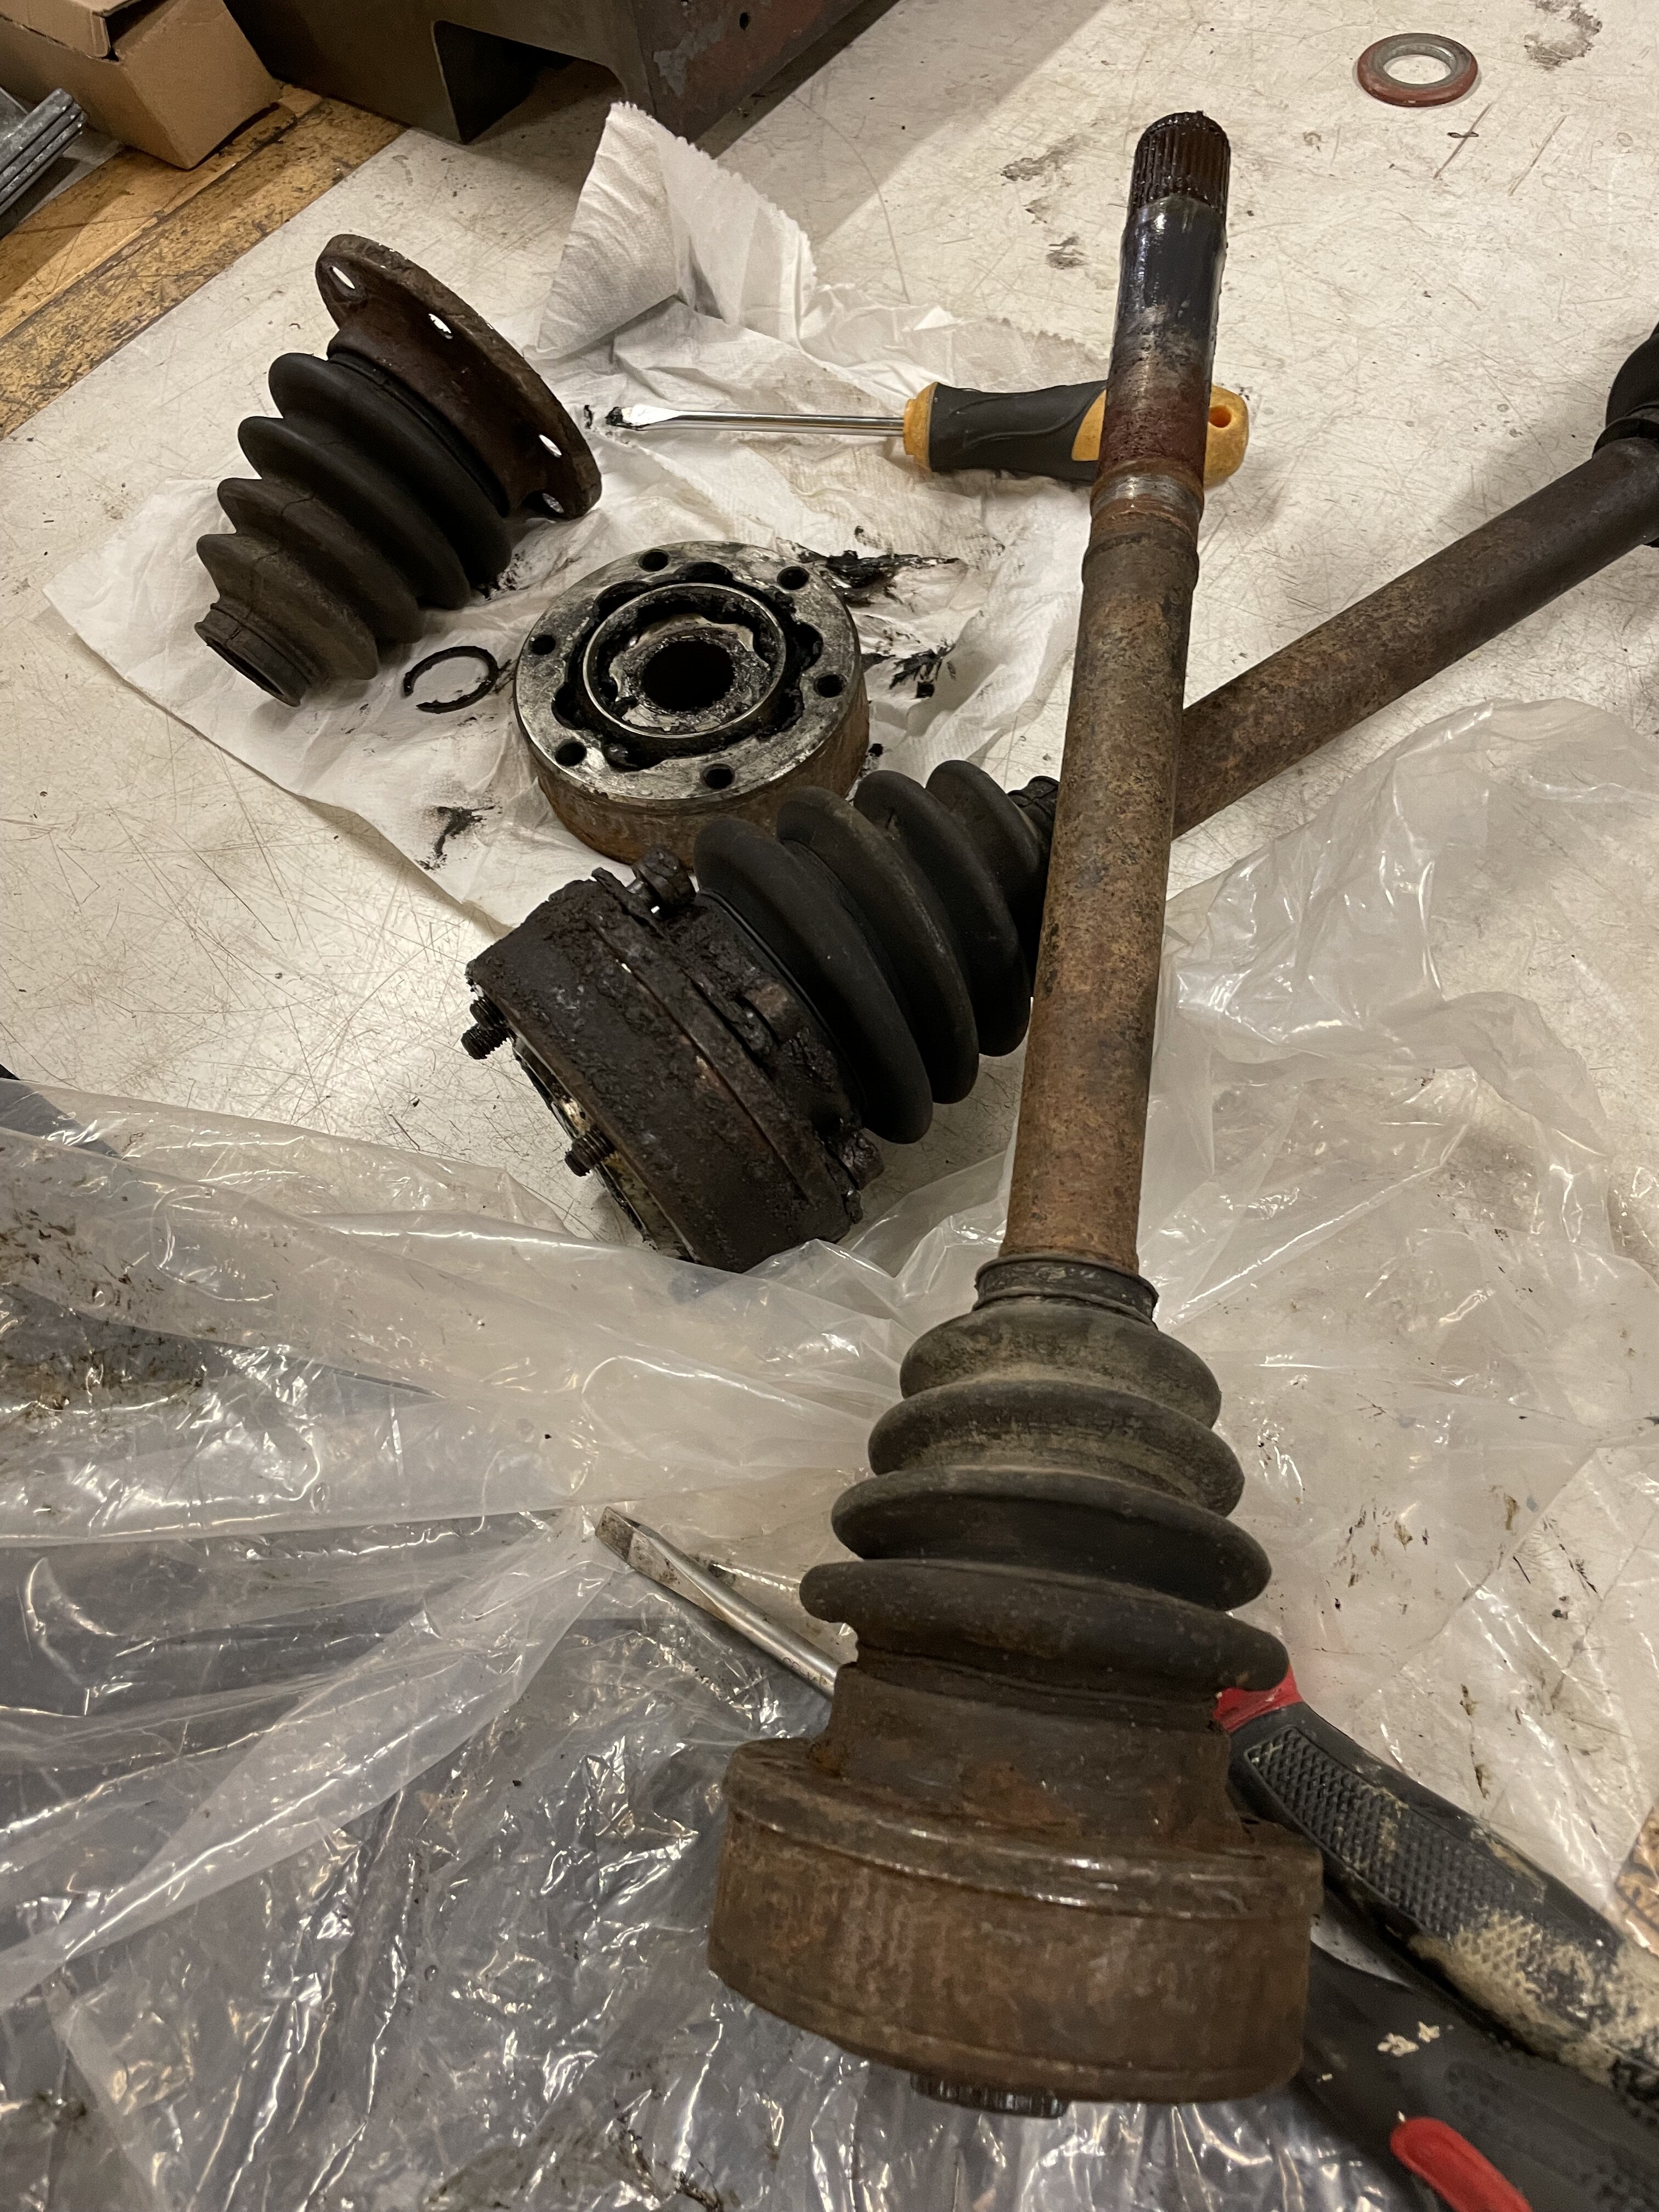
Joints were stamped 1975, some of them did look like it too

Image

In the end I replaced two of the joints which had worn the worst and kept the two better ones.

Image

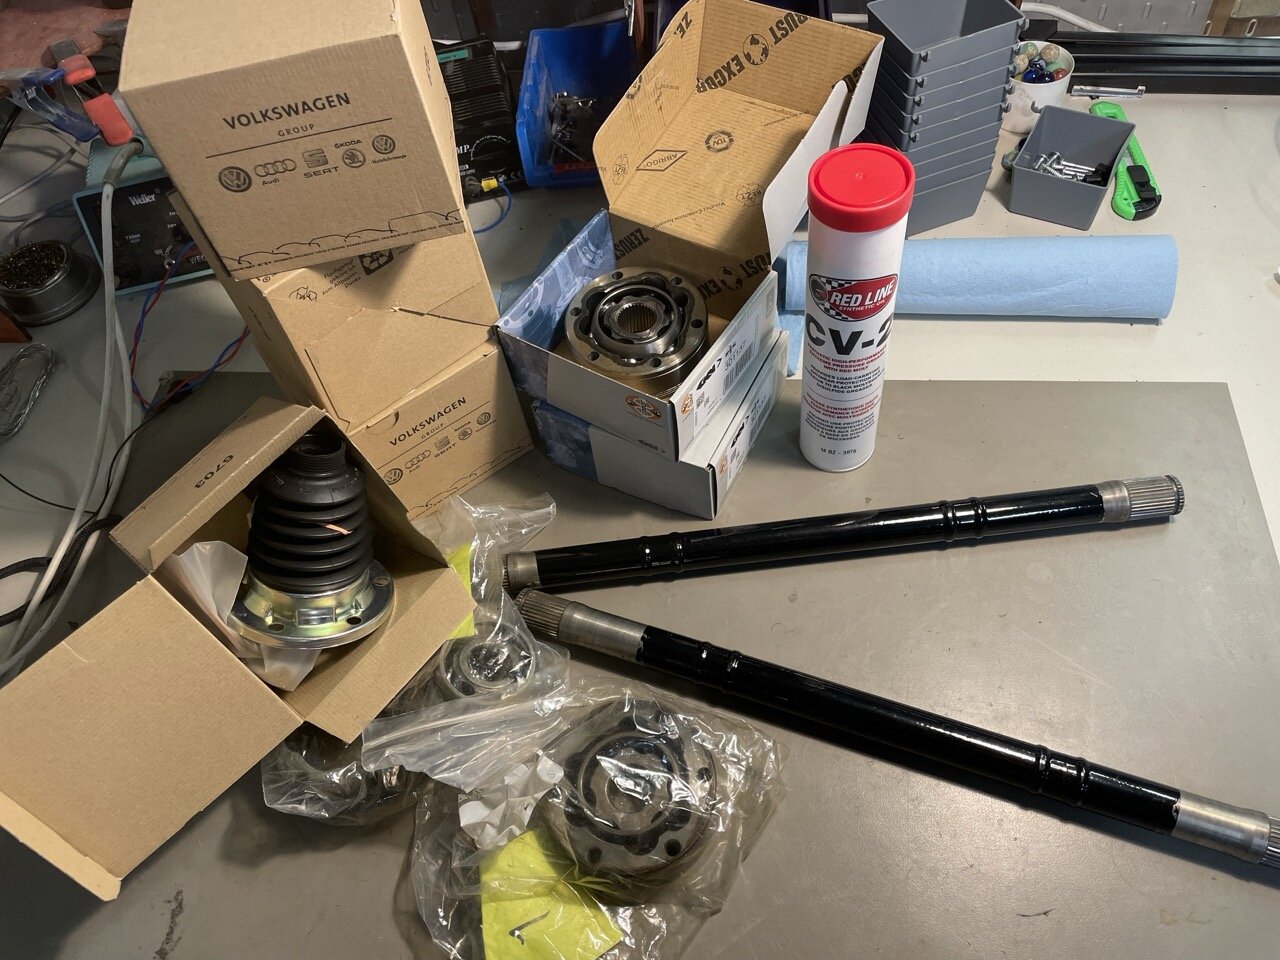
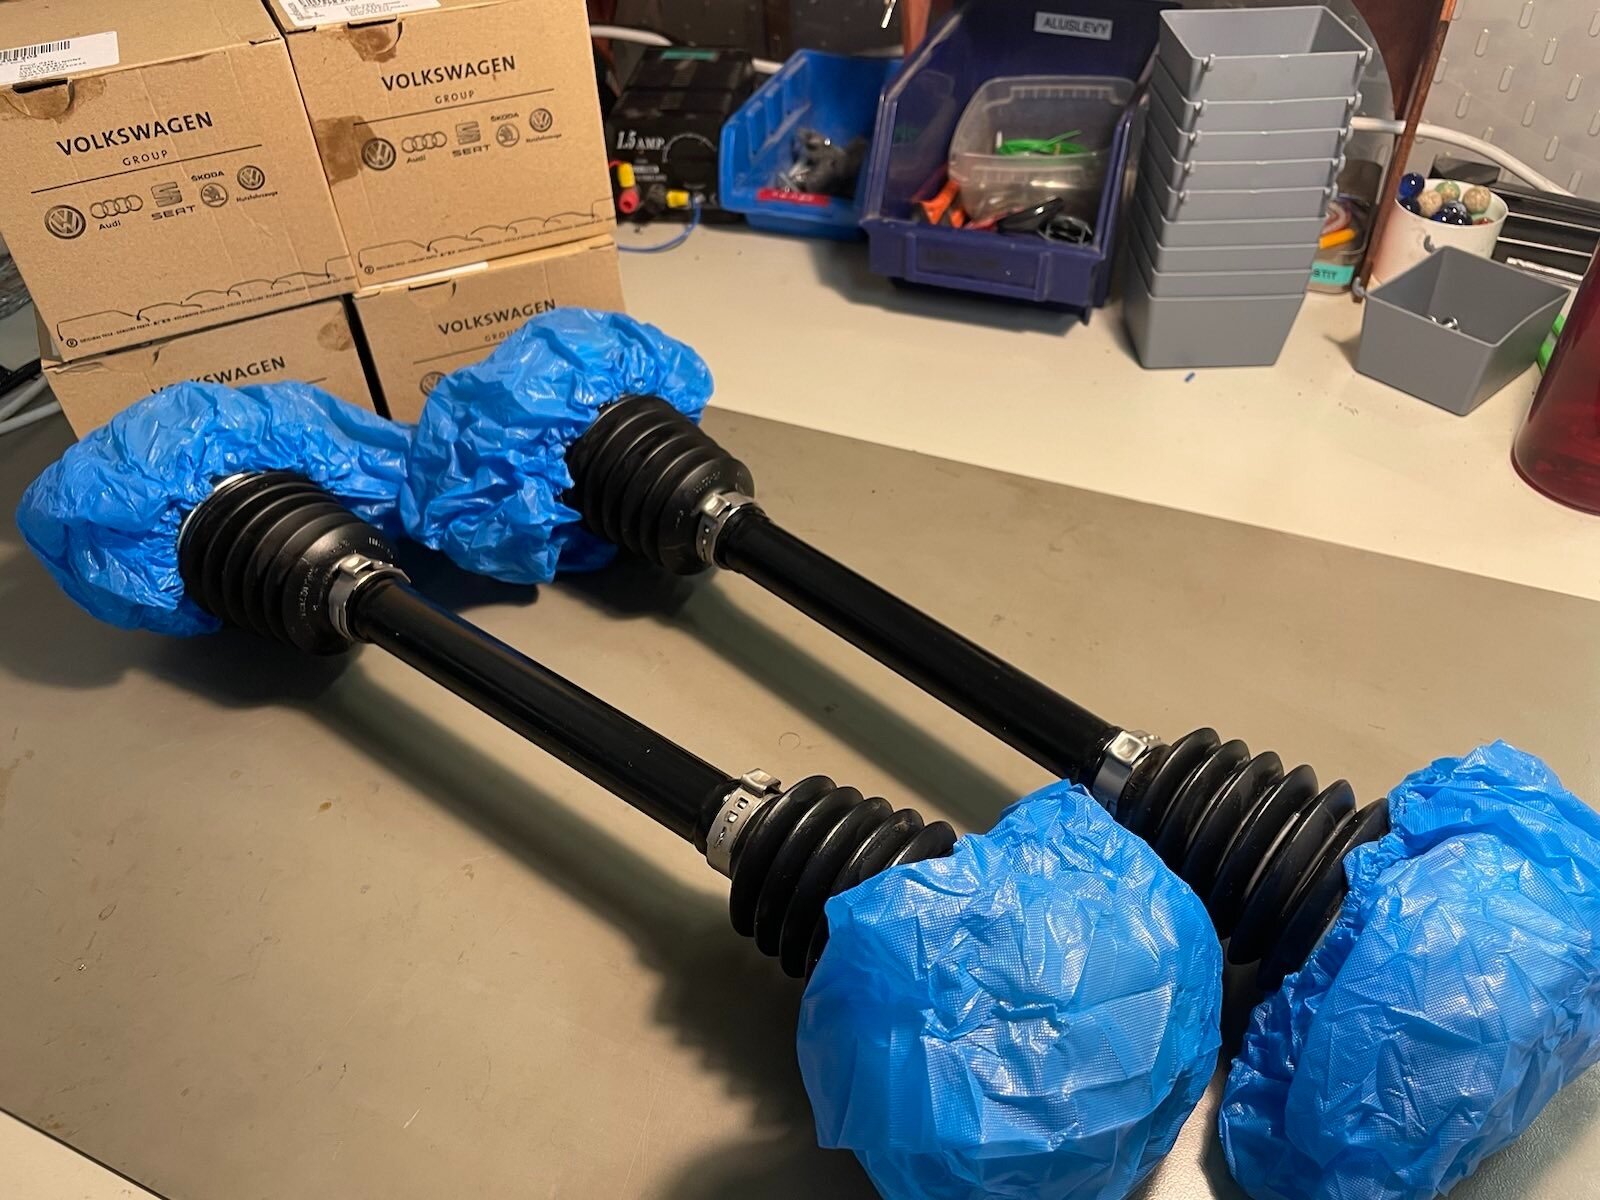
Liberal amounts of grease, new VW rubber boots, powder coated the axles and it's like they never left the factory!

Image

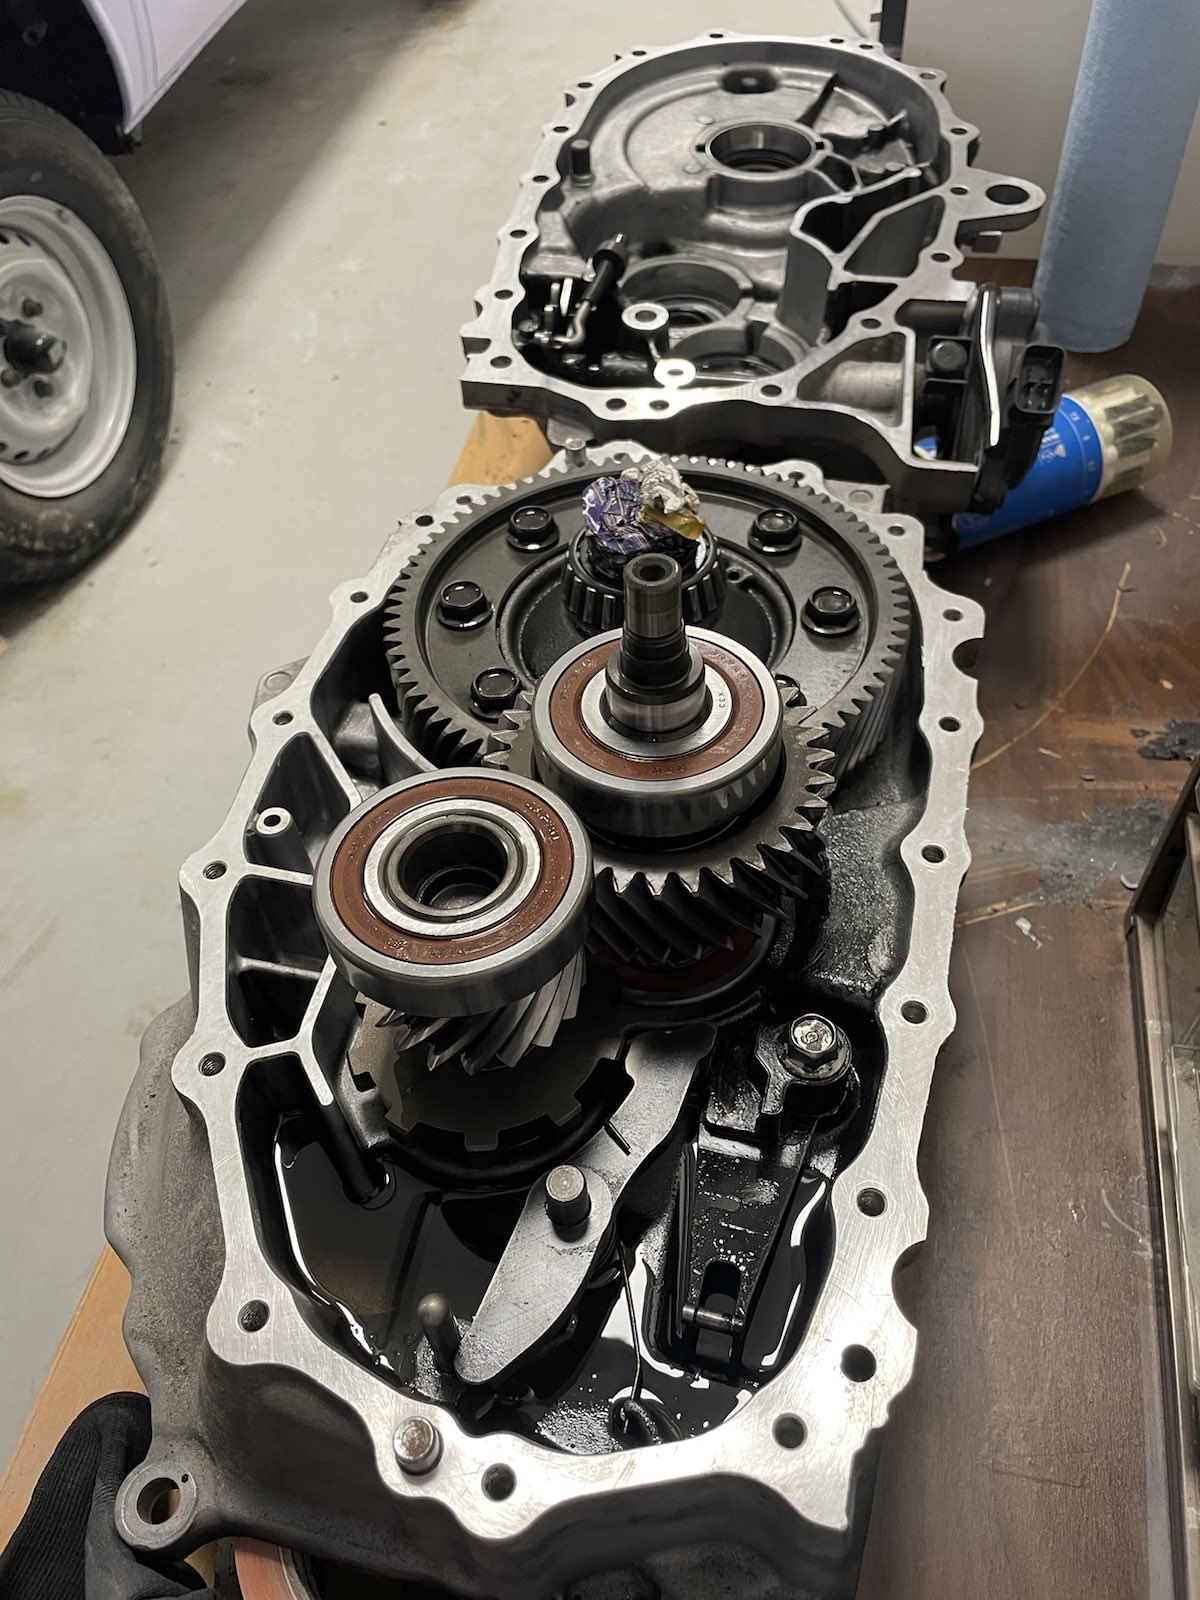
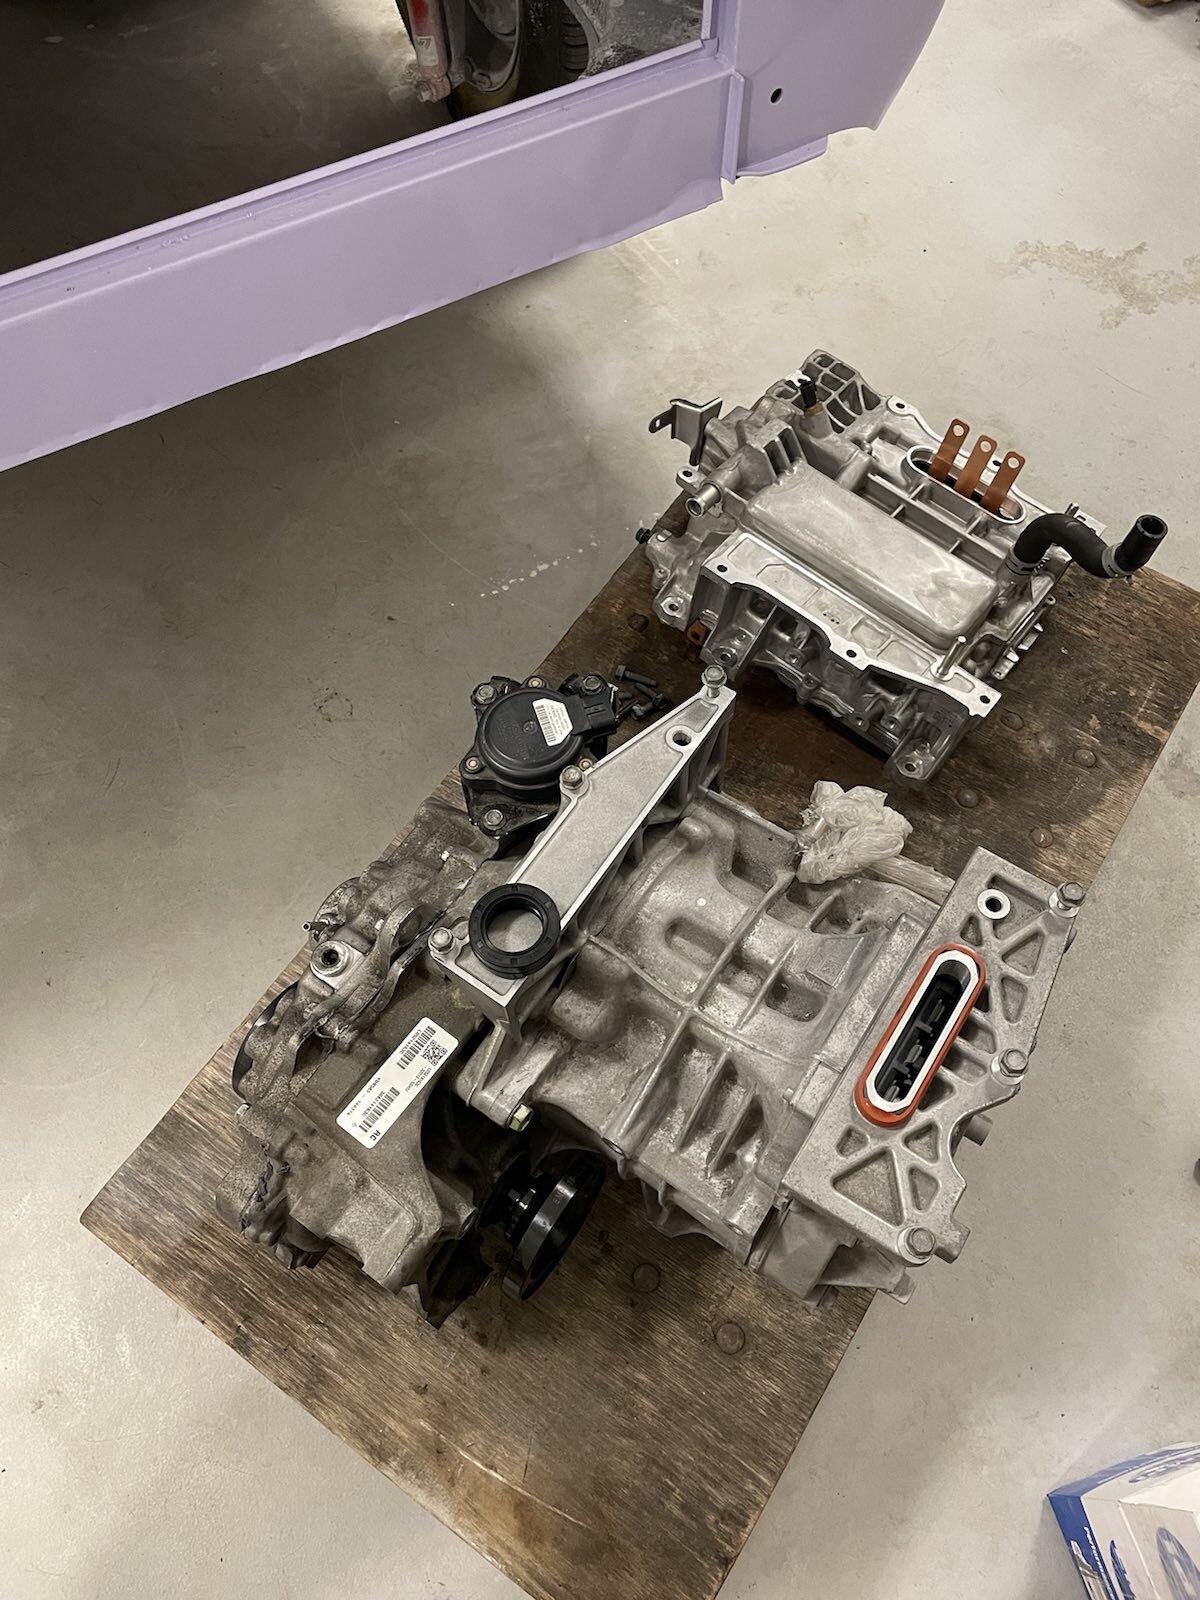
I also reassembled the Leaf gearbox. I ended up not designing any alternative lubrication for running this in reverse. There's been multiple reports on people using these care-free in reverse as long as they've had the shielded bearings and preferably bit overfilled with oil so I'm just going to risk it, too. 😄

Image

Image

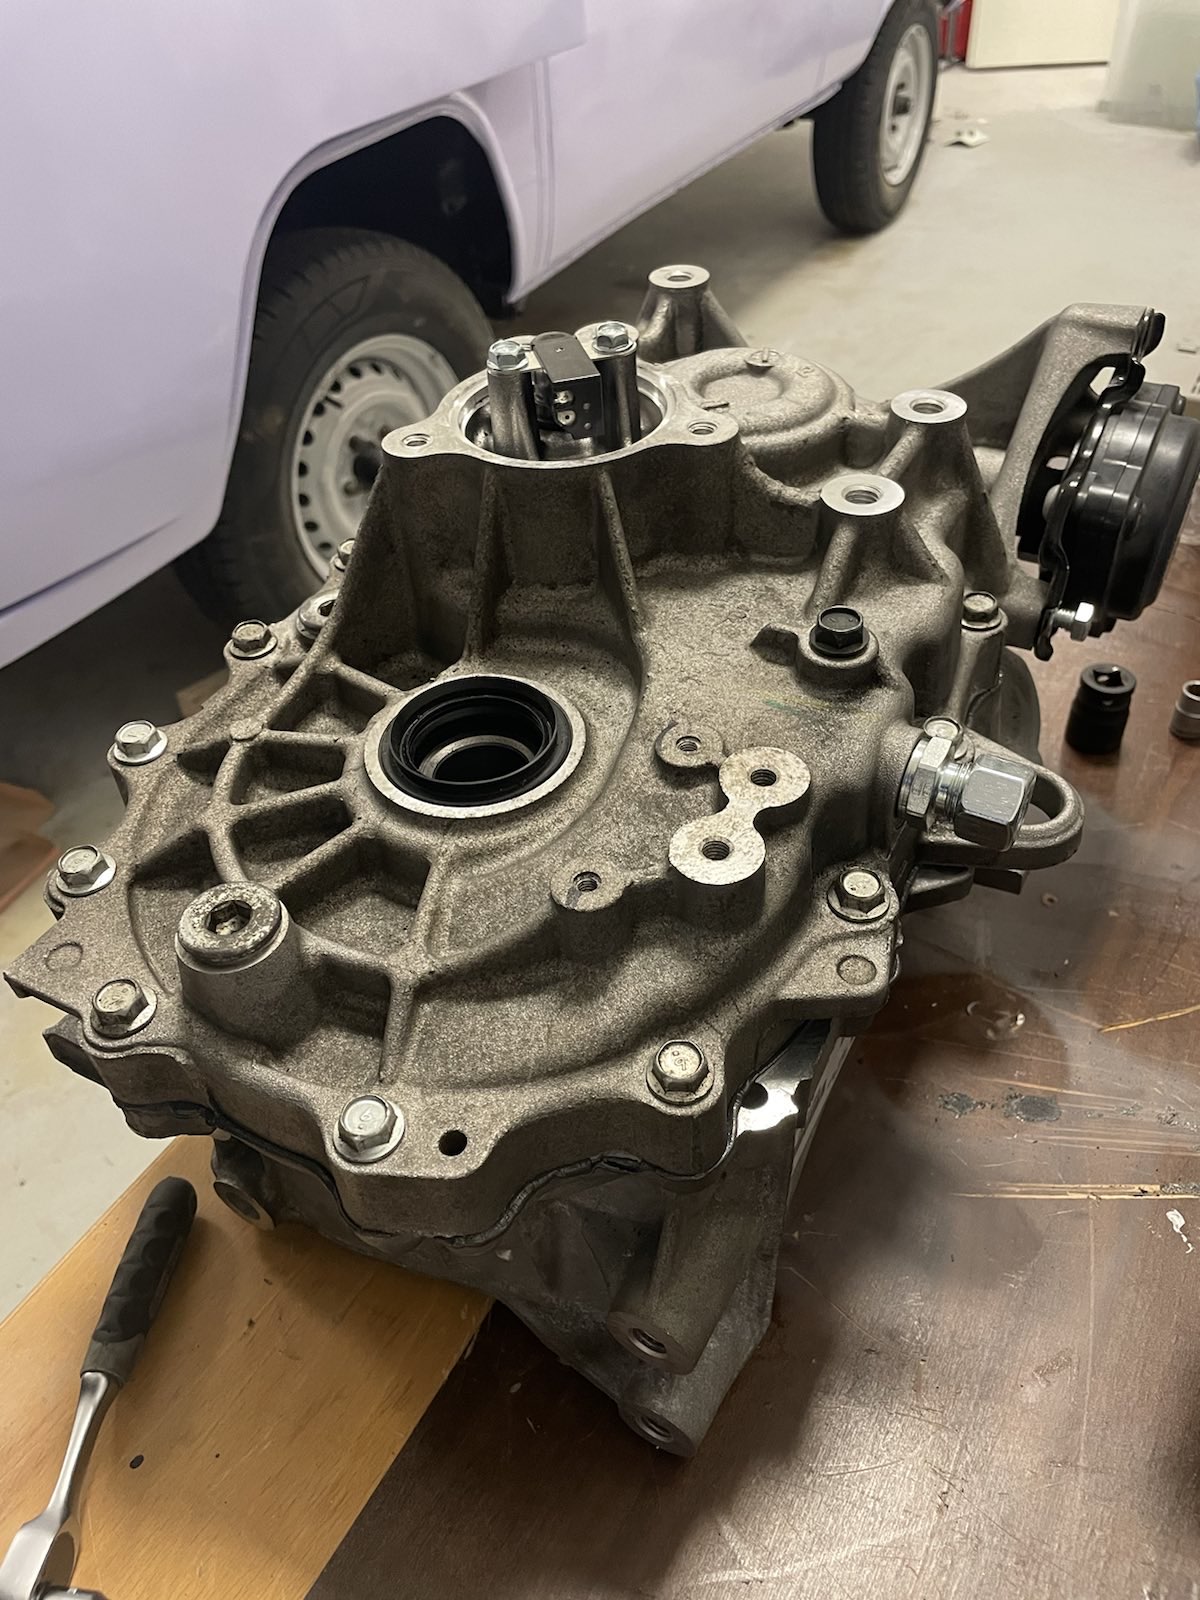
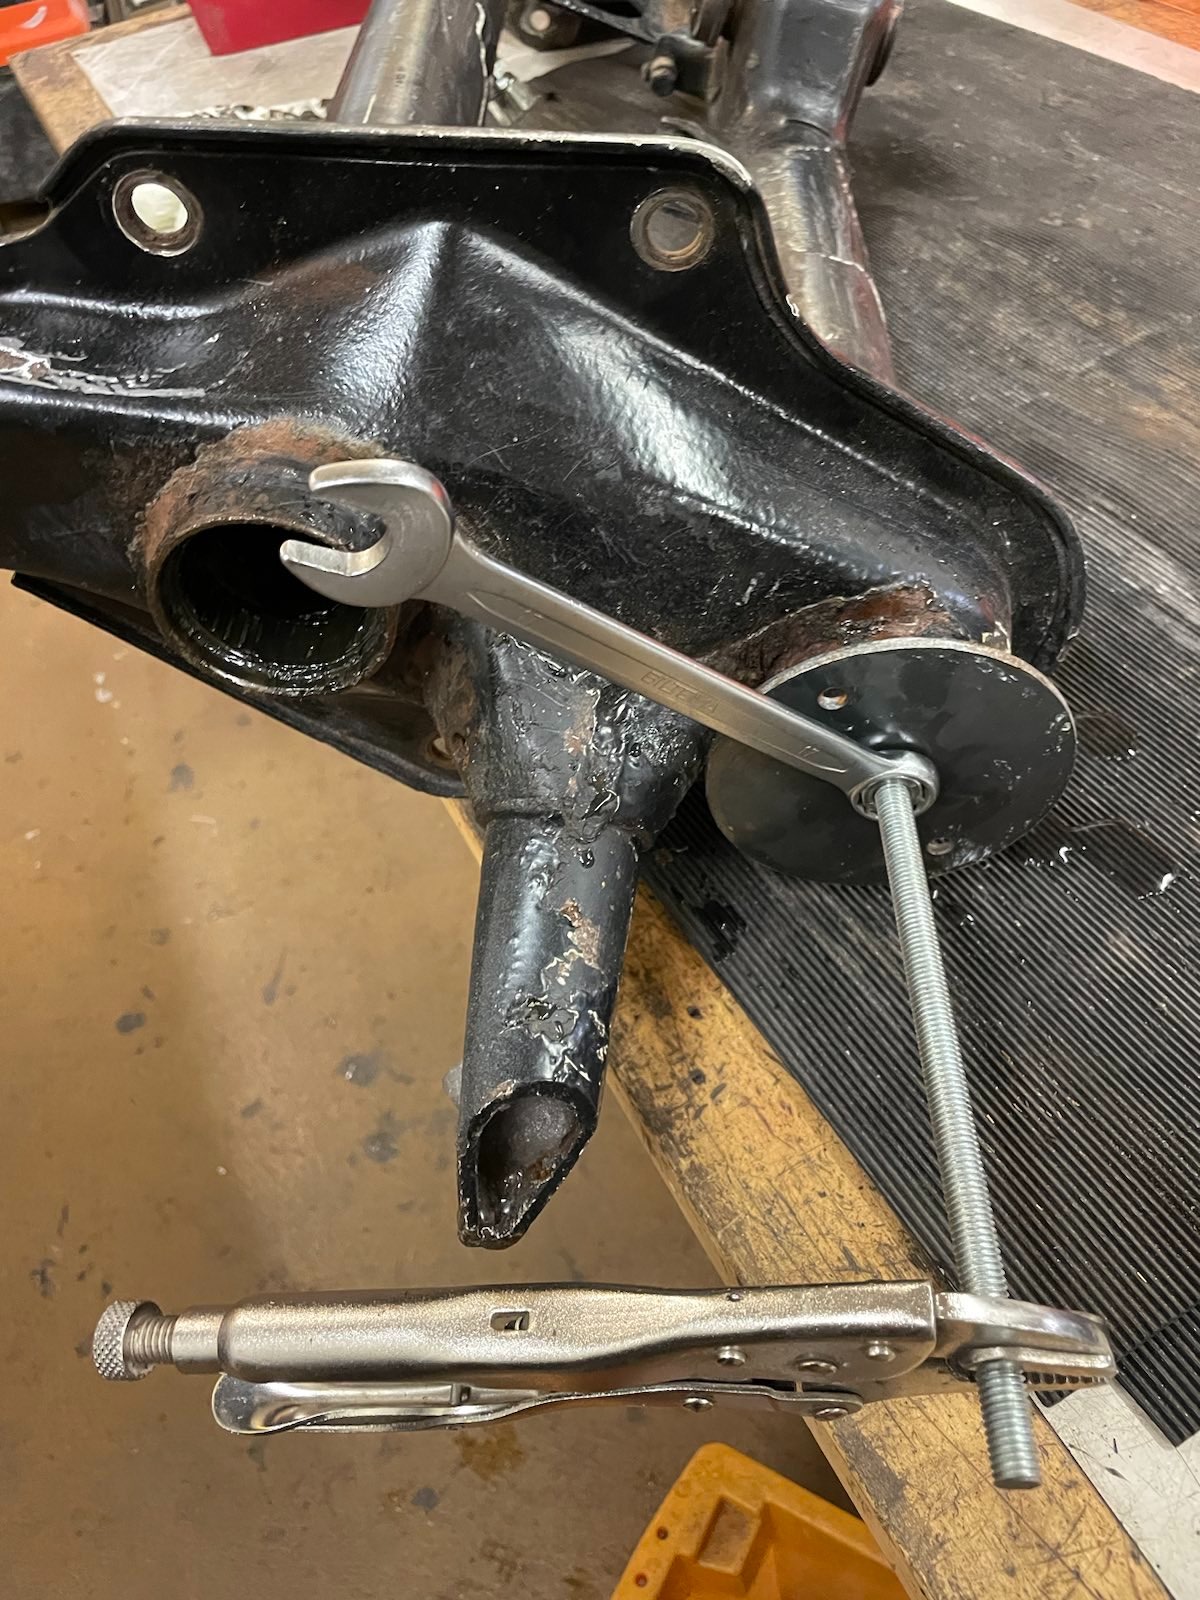
Which means that the stubs from bratindustries and drive flanges can be mounted, too.
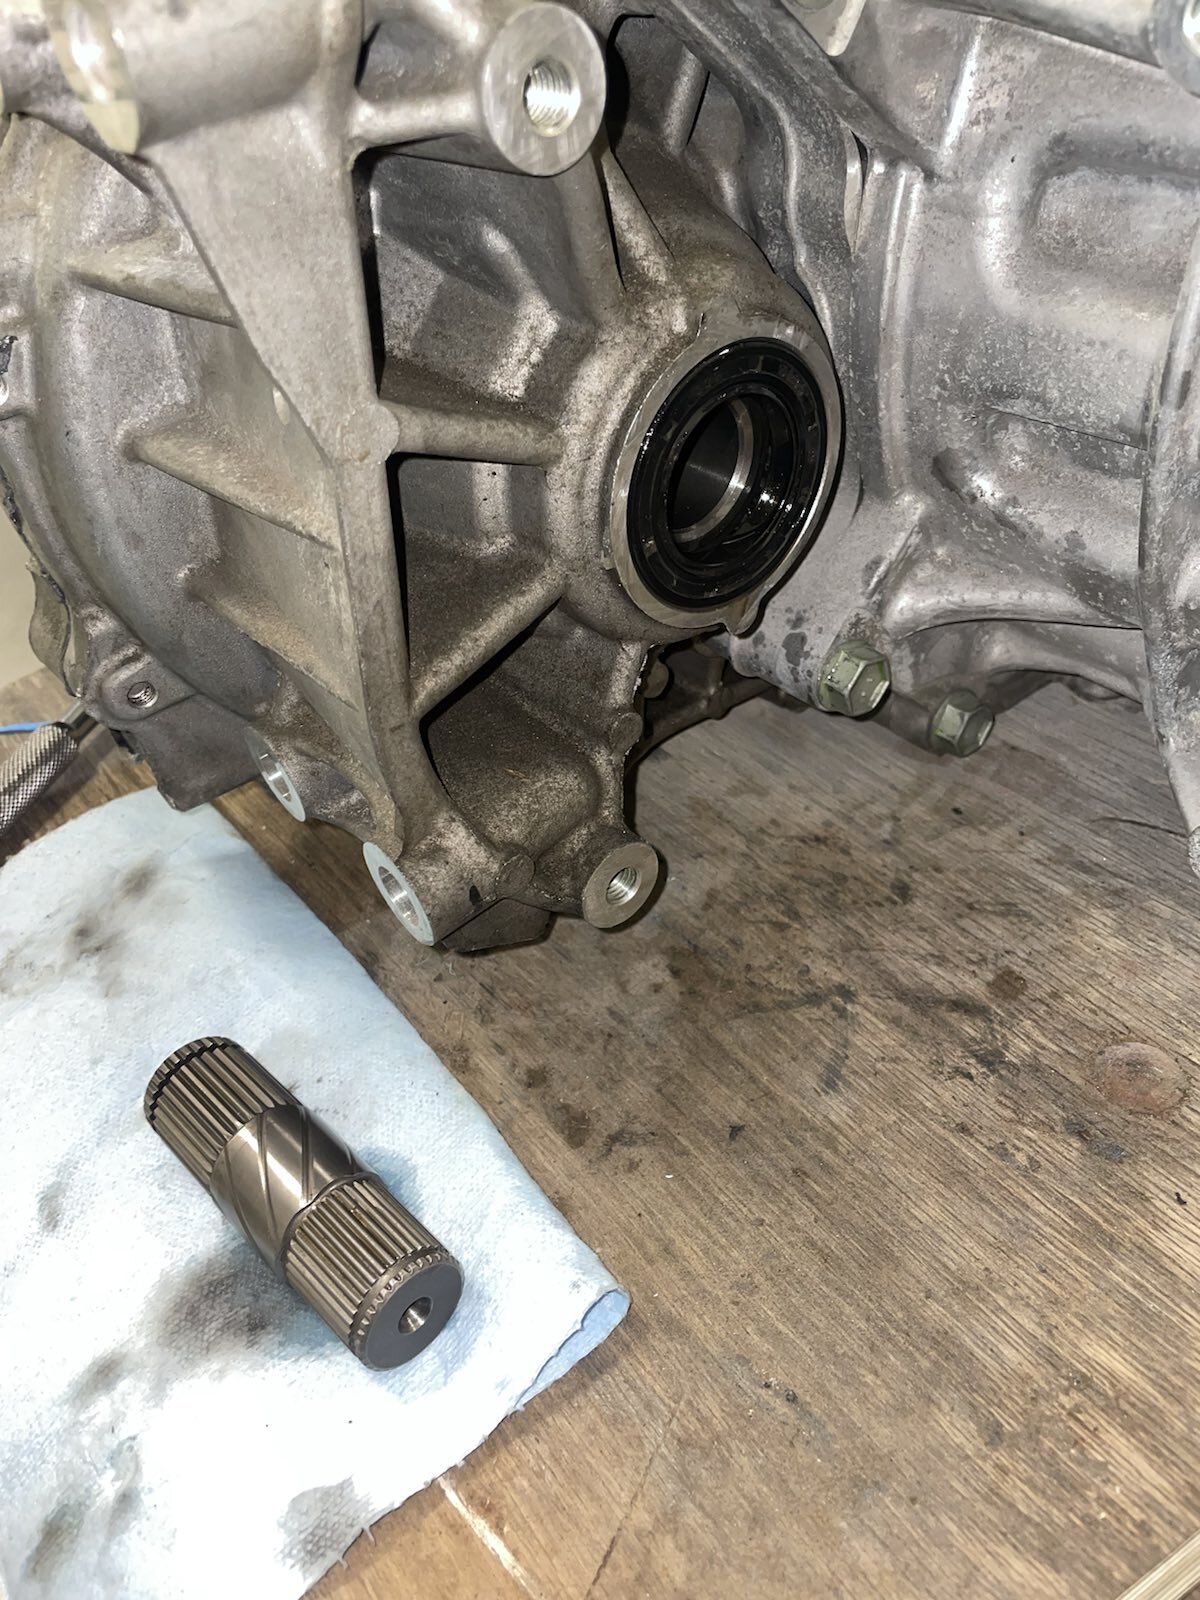
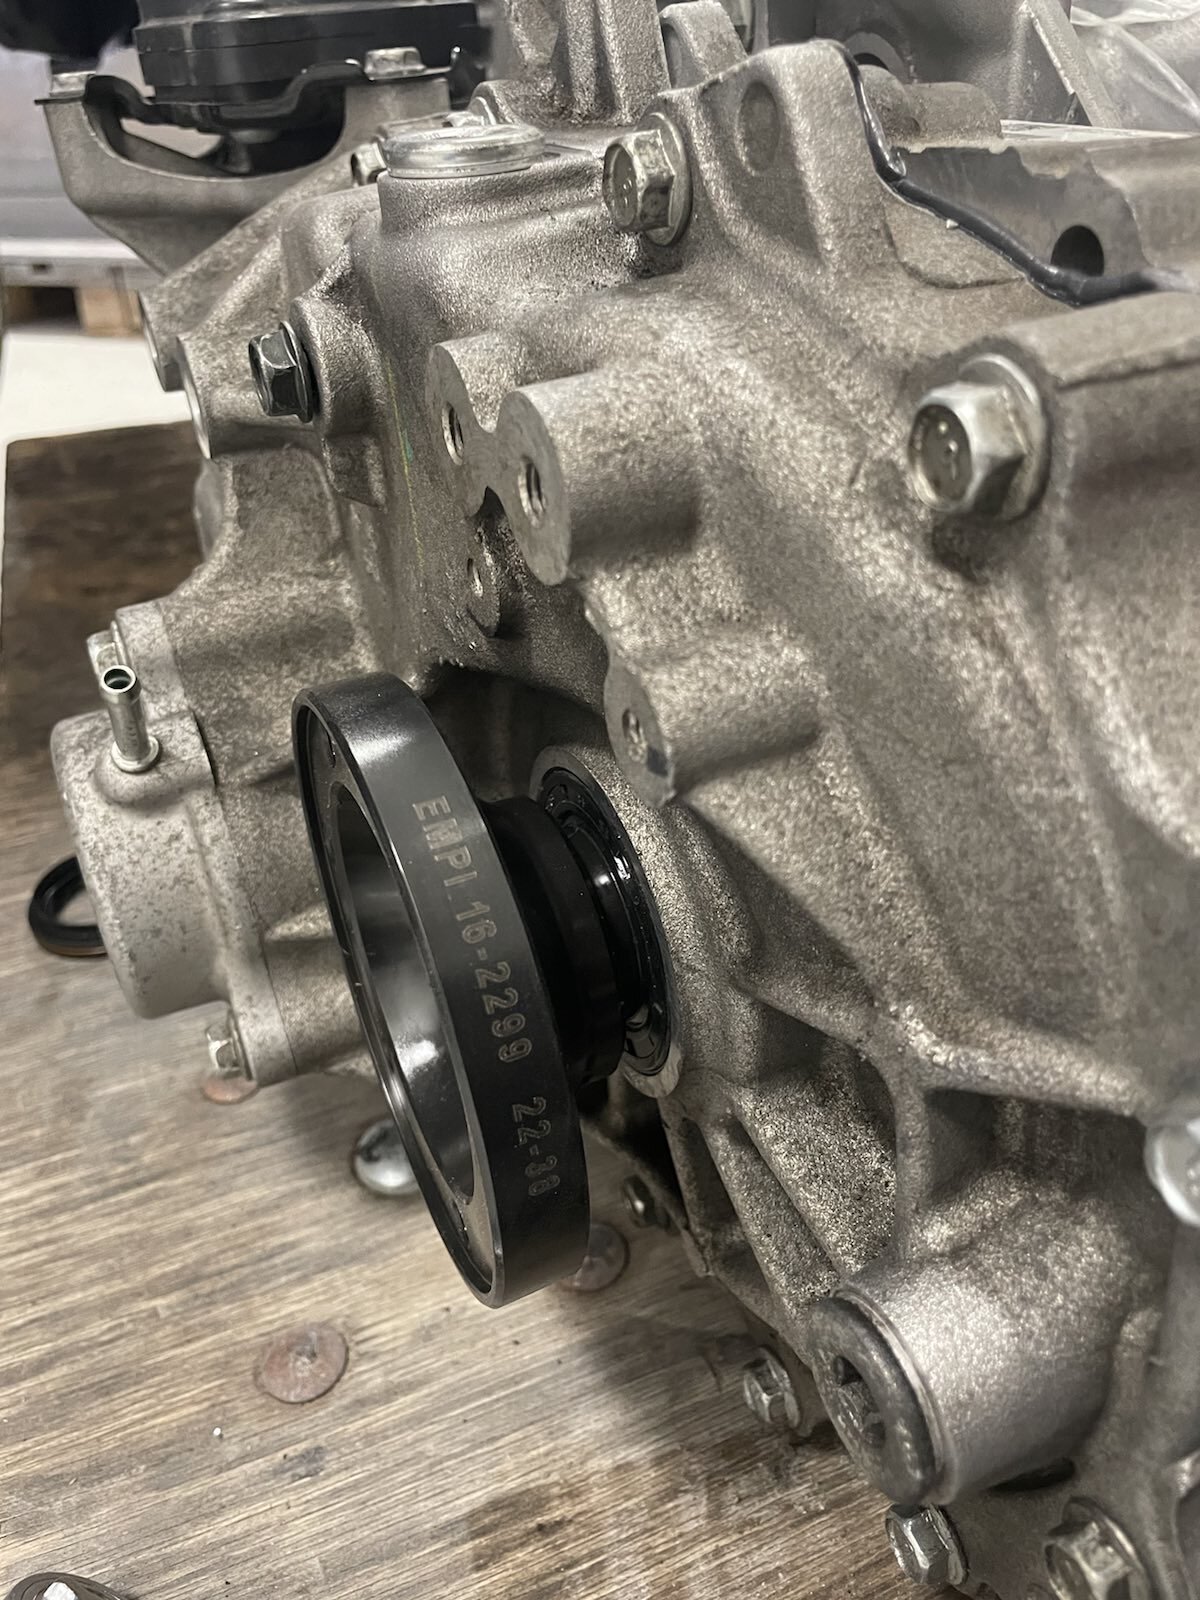
Image

Image

Fits perfectly. 😊

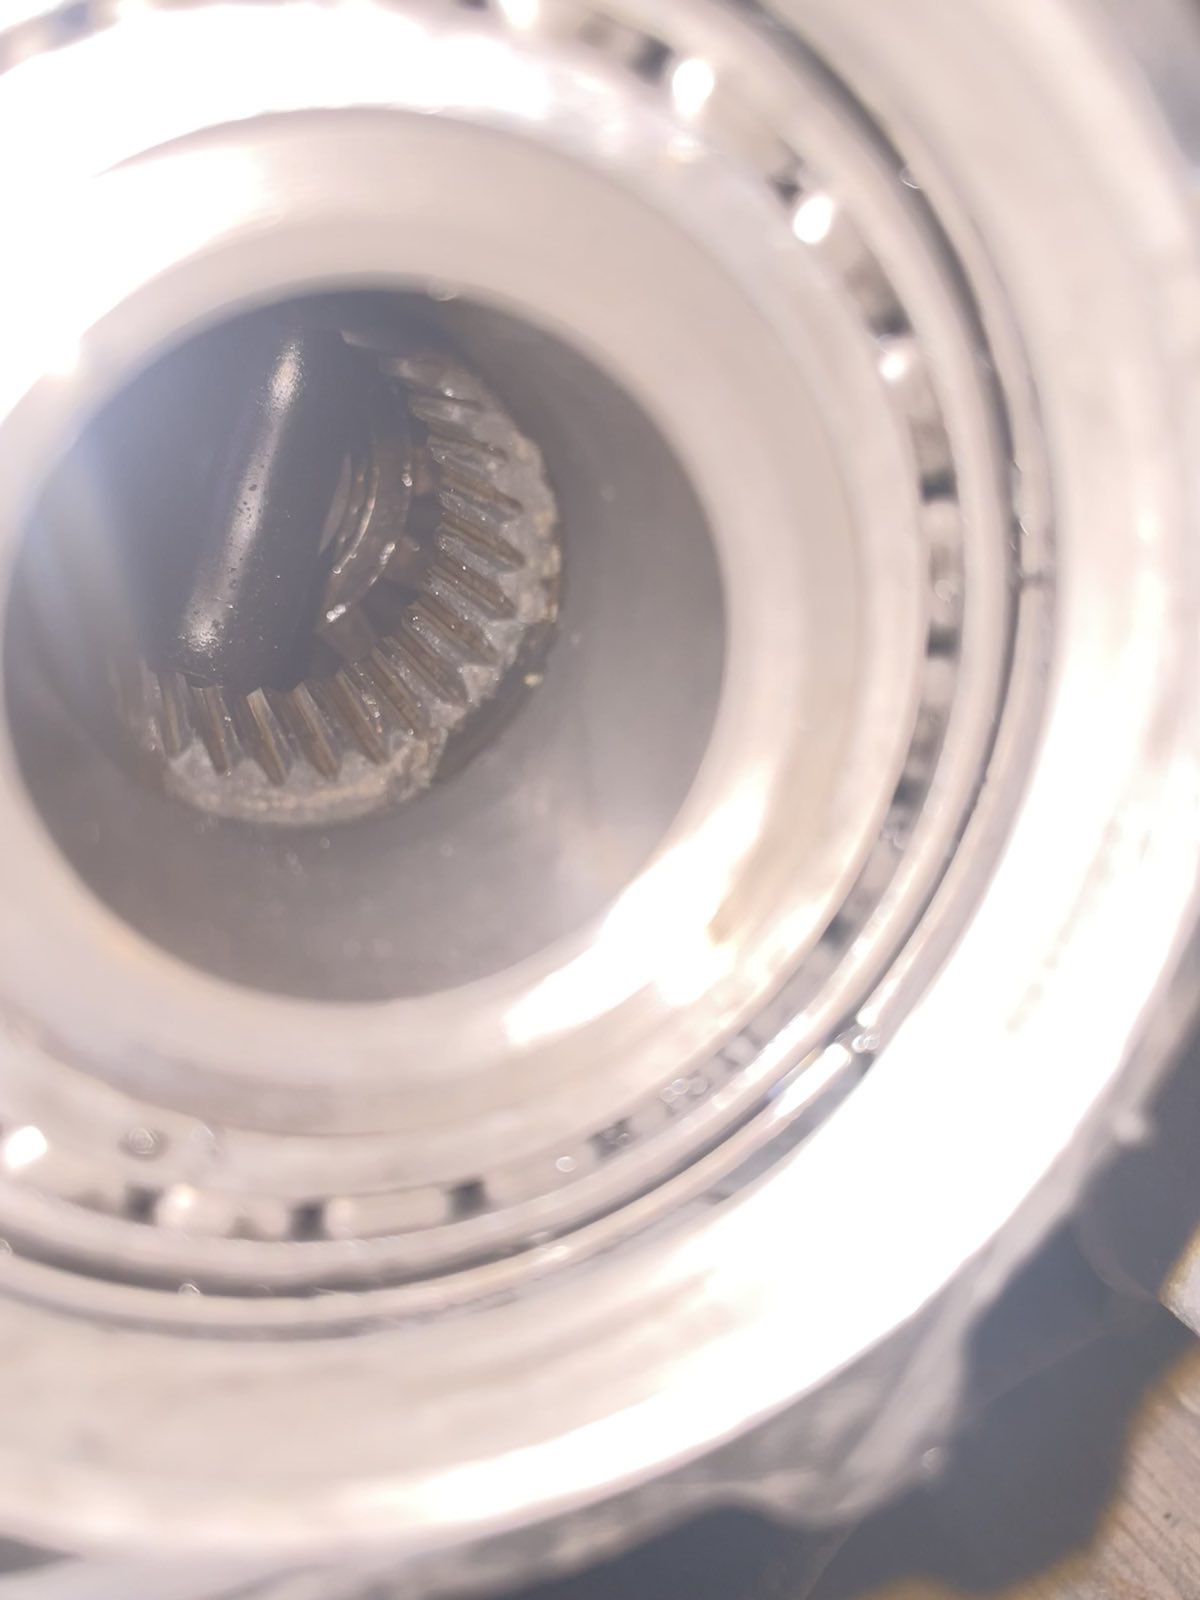
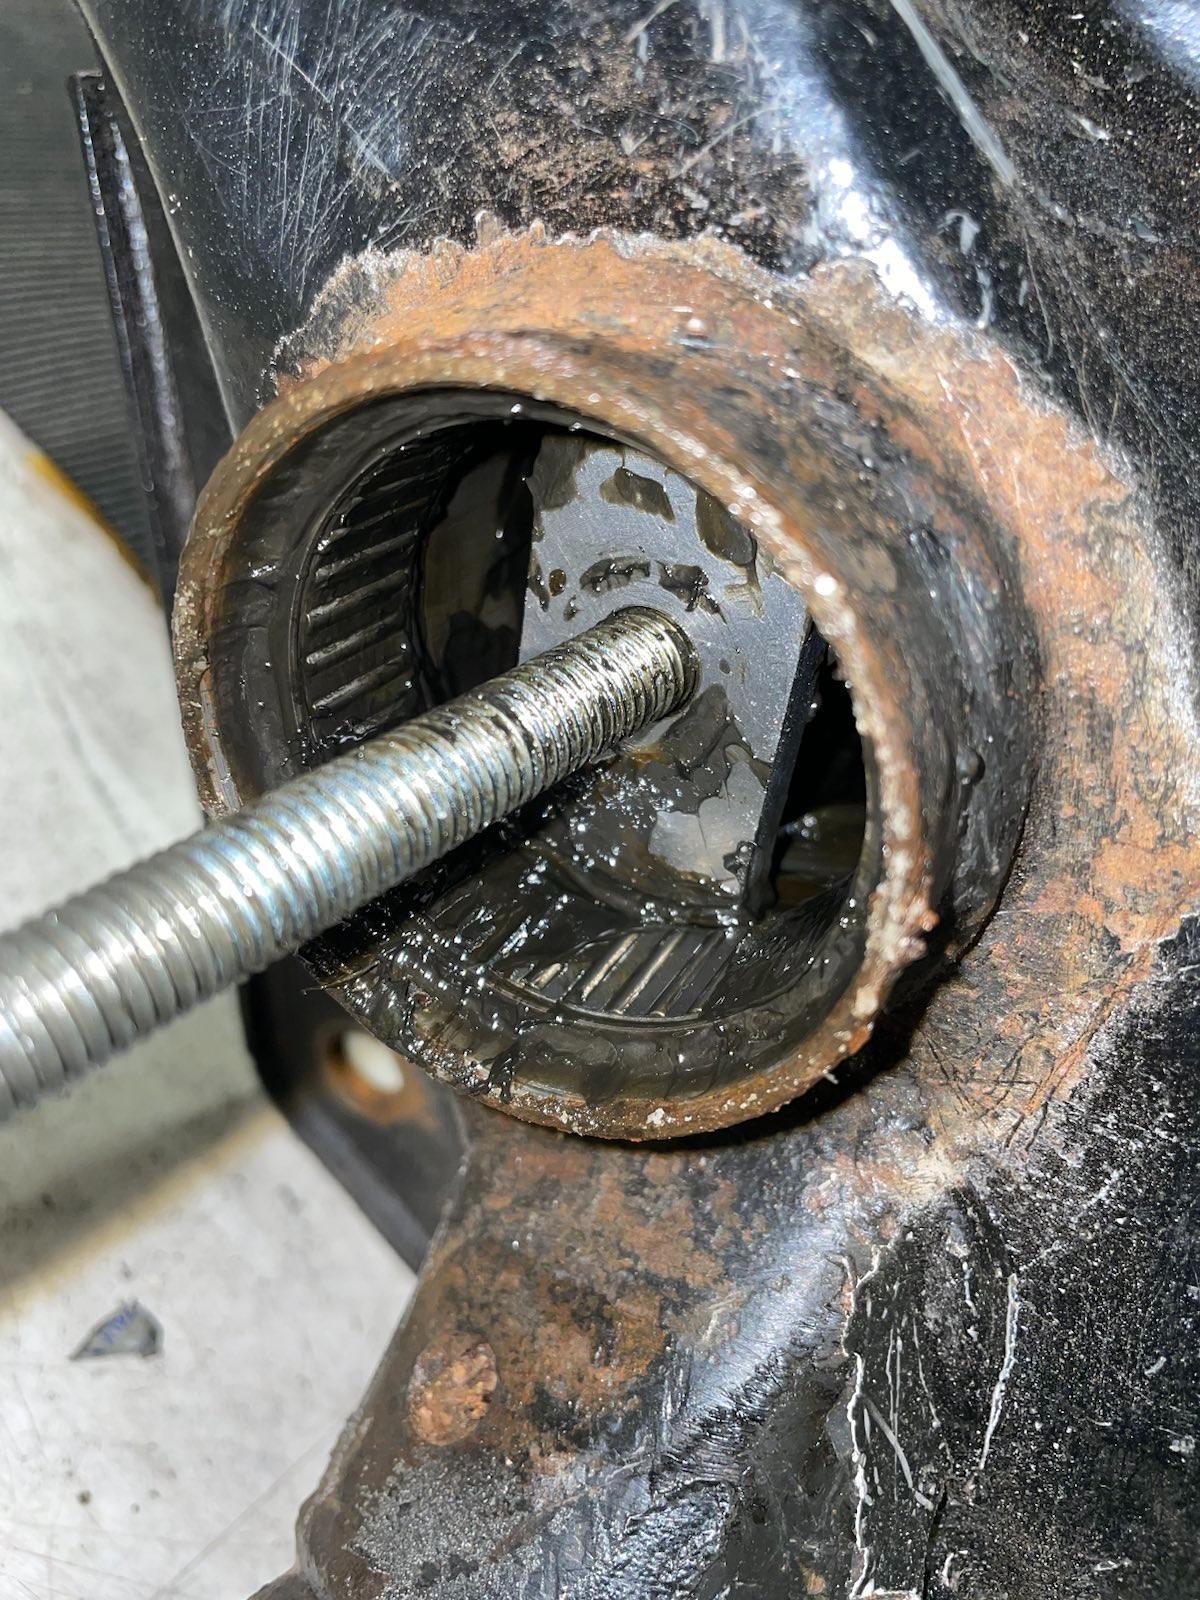
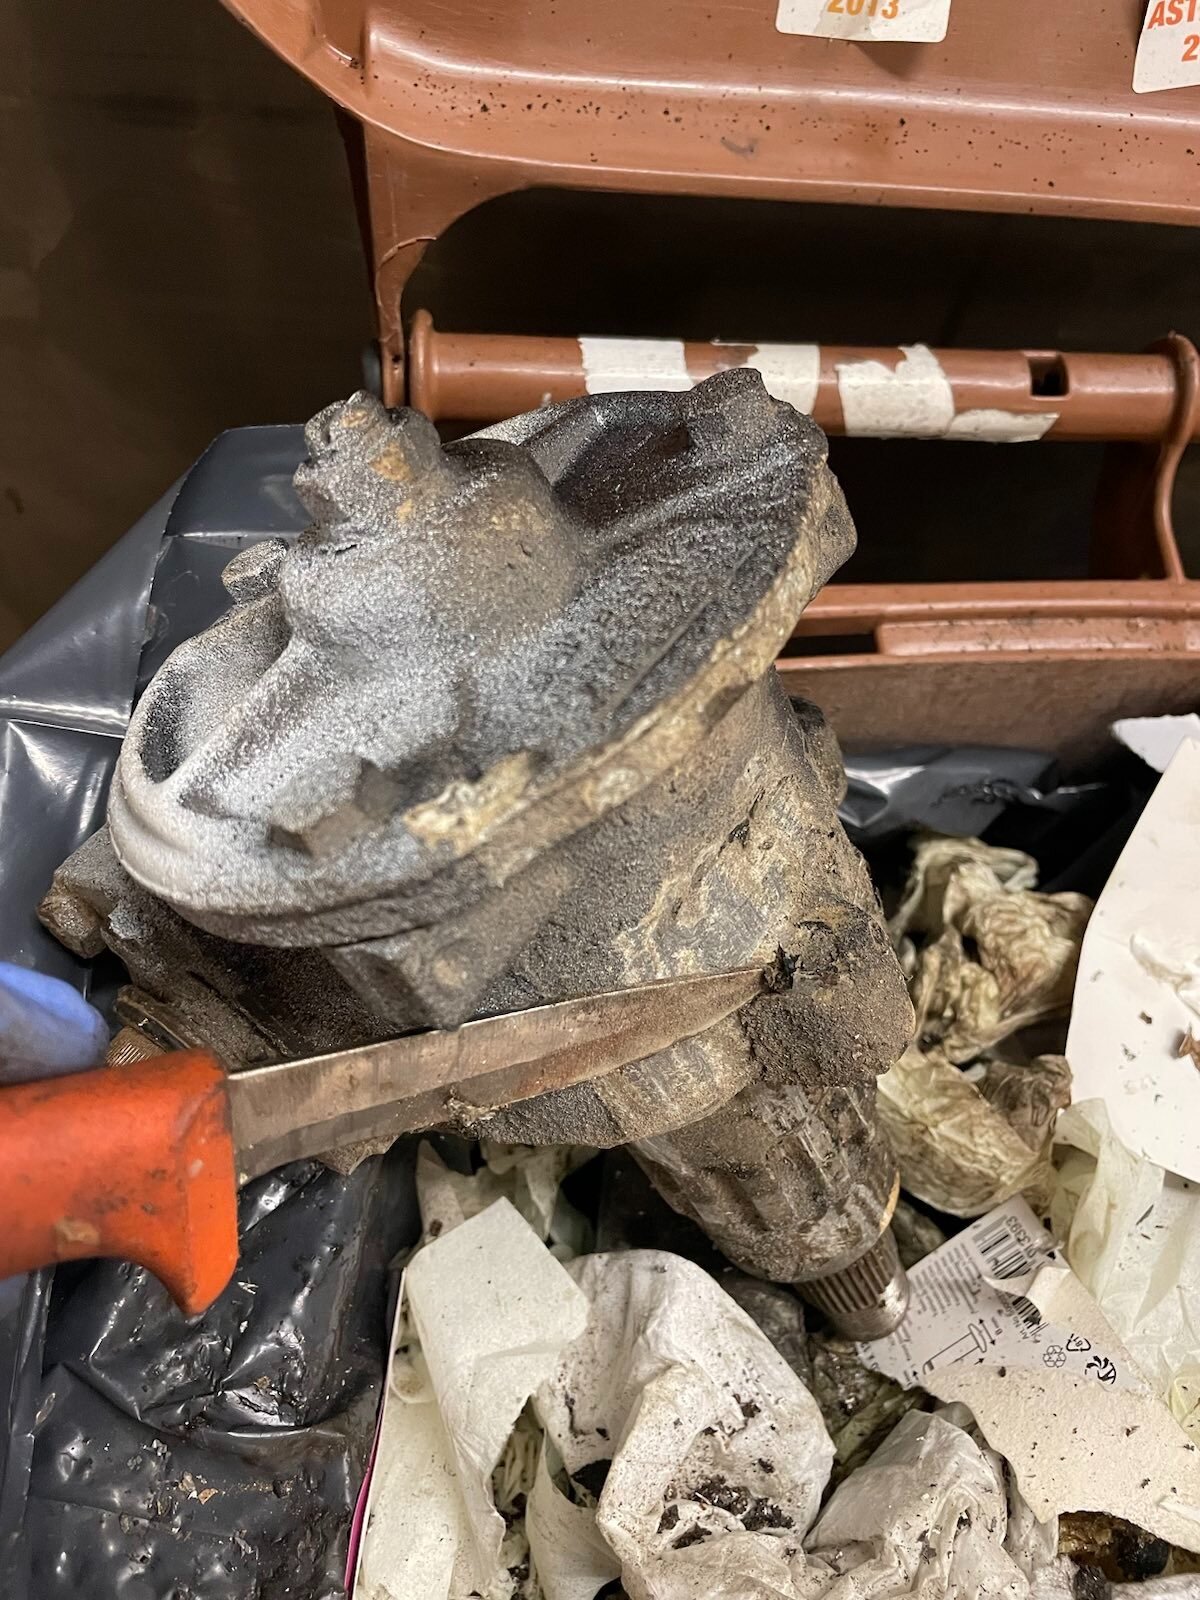
I also noticed, at this point only, that this gearbox which I bought with the motor has some damage on the differential gear outer face. I never removed the largest helical while disassembling this, so I only saw it now when changing the oil seals for the stub axles.

There's pretty large chunks of metal missing from the outer edge of the gear. :? I eventually found these larger chunks from the magnetic plug below the largest helical.

Image

Video: https://ceravyn.net/up/VW/IMG_4247.mp4

I'm not undoing the sealant glue I just put into place before noticing this, nor do I have any replacement gears or anything to fix this, so I'll leave that be. I also think this isn't going to be any problem for me, as it looks that the damage is on the outermost edge only, which I figure doesn't have any real forces applied to it so I'm confused how this has even happened. 🤷‍♀️

Current leading theory is that maybe the car this was disassembled from had some sort of collision which briefly pushed the driveshaft on this side inwards too much, splines ran out and something contacted the gear face? I don't know.

Anyway. Moving on. :)

Image

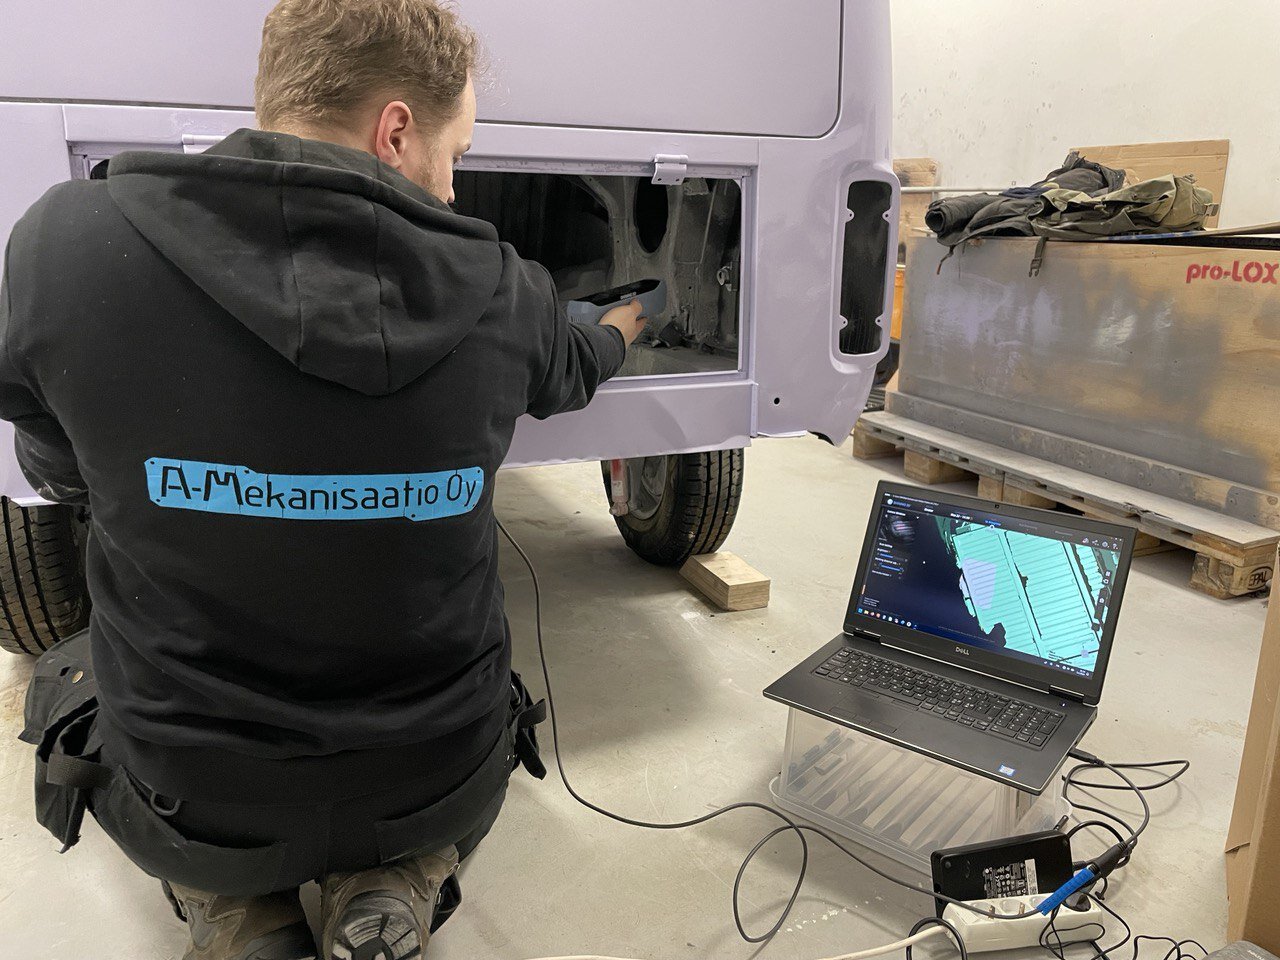
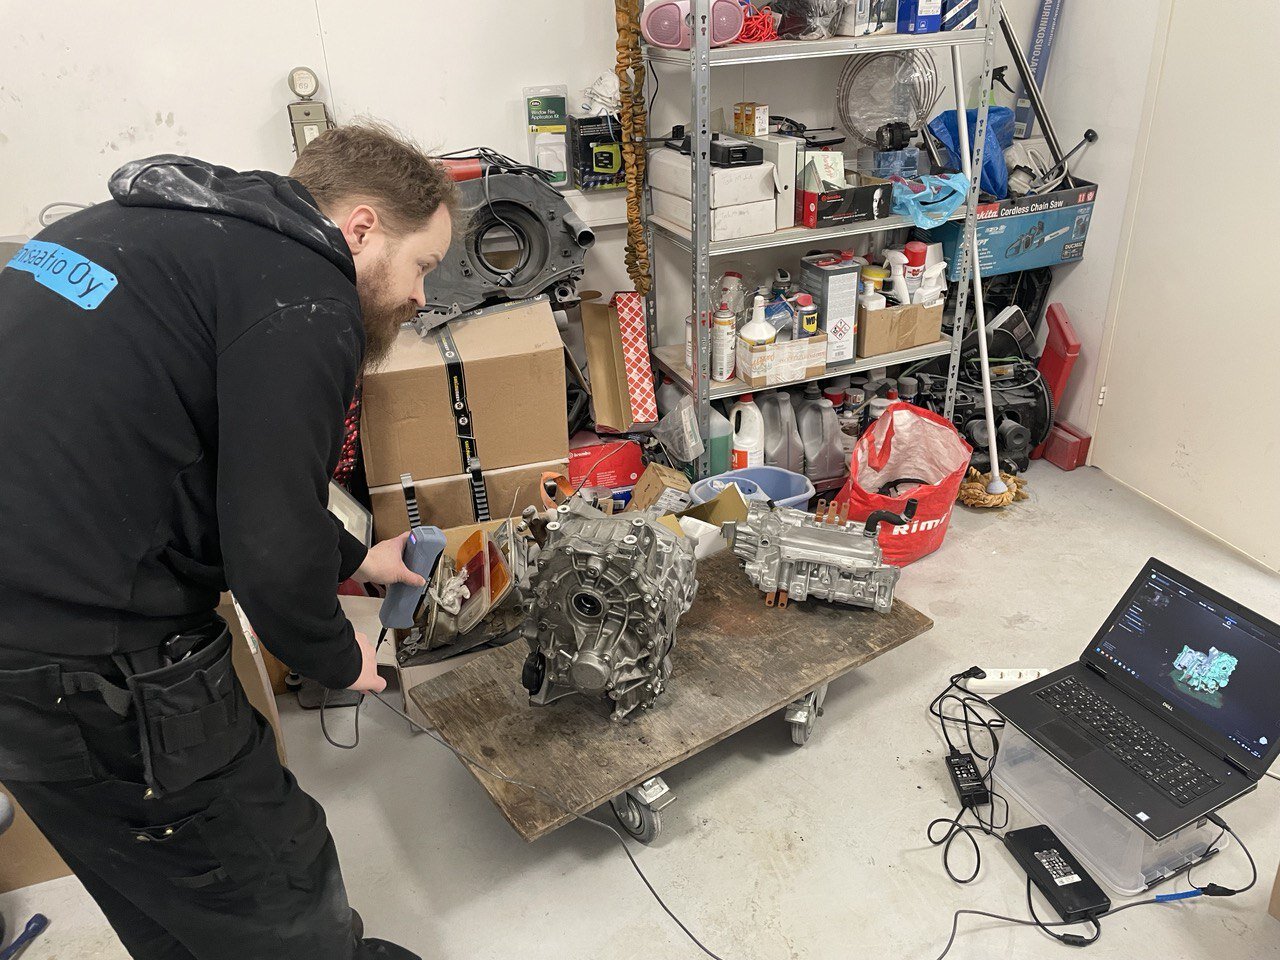
We 3D scanned the whole engin... I mean motor bay.

https://volkkaripalsta.com/keskustelu/u ... a4dc15.mp4

Thanks to Arno from local hackerspace (and his company https://mekanisaatio.fi )

Image

And the Leaf motor, although that probably would've been available.

Image

Phew. Hows that for an update? :D

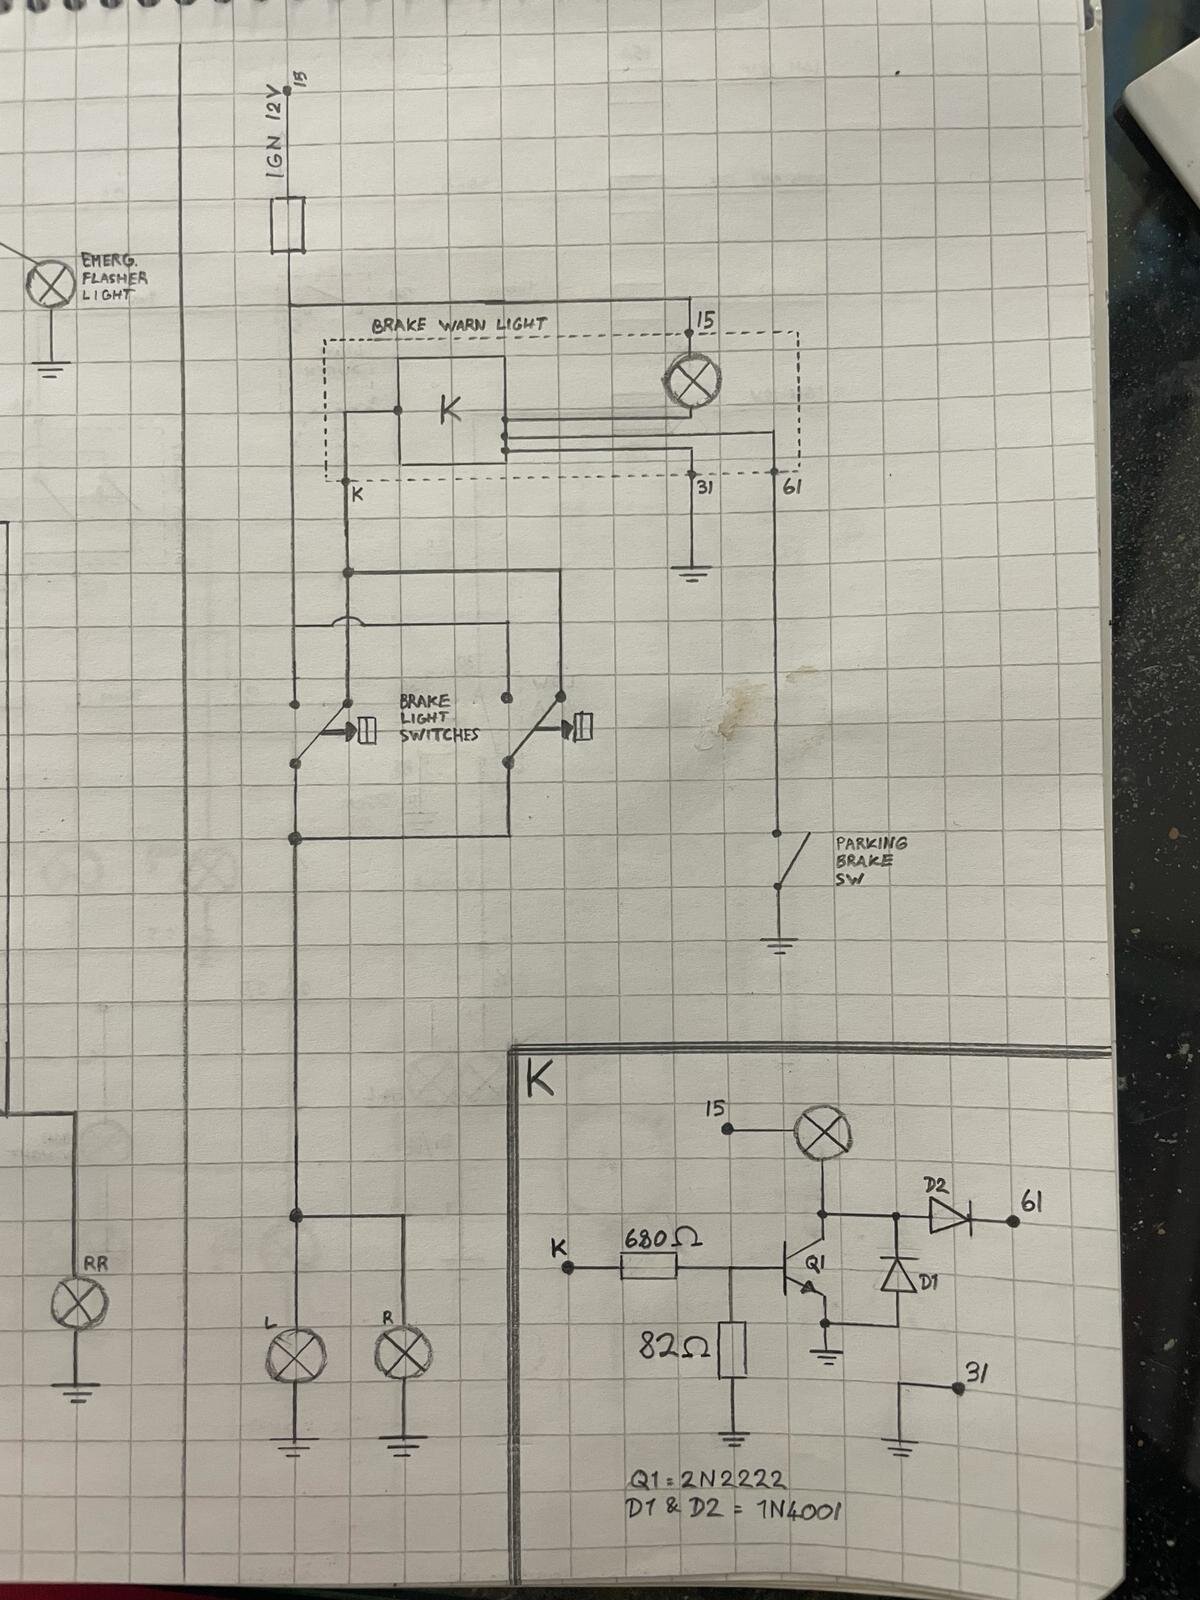
On the drawing board now, whole 12V electrics:

Image

And plans for how to mount the batteries:

Image

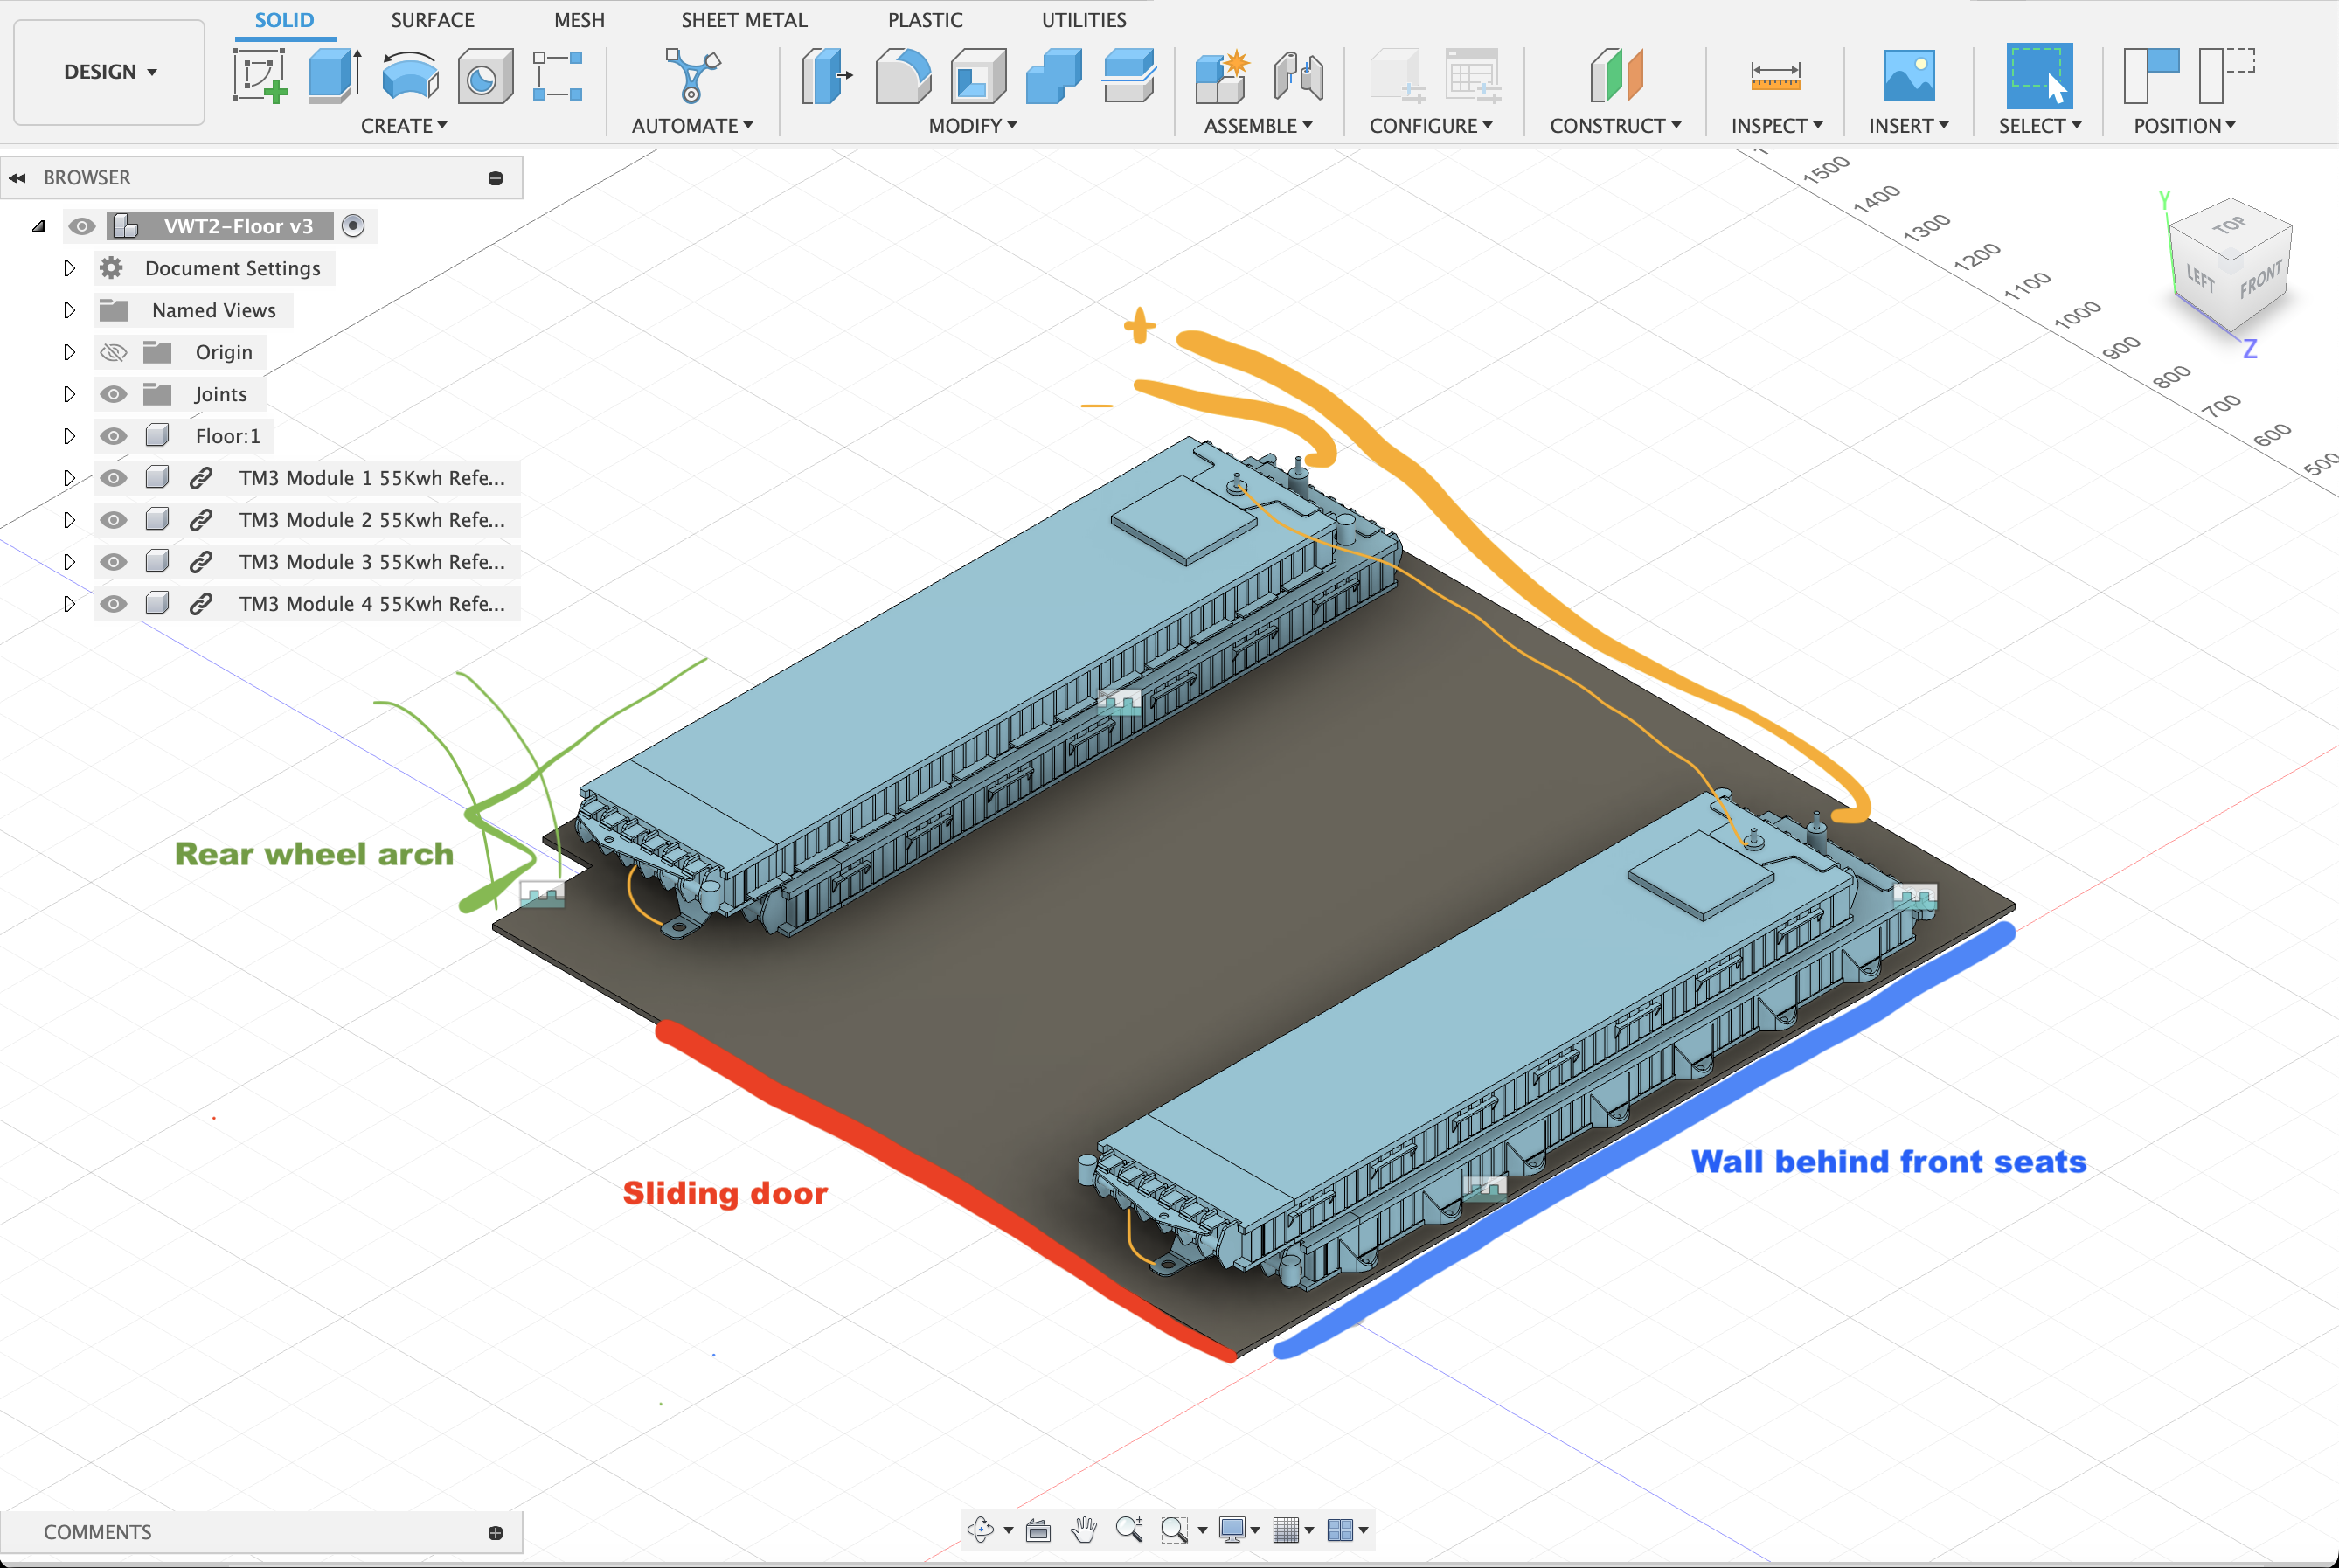
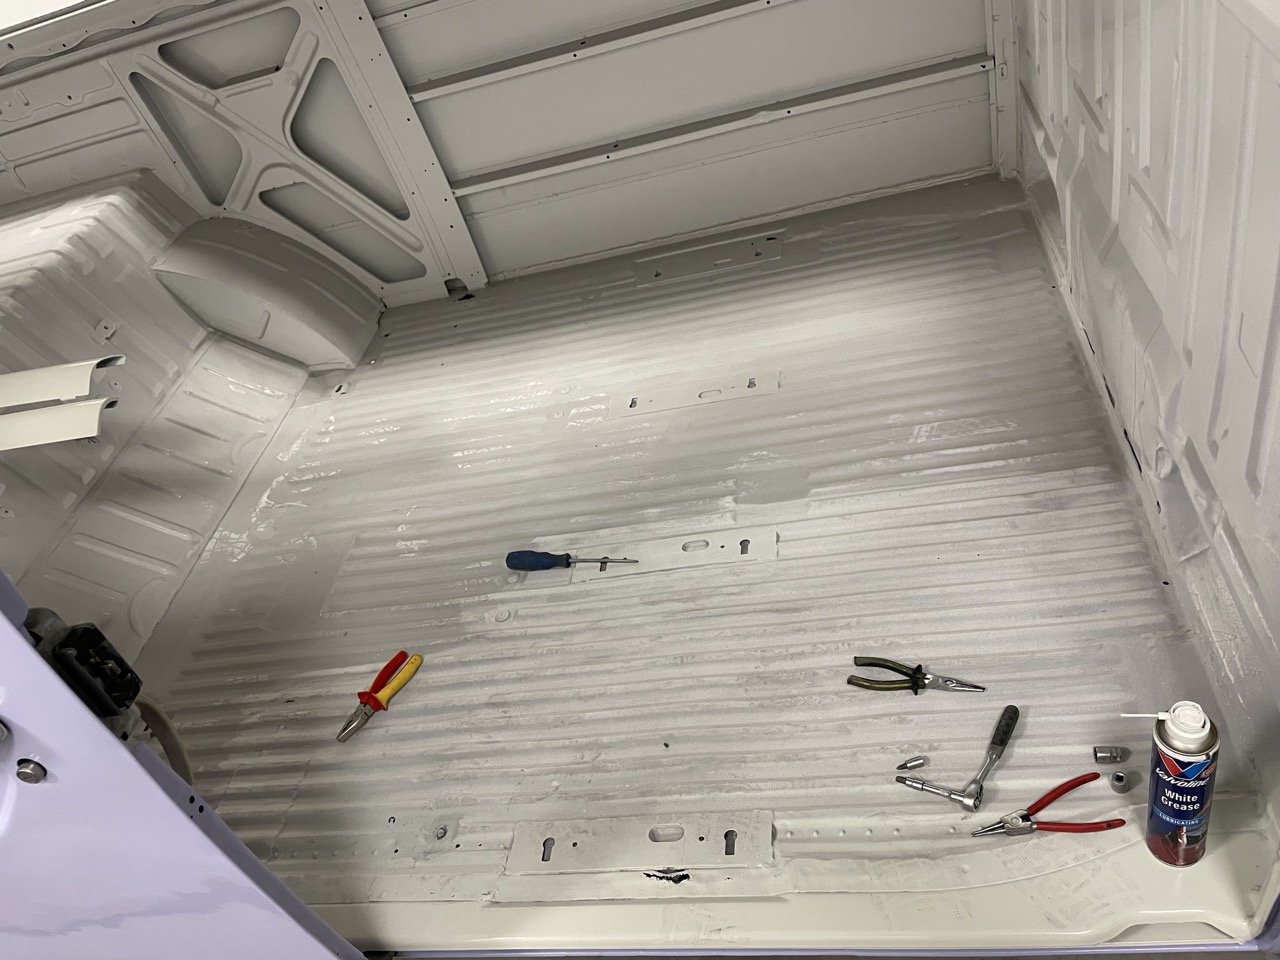
Cargo space for context:
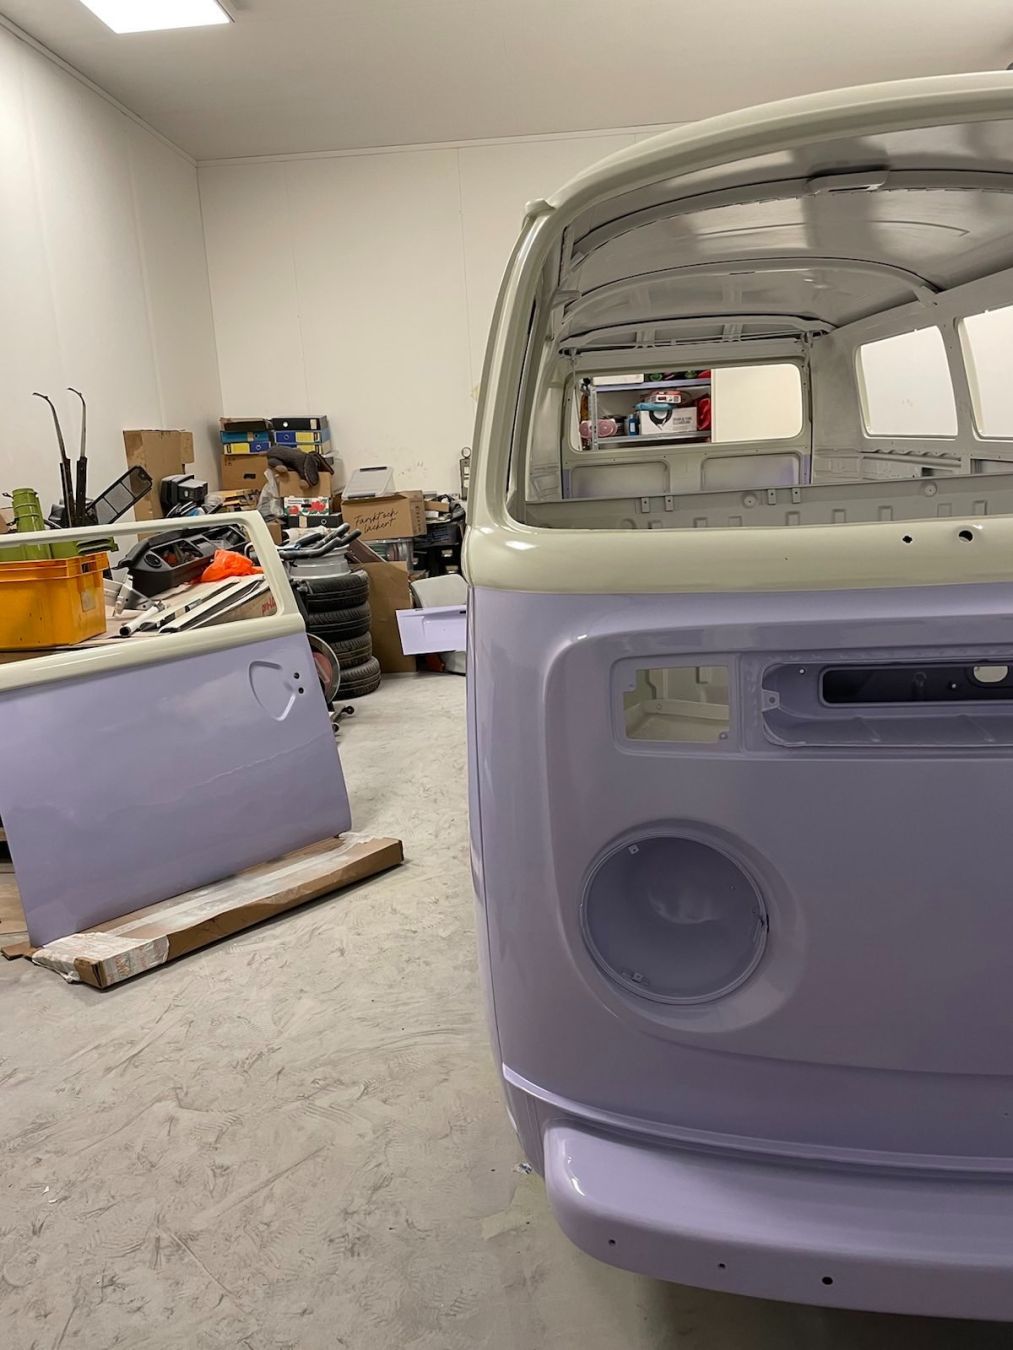
Image
Jacobsmess
Posts: 473
Joined: Thu Mar 02, 2023 1:30 pm
Has thanked: 243 times
Been thanked: 59 times

Re: [WIP] Voltswagen T2 -76

Post by Jacobsmess »

Tosi Hyvää!
Post Reply